

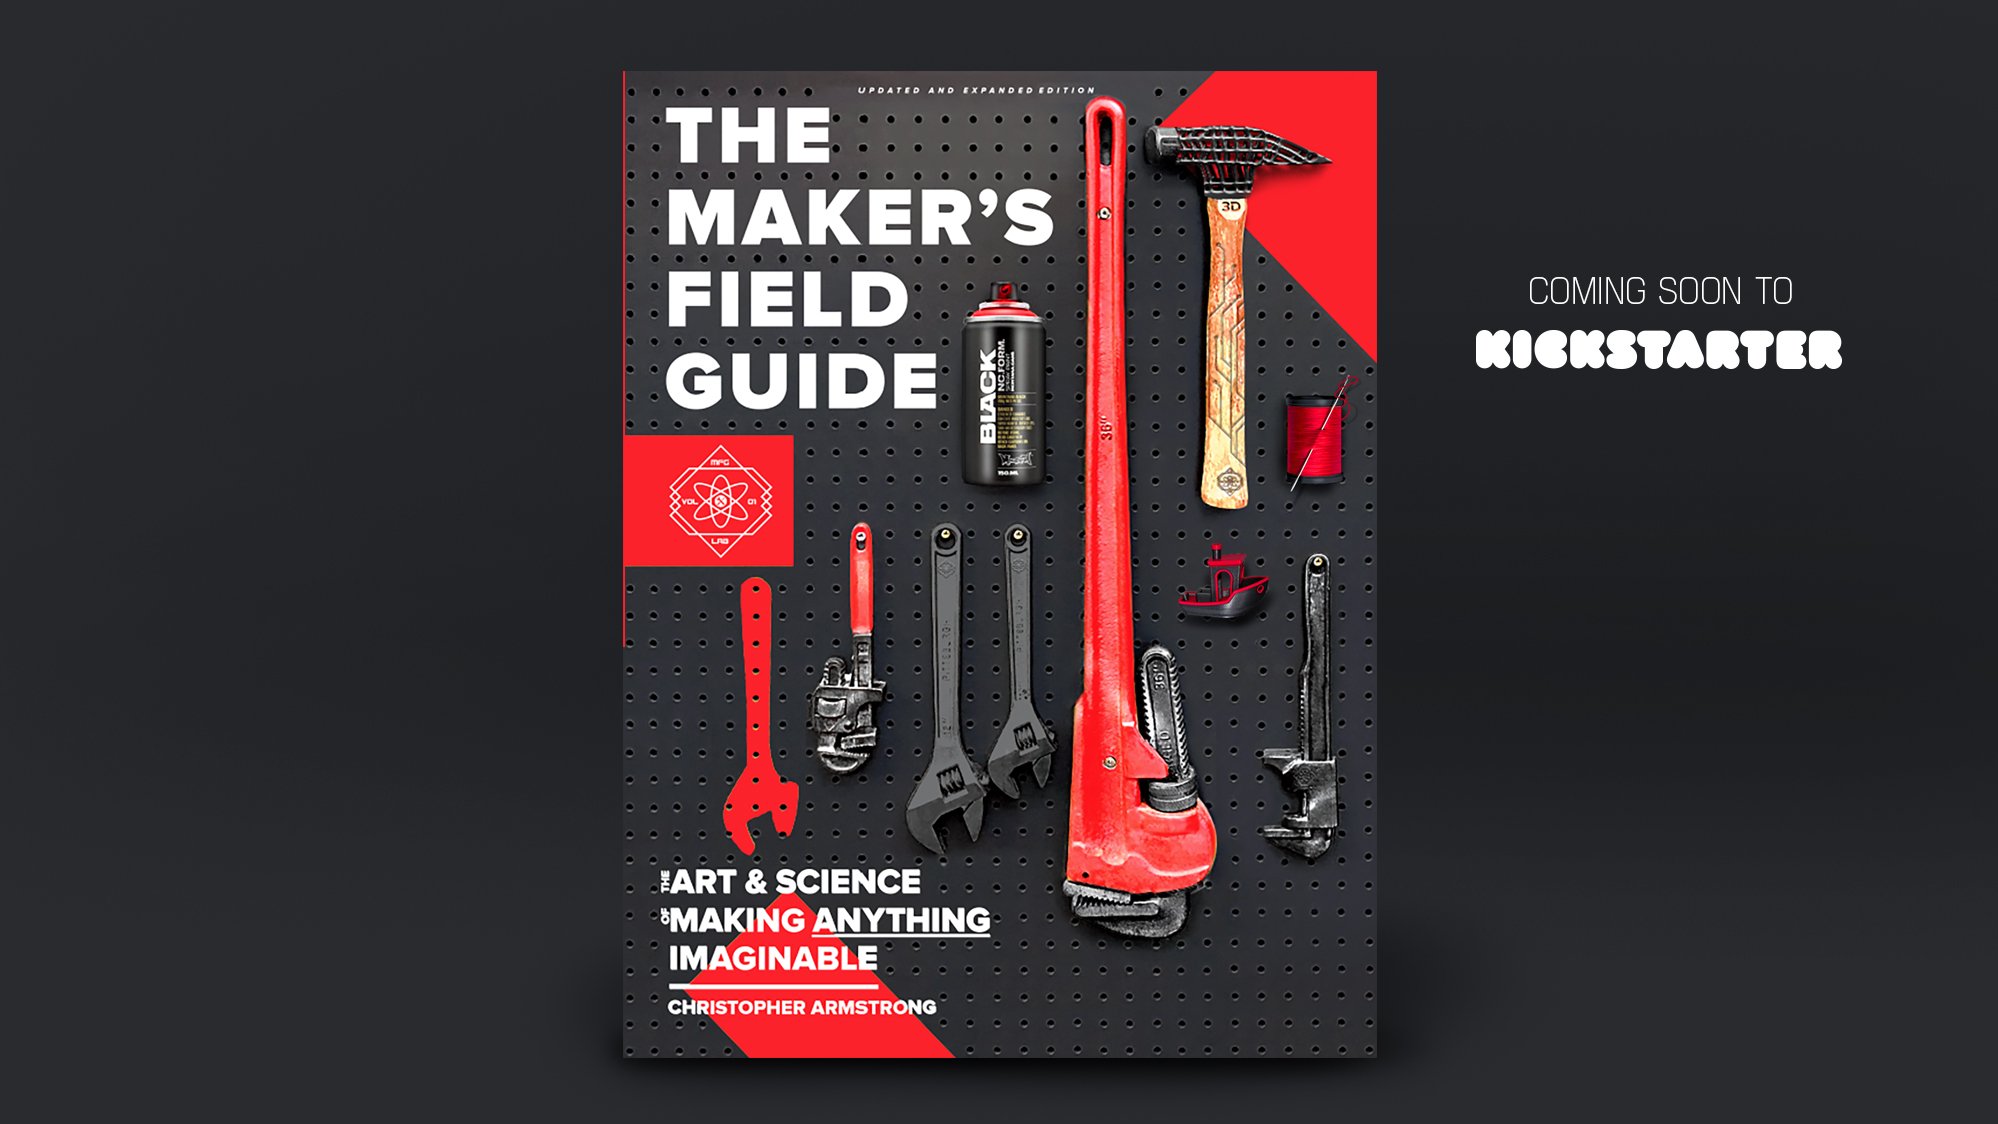
New Year, New Book! Coming Soon To Kickstarter 🚀
To kickoff the new year with a bit of excitement, I just wanted to give all of you who are following the blog a sneak peek into a top secret new book project I've been working on.
I’m simply calling it The Maker’s Field Guide: Updated and Expanded Edition, and it will be a newly updated paperback version of everybody’s favorite maker book — this time with a new black / red cover!
Hello Maker Family!
To kickoff the new year with a bit of excitement, I just wanted to give all of you who are following the blog a sneak peek into a top secret new book project I've been working on.
I’m simply calling it The Maker’s Field Guide: Updated and Expanded Edition, and it will be a newly updated paperback version of everybody’s favorite maker book — this time with a new black / red cover!
Shortly after it’s release, and after many great positive comments and reviews, I ultimately felt the gold color scheme of the former updated & expanded edition hardcover didn’t quite reflect the democratic nature of the Maker Movement. I immediately had the vision of wanting to repackage the book in a way that mirrors some of the more iconic power tools and 3d printer brands that exist within the DIY marketplace (i.e. Milwaukee Tools, MakerBot, etc.), and also thought the cover to do a much better job at reflecting the wide breadth of different technologies, tools, materials and processes that are contained within. That includes 2D soft goods / cut & sew, 3d printing, and electronics / robotics in addition to many more besides an overly-simplistic set of hand tools and a can of spray paint (it's honestly been harder than it looks to reflect all of the content covered within the book on one single cover design in a clean, modern and minimalist way — without appearing too cluttered, gaudy or gimmicky).

In addition, the new edition of the book will be offered at lower mass-market price point, which will include free shipping throughout North America and a greatly reduced international shipping rate. The latter should be great news for international backers / readers, and will be possible since this time around I’ll be working with a 3rd party fulfillment partner (final intl. S/H price is still TBD).
Finally and probably most importantly, a few extra goodies such as an expanded terminology section and Index at the back of the book will also be added this time around — resulting in page increase from 346 pages in the former expanded GOLD edition, to a roughly 378+ page behemoth this time around.
This ultimately means the 346 page GOLD edition will be treated as a limited edition print run of 3,000 copies only, and will be effectively phased out and replaced by this new black / red paperback version going forward. That said, there are only a few hundred copies of the GOLD edition still available, so the is your last chance to pick up a copy of one of those on Amazon or from the direct book website here. When they’re gone, I will not be reprinting them again, since it will be a borderline-impossible feat to sell and distribute two different books at the same time as a small independent author & publisher.
I’m also considering phasing out the first 208 page non-updated / non-expanded paperback edition — since that is a print-on-demand arrangement and the costs are much higher to produce — in comparison to a mass produced book which is made by a professional book manufacturer. I also plan to use the same USA based factory out of Illinois, who manufactured the hardcover book which many of you backed here on Kickstarter — since they're extremely professional and reliable, and the print quality was phenomenal.
The price hasn’t been finalized just yet, but will be somewhere around the ballpark of $25 - $28. Be sure to stay tuned for more information to come out shortly, with a Kickstarter launch planned somewhere by the end of January or the start of February.

You heard it here first!! Please be on the lookout for more details to drop soon here on the blog or by subscribing to the email newsletter on the MFG book website here!
🛠️ Christopher Armstrong

The Maker Community Steps up to COVID-19 | NY Times
Hey All,
I wanted to share this video that was recently published by the New York Times. This is a great example of how a maker community can come together to lend emergency response & assistance by creating open-sourced, makeshift PPE (personal protective equipment) for the doctors and healthcare providers who are battling it out on the front lines to combat this virus!
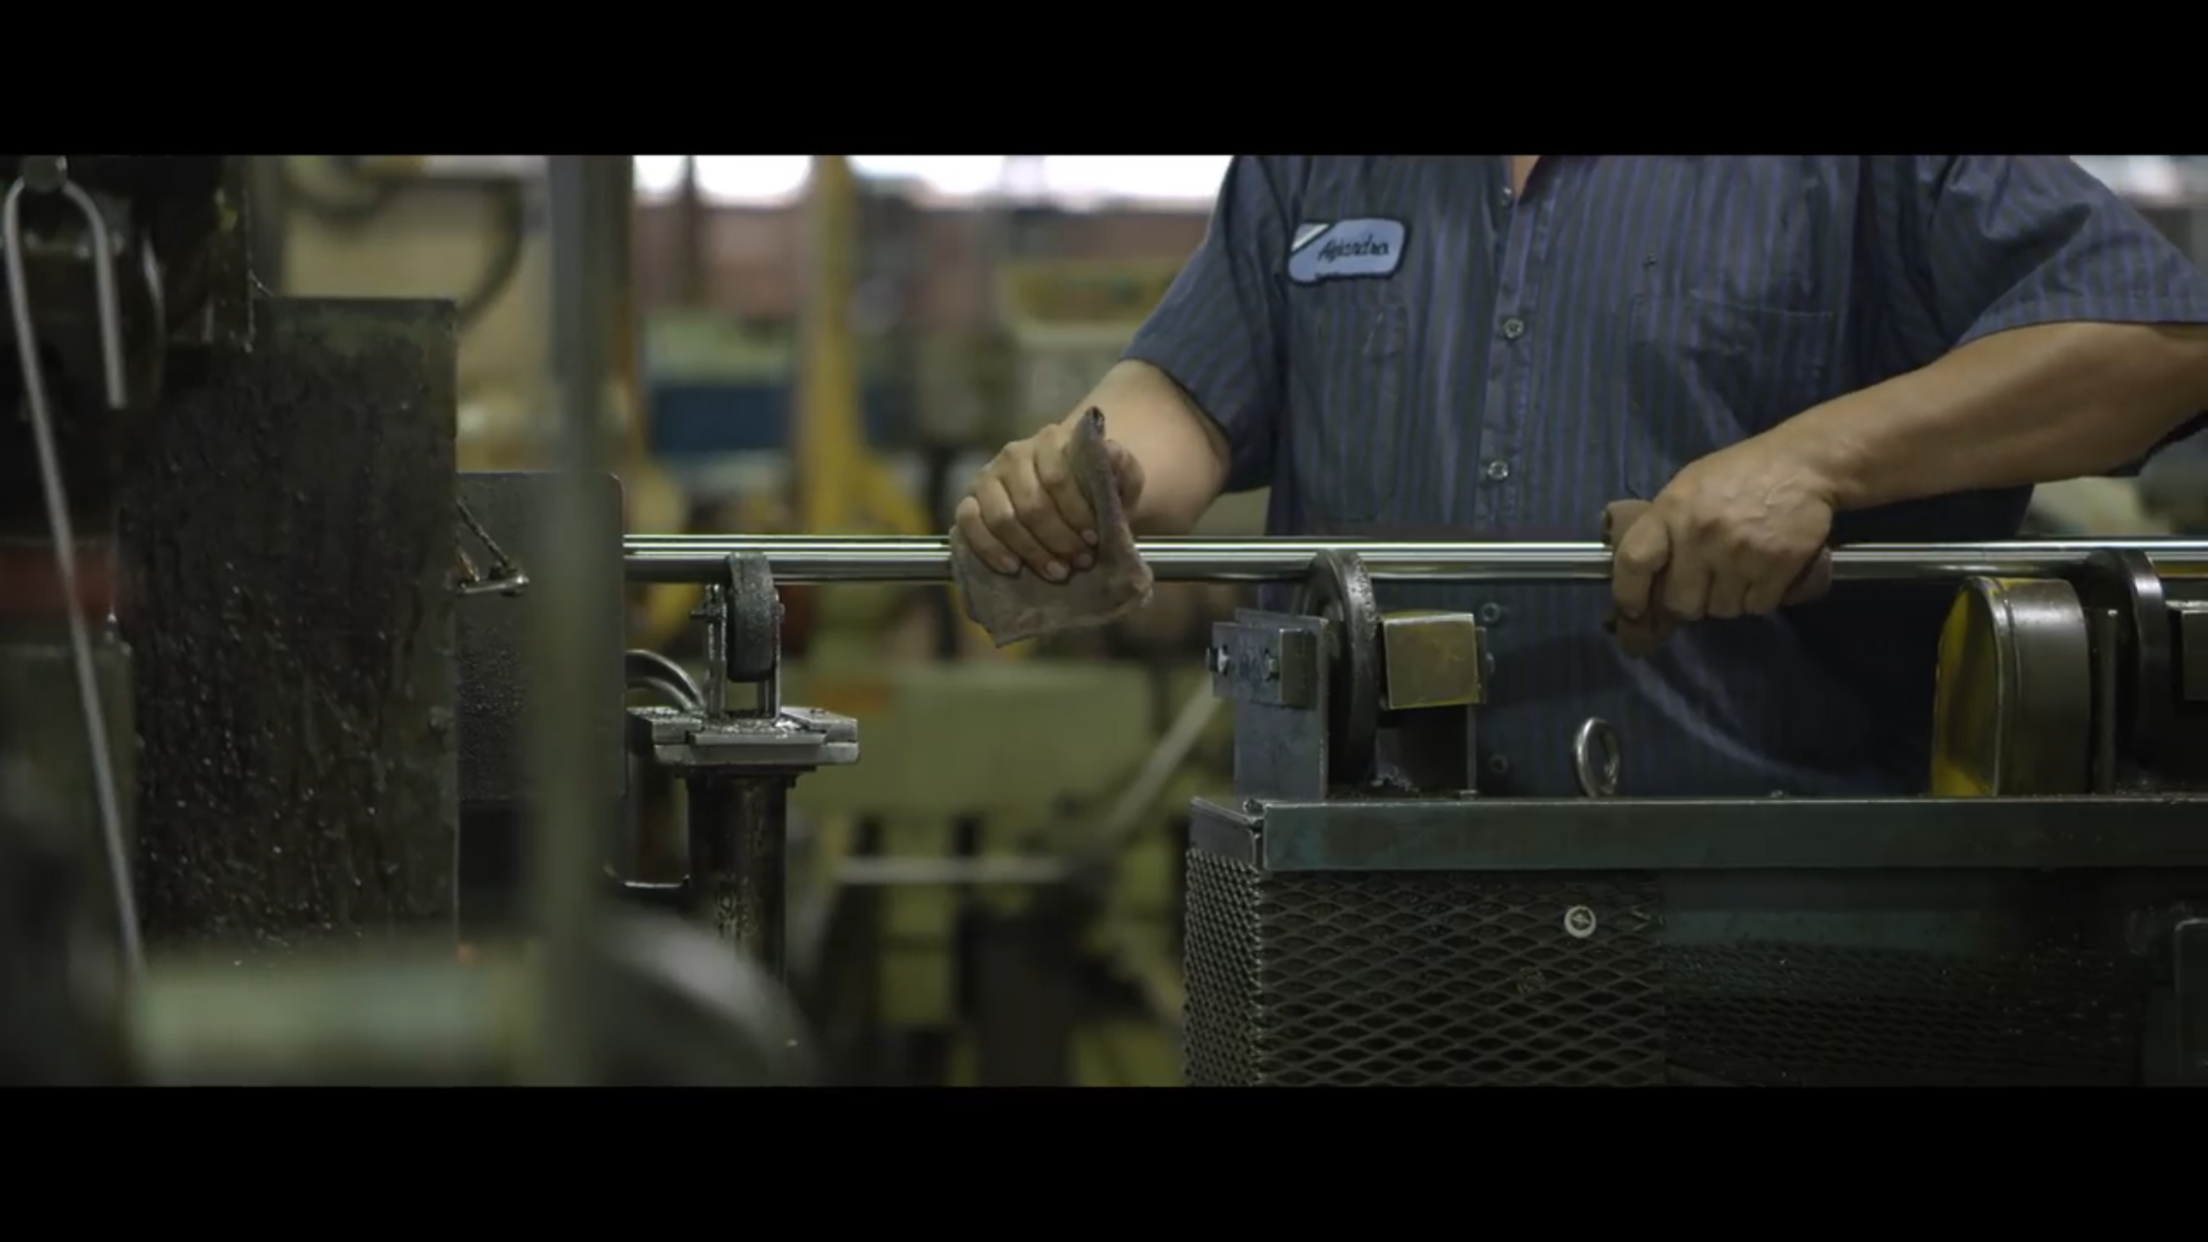
RESPECT THE PROCESS — Making a Rogue Barbell in the USA
How BADASS is this barbell manufacturing video from the leader in CrossFit / Olympic weightlifting equipment, ROGUE Fitness? I don’t know about you guys, but this to me is what being a ‘maker’ is truly all about. If you don’t get emotional watching this, you aren’t human - period!
This short four-minute clip captures the elegant symphony of the metallurgical and manufacturing process that goes into every single one of ROGUE’s indestructible barbells — which are designed and built specifically to take a beating during high volume, high intensity Olympic style heavy lifts. The process of going from A to B to make a seemingly simple object like the standard barbell might be hidden from the consumer’s eyes, and the craftsmanship of the manufacturing is all too often underappreciated by the ‘suits’ of the Wall Street business community. ROGUE does a great job showing the elegance that’s involved in the manufacturing process for what it is — art. Remember that the next time you pick up a product and take for granted, and consider where those individual parts came from, because the process behind their creation makes ALL the difference between something of quality and something that’s been lazily slapped together in an effort to squeeze a few pennies out of each unit to boost the bottom line.
The founder of ROGUE, Bill Henniger, was working as an industrial engineer at General Motors’ powertrain factory in Toldedo when he first dreamed up the brand: “There was something about metal that just sang to him. He loved figuring out how to shape it and make things out of it. Shipping other people’s barbells and bumper plates made him want to forge his own wares and make them better, indestructible and impervious to CrossFit’s relentless brunt force and load.” (quoted from ‘Learning to Breathe Fire: The Rise of Crossfit and the Primal Future of Fitness’ by J.C. Herz).
This is a perfect example of how taking something simple, but doing it extremely well, can often lead to breakthroughs.

3D Printing Is Changing the World 🌎 | Mini-Documentary by VICE
What’s up, Maker fam!
I just wanted to share this brilliant mini-documentary released by VICE, which talks about some of the more exciting and game-changing future possibilities of 3d printing. This feature explores everything from the effects of the technology on product development, decentralized manufacturing and the global supply chains, innovations in material science, the use in medical and bio-mechanical, applications in advanced R&D of NASA and similar space exploration agencies, use of machine learning to engineer parts never before thought possible, and even an interview with the founder / CEO of FormLabs.
I highly recommend taking twelve minutes out of your days to check it out. Enjoy!


Directory of Makerspaces throughout the USA & Worldwide
If you’ve ever found it hard to find access to tools or equipment in your local area, Maker Media (owners of Make: Magazine) have recently put together a comprehensive list of makerspaces throughout the USA and worldwide. This list is quite extensive, and search parameters can triangulated by city, location or zip code. (independent makerspaces owners / operators can also add their facility to the online registry). Thanks to the team at Maker Media for putting together this list — this is a great resource for all of those within the maker community, and one that’s been sorely needed. Tools and machines, class offerings, and sizes of facilities of these spaces will all vary from one to another, so it would be a good idea to check out a few before signing up for a membership to one or another. Notice from the maps below, that most of the makerspaces are located in the top metropolitan/entreprenuerial business hubs — with the crown going to Silicon Valley / San Francisco with 27 makerspaces in the bay area alone. These regions are fortunately recognizing the importance of these facilities for various reasons — to stay competitive in the ever-changing technological atmosphere, to nurture practical/hands-on STEM educations early on, and to foster local Startup business activity (which has a dramatic impact on local economies and GDP growth).
Additional information, including website links to over 895 individual makerspaces registered worldwide can be found through Make:’s incredible registry here: https://makerspaces.make.co
Source: Maker Media / Google

Worldwide

USA

North America

Europe

Eurasia, Africa & Australia

Audible Audiobook Edition - Now Available!
After months of planning and receiving auditions from over 120 narrator’s, I’ve finally selected talented LA based voiceover actor Joe Smith to narrate the book. His narrative and enthusiastic “Tony Stark” esque storytelling style is a perfect match for this book. I’m excited to use this new format to get this content out to more readers! Stay tuned, and in the meantime feel free to have a listen to Joe’s audition for the project below!


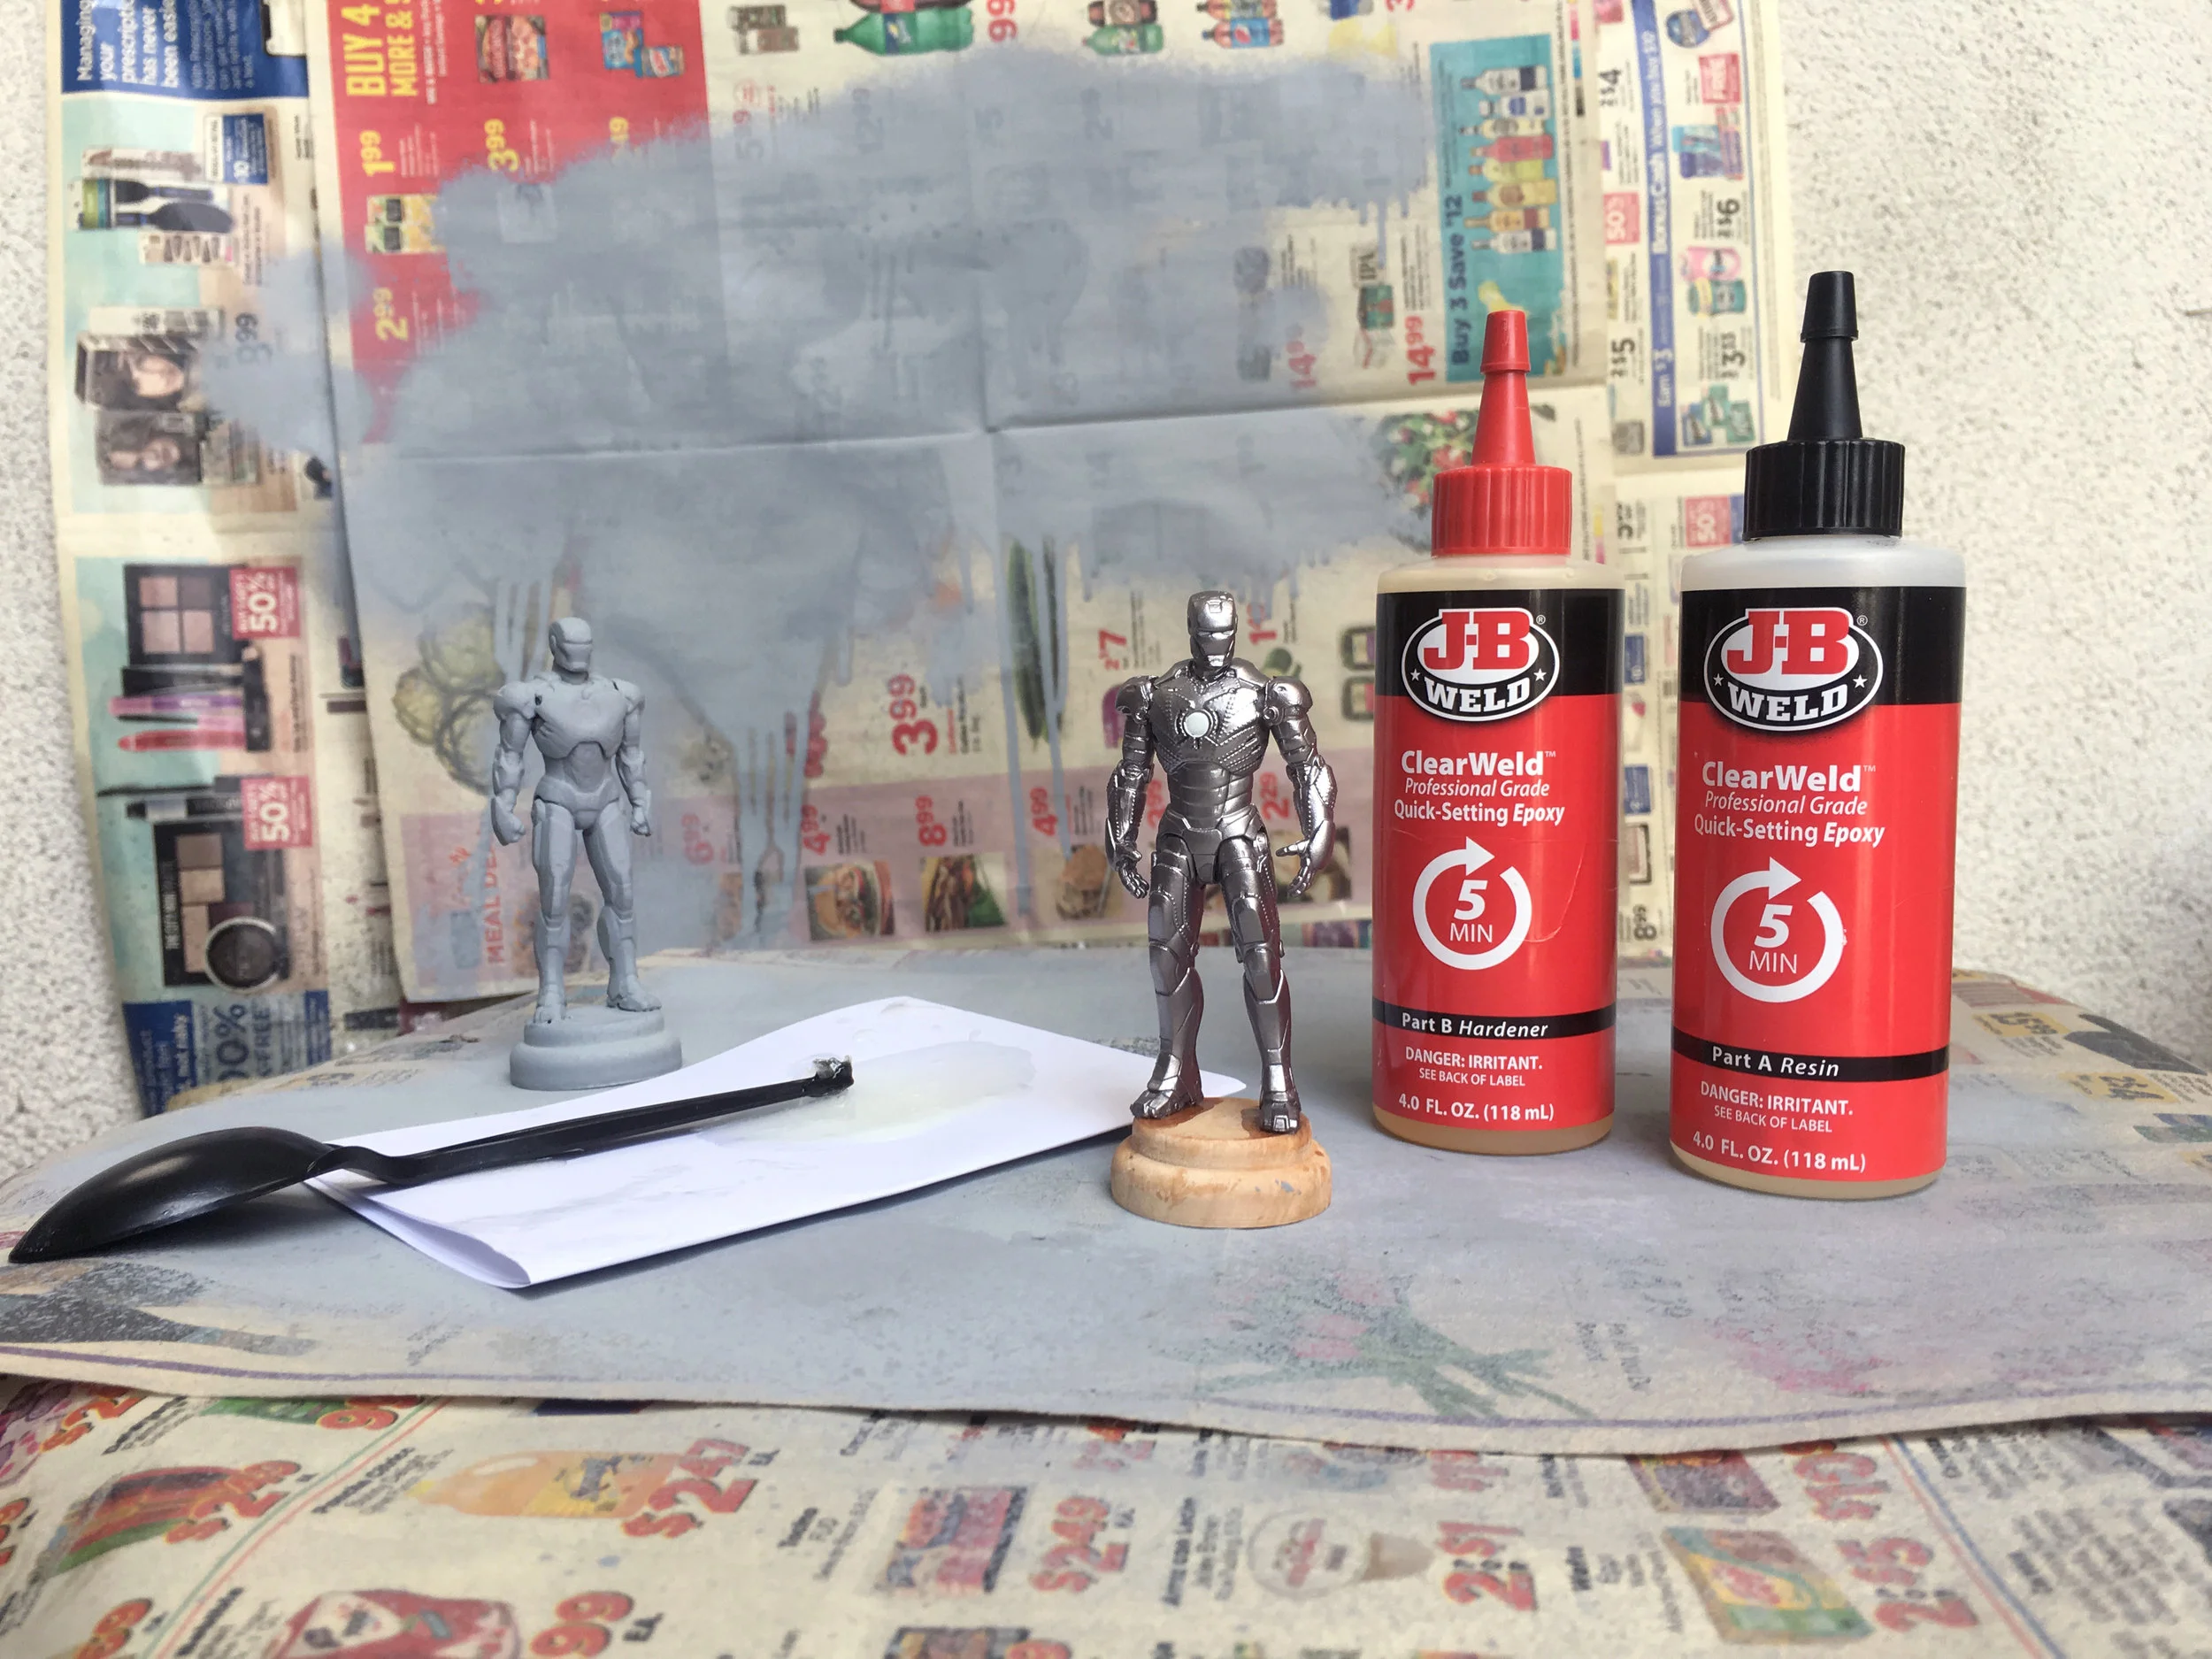
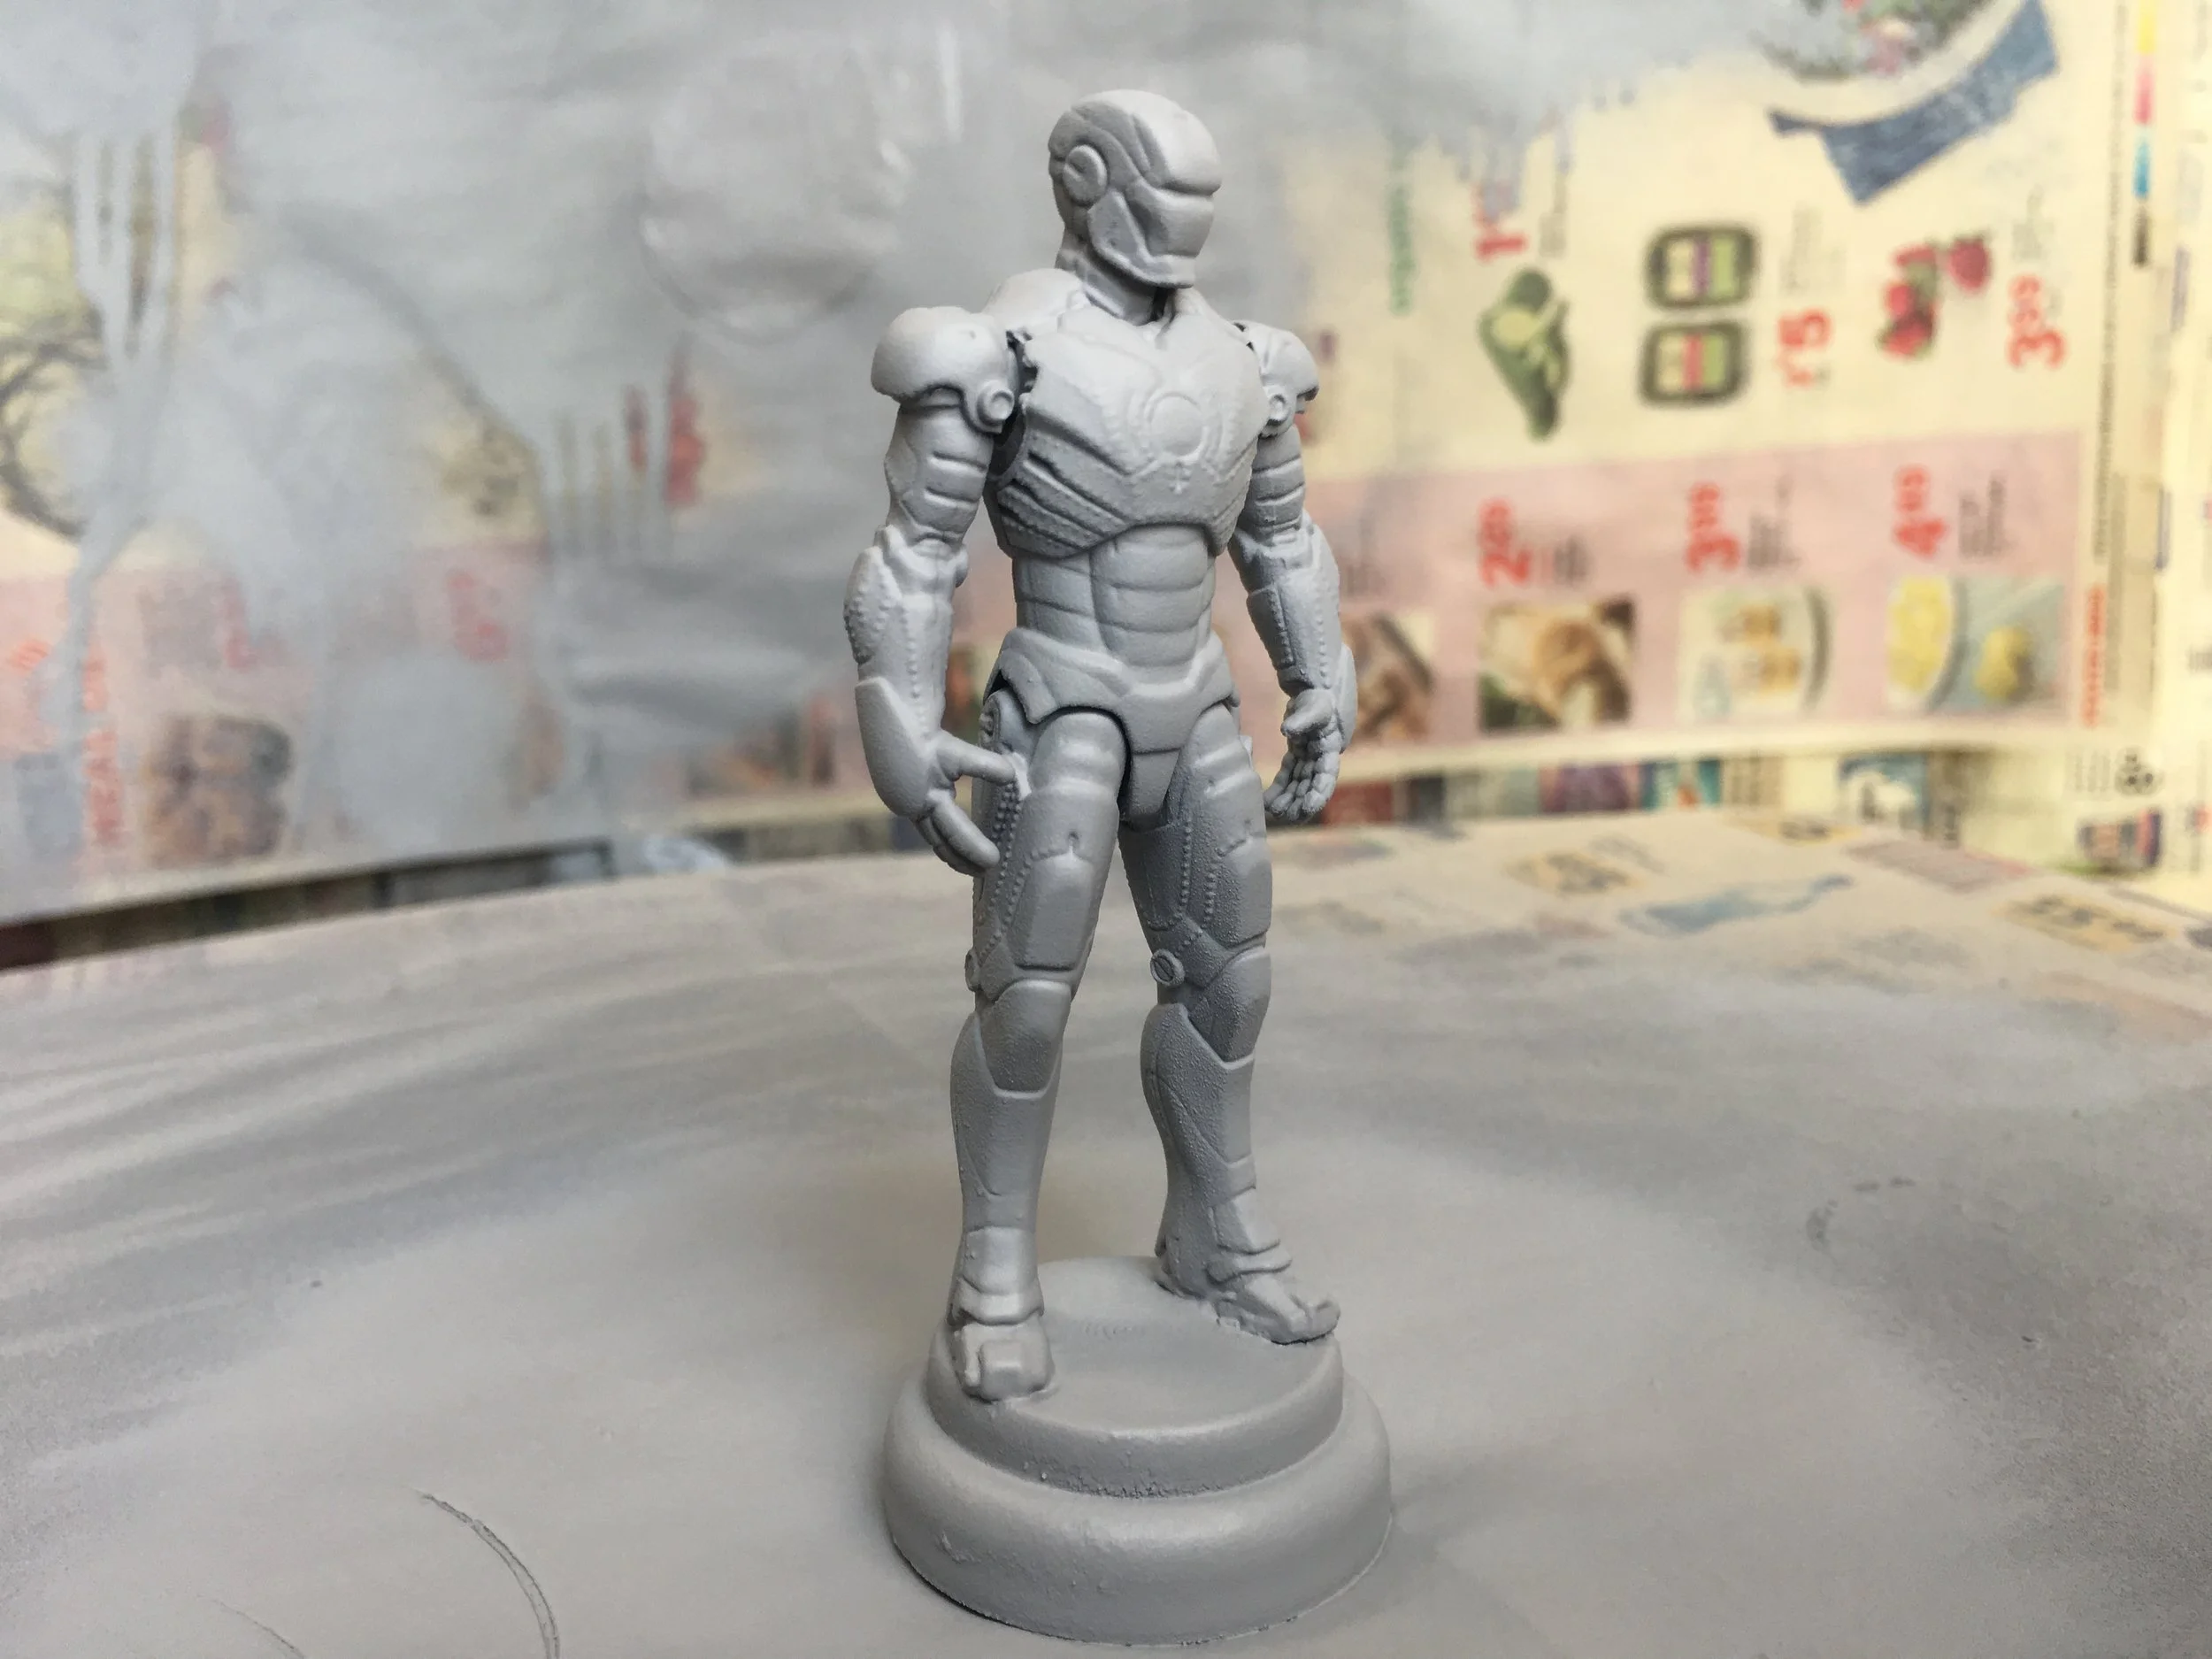
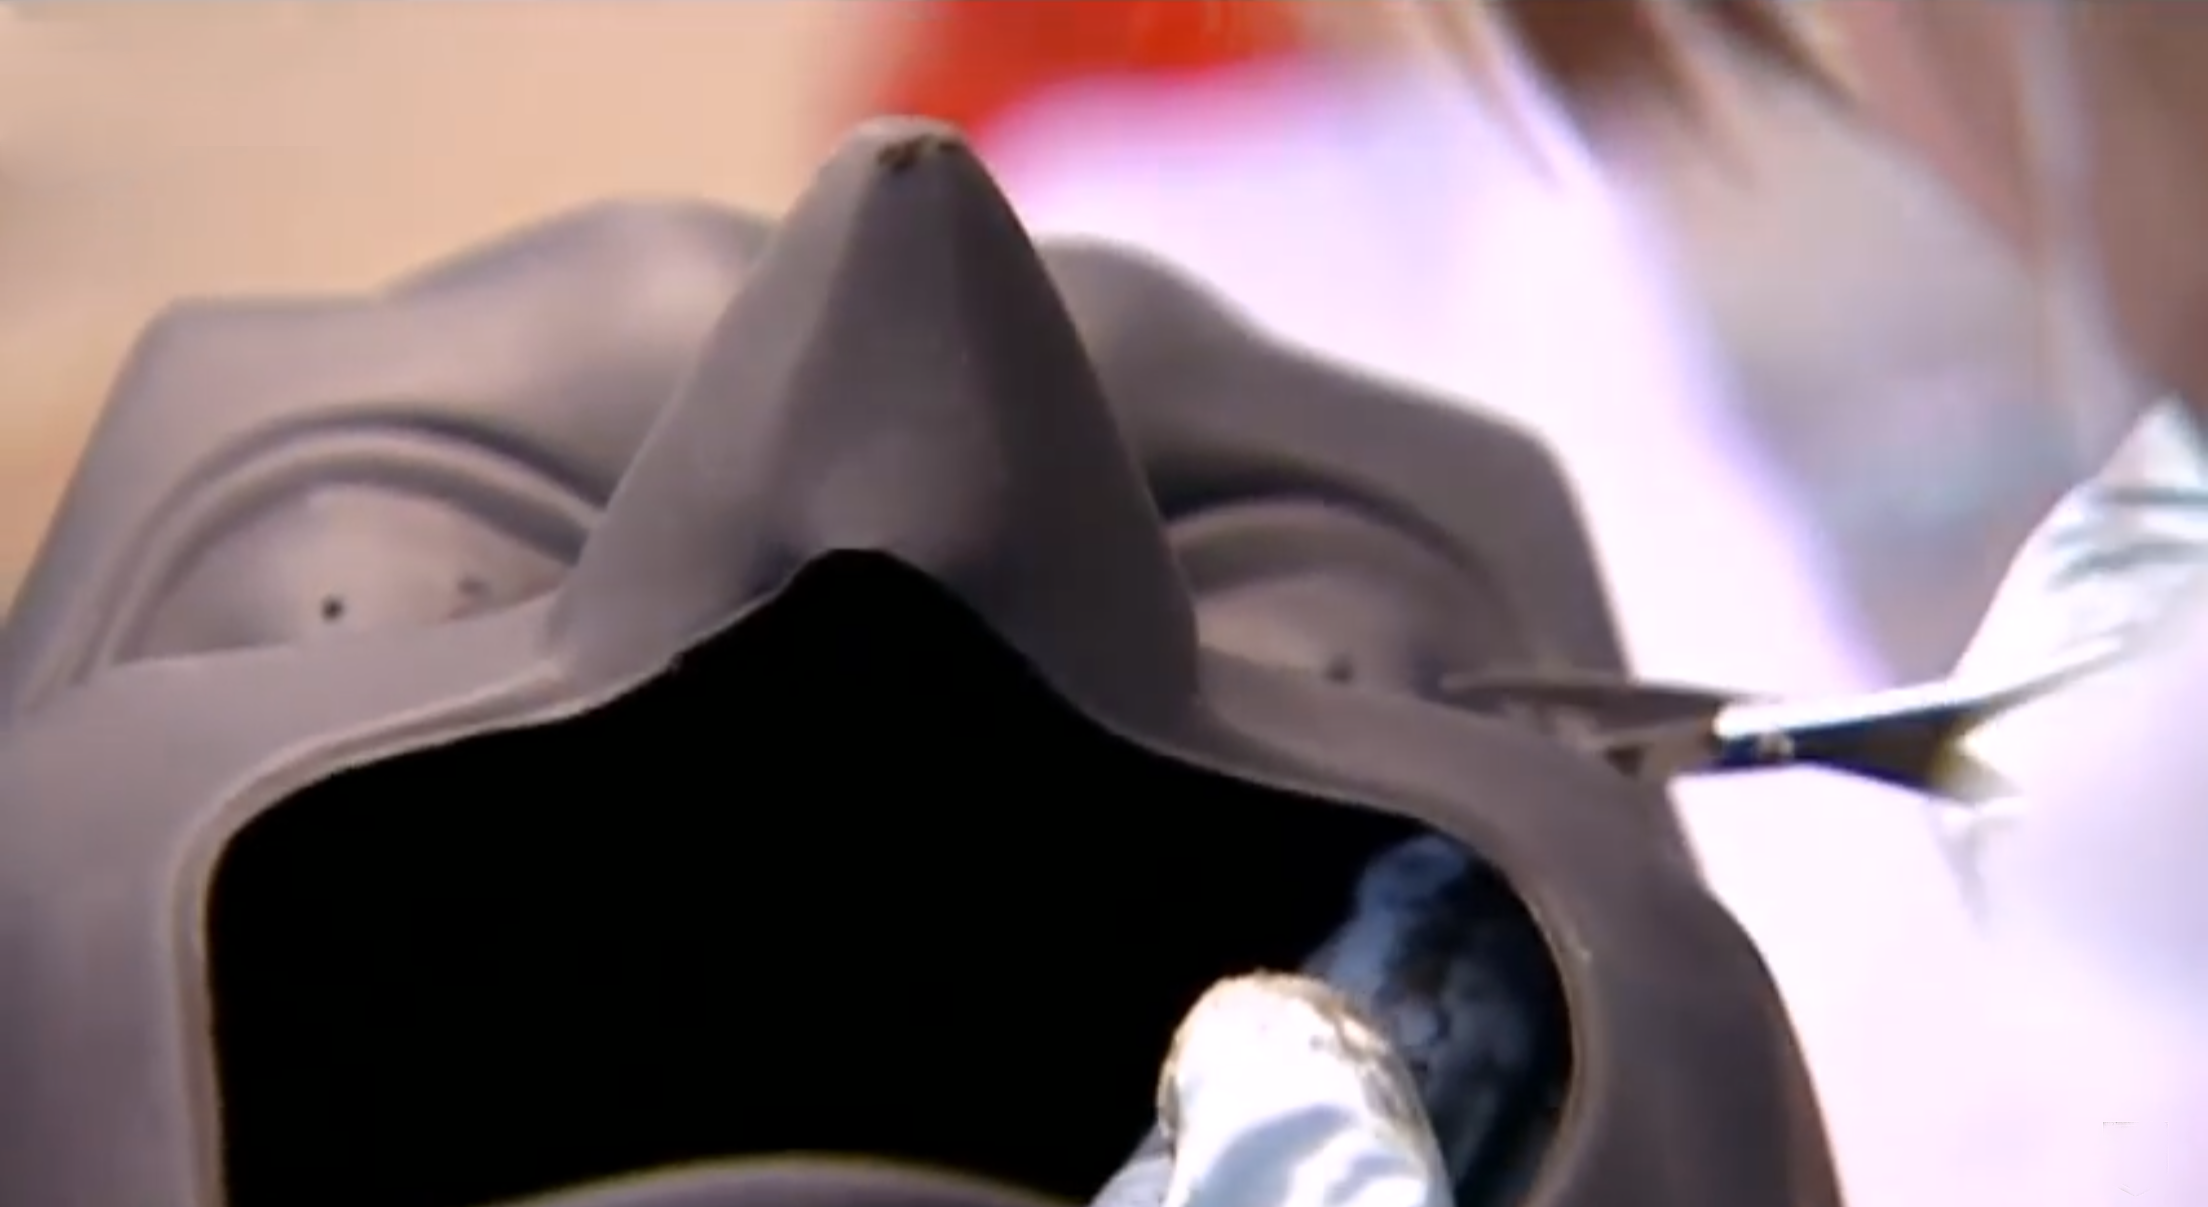
Iron Man Bronze Statue - Master Build
In this Master Build, Christopher Armstrong reveals the assembly and painting of a miniature Iron Man capsule toy (Japanese gashapon) model kit, to resemble a cast metallic sculpture with realistic weathering effects.
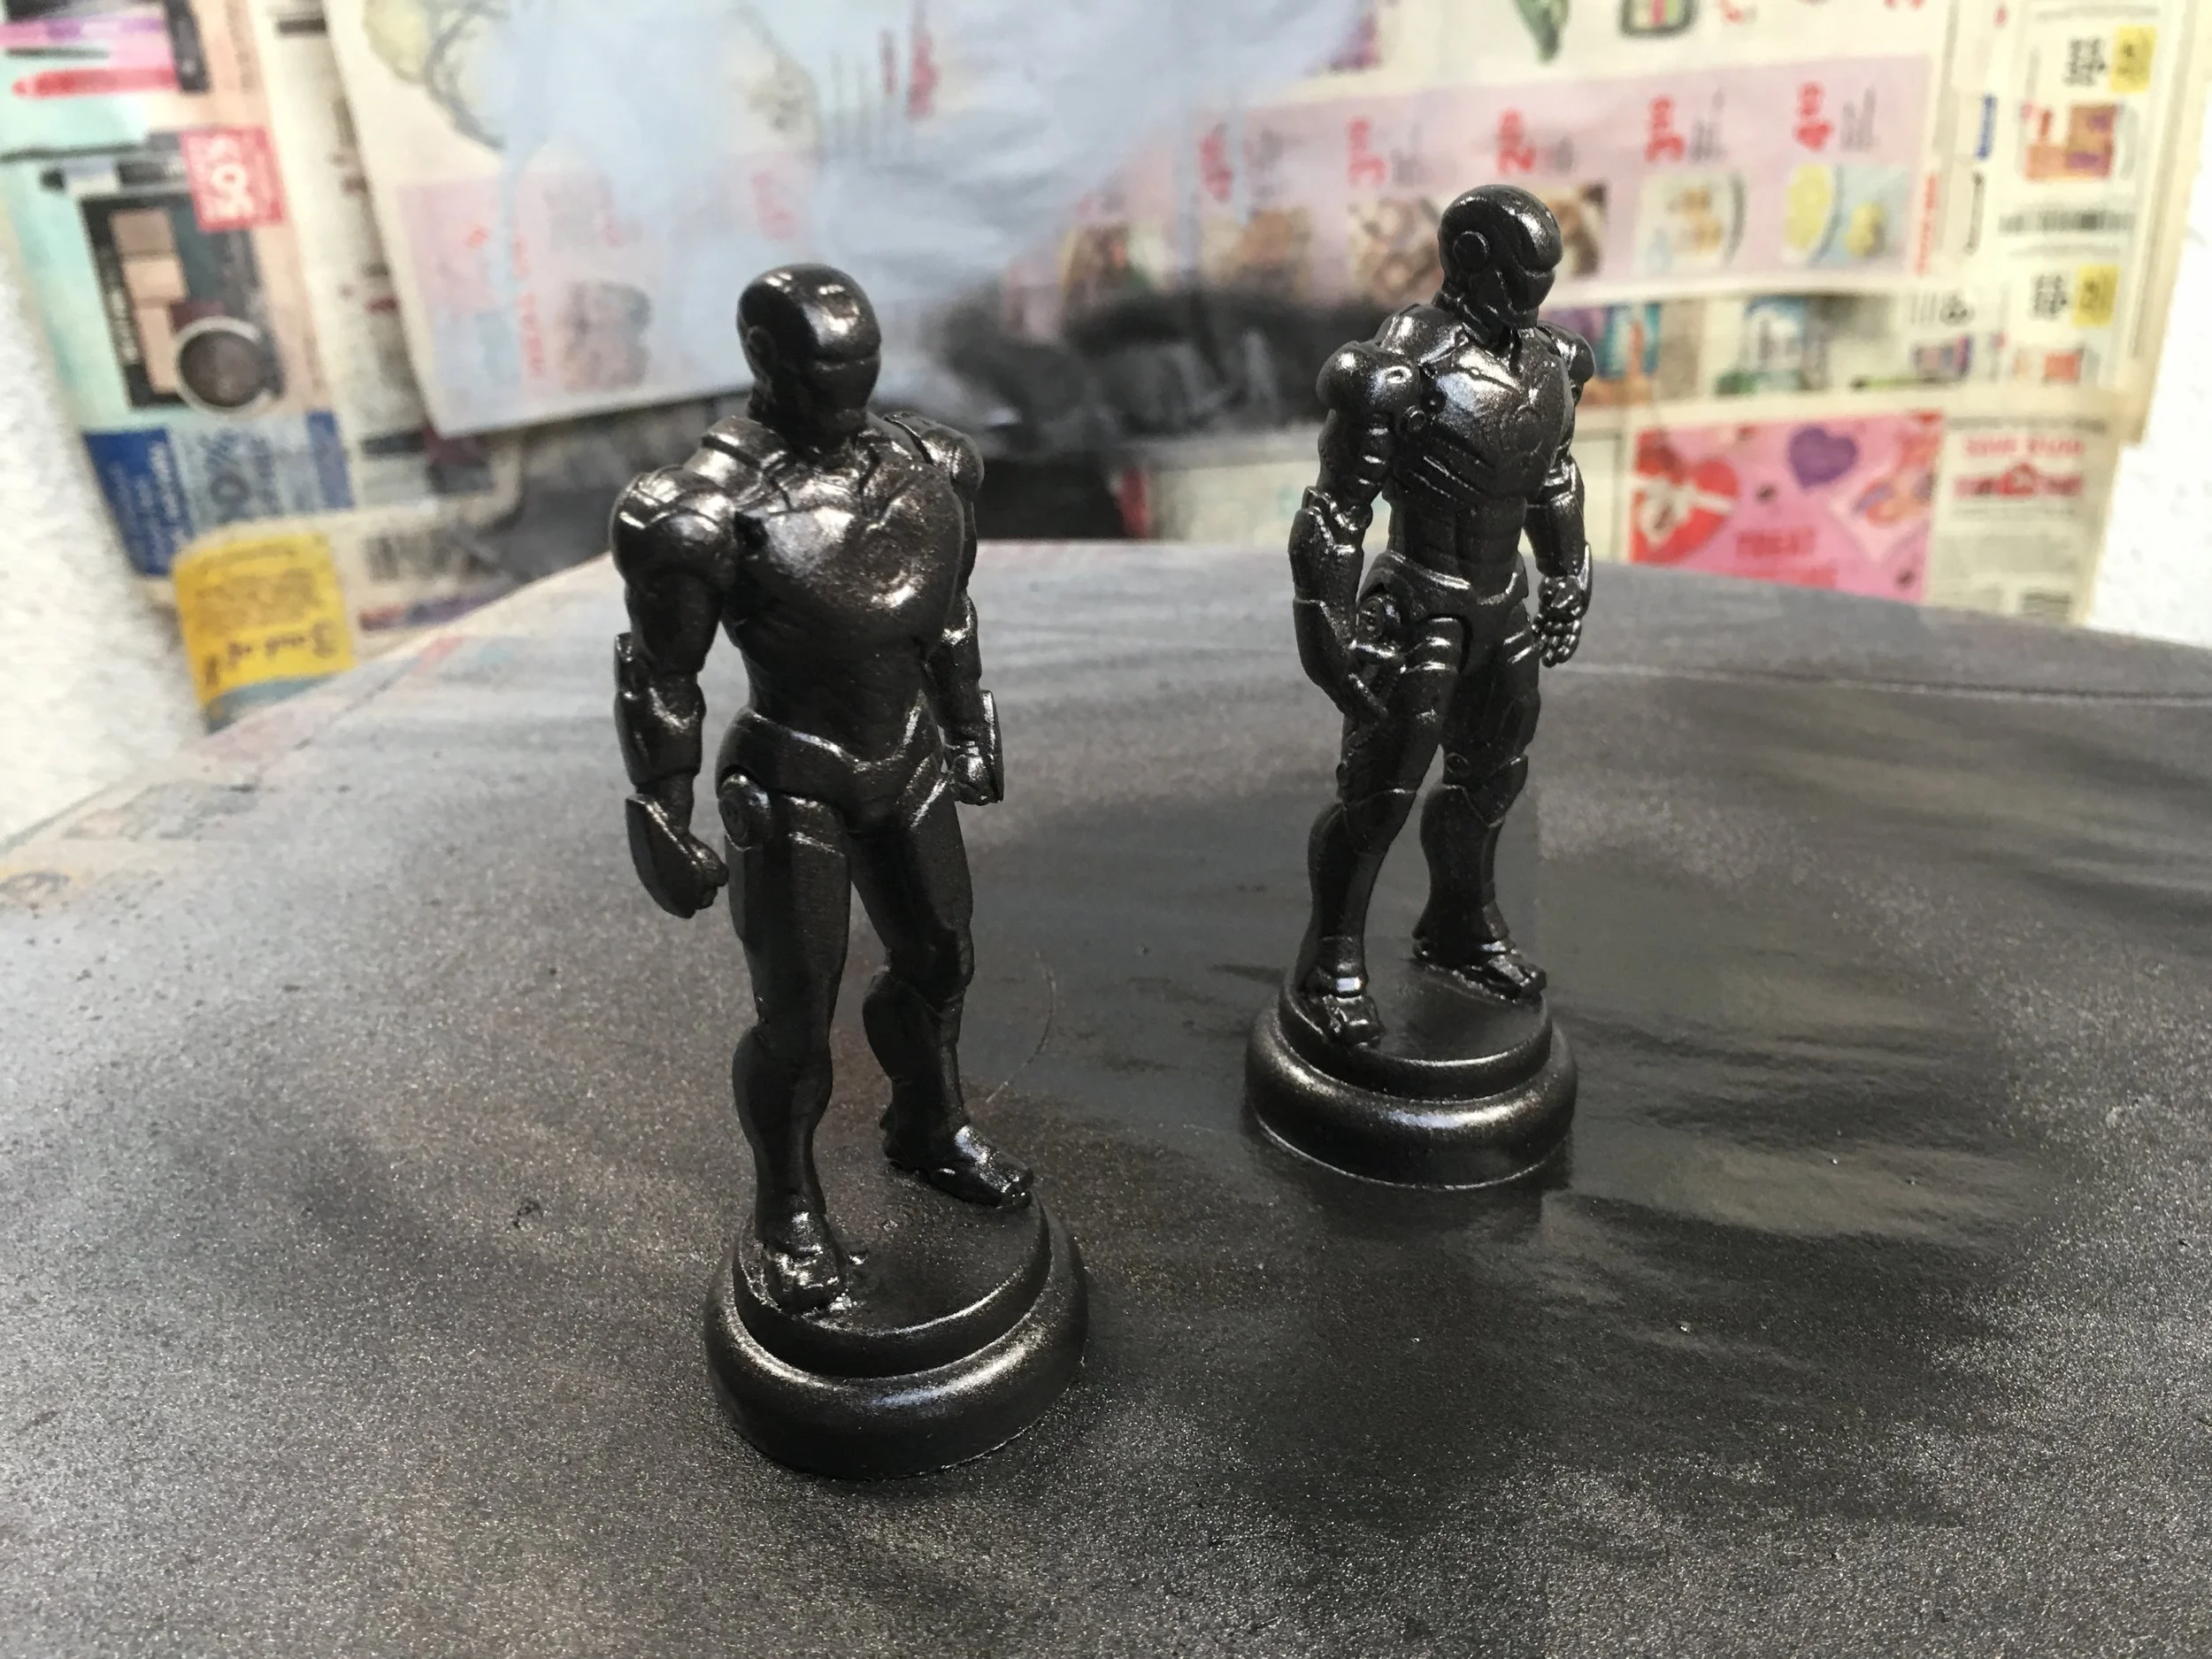
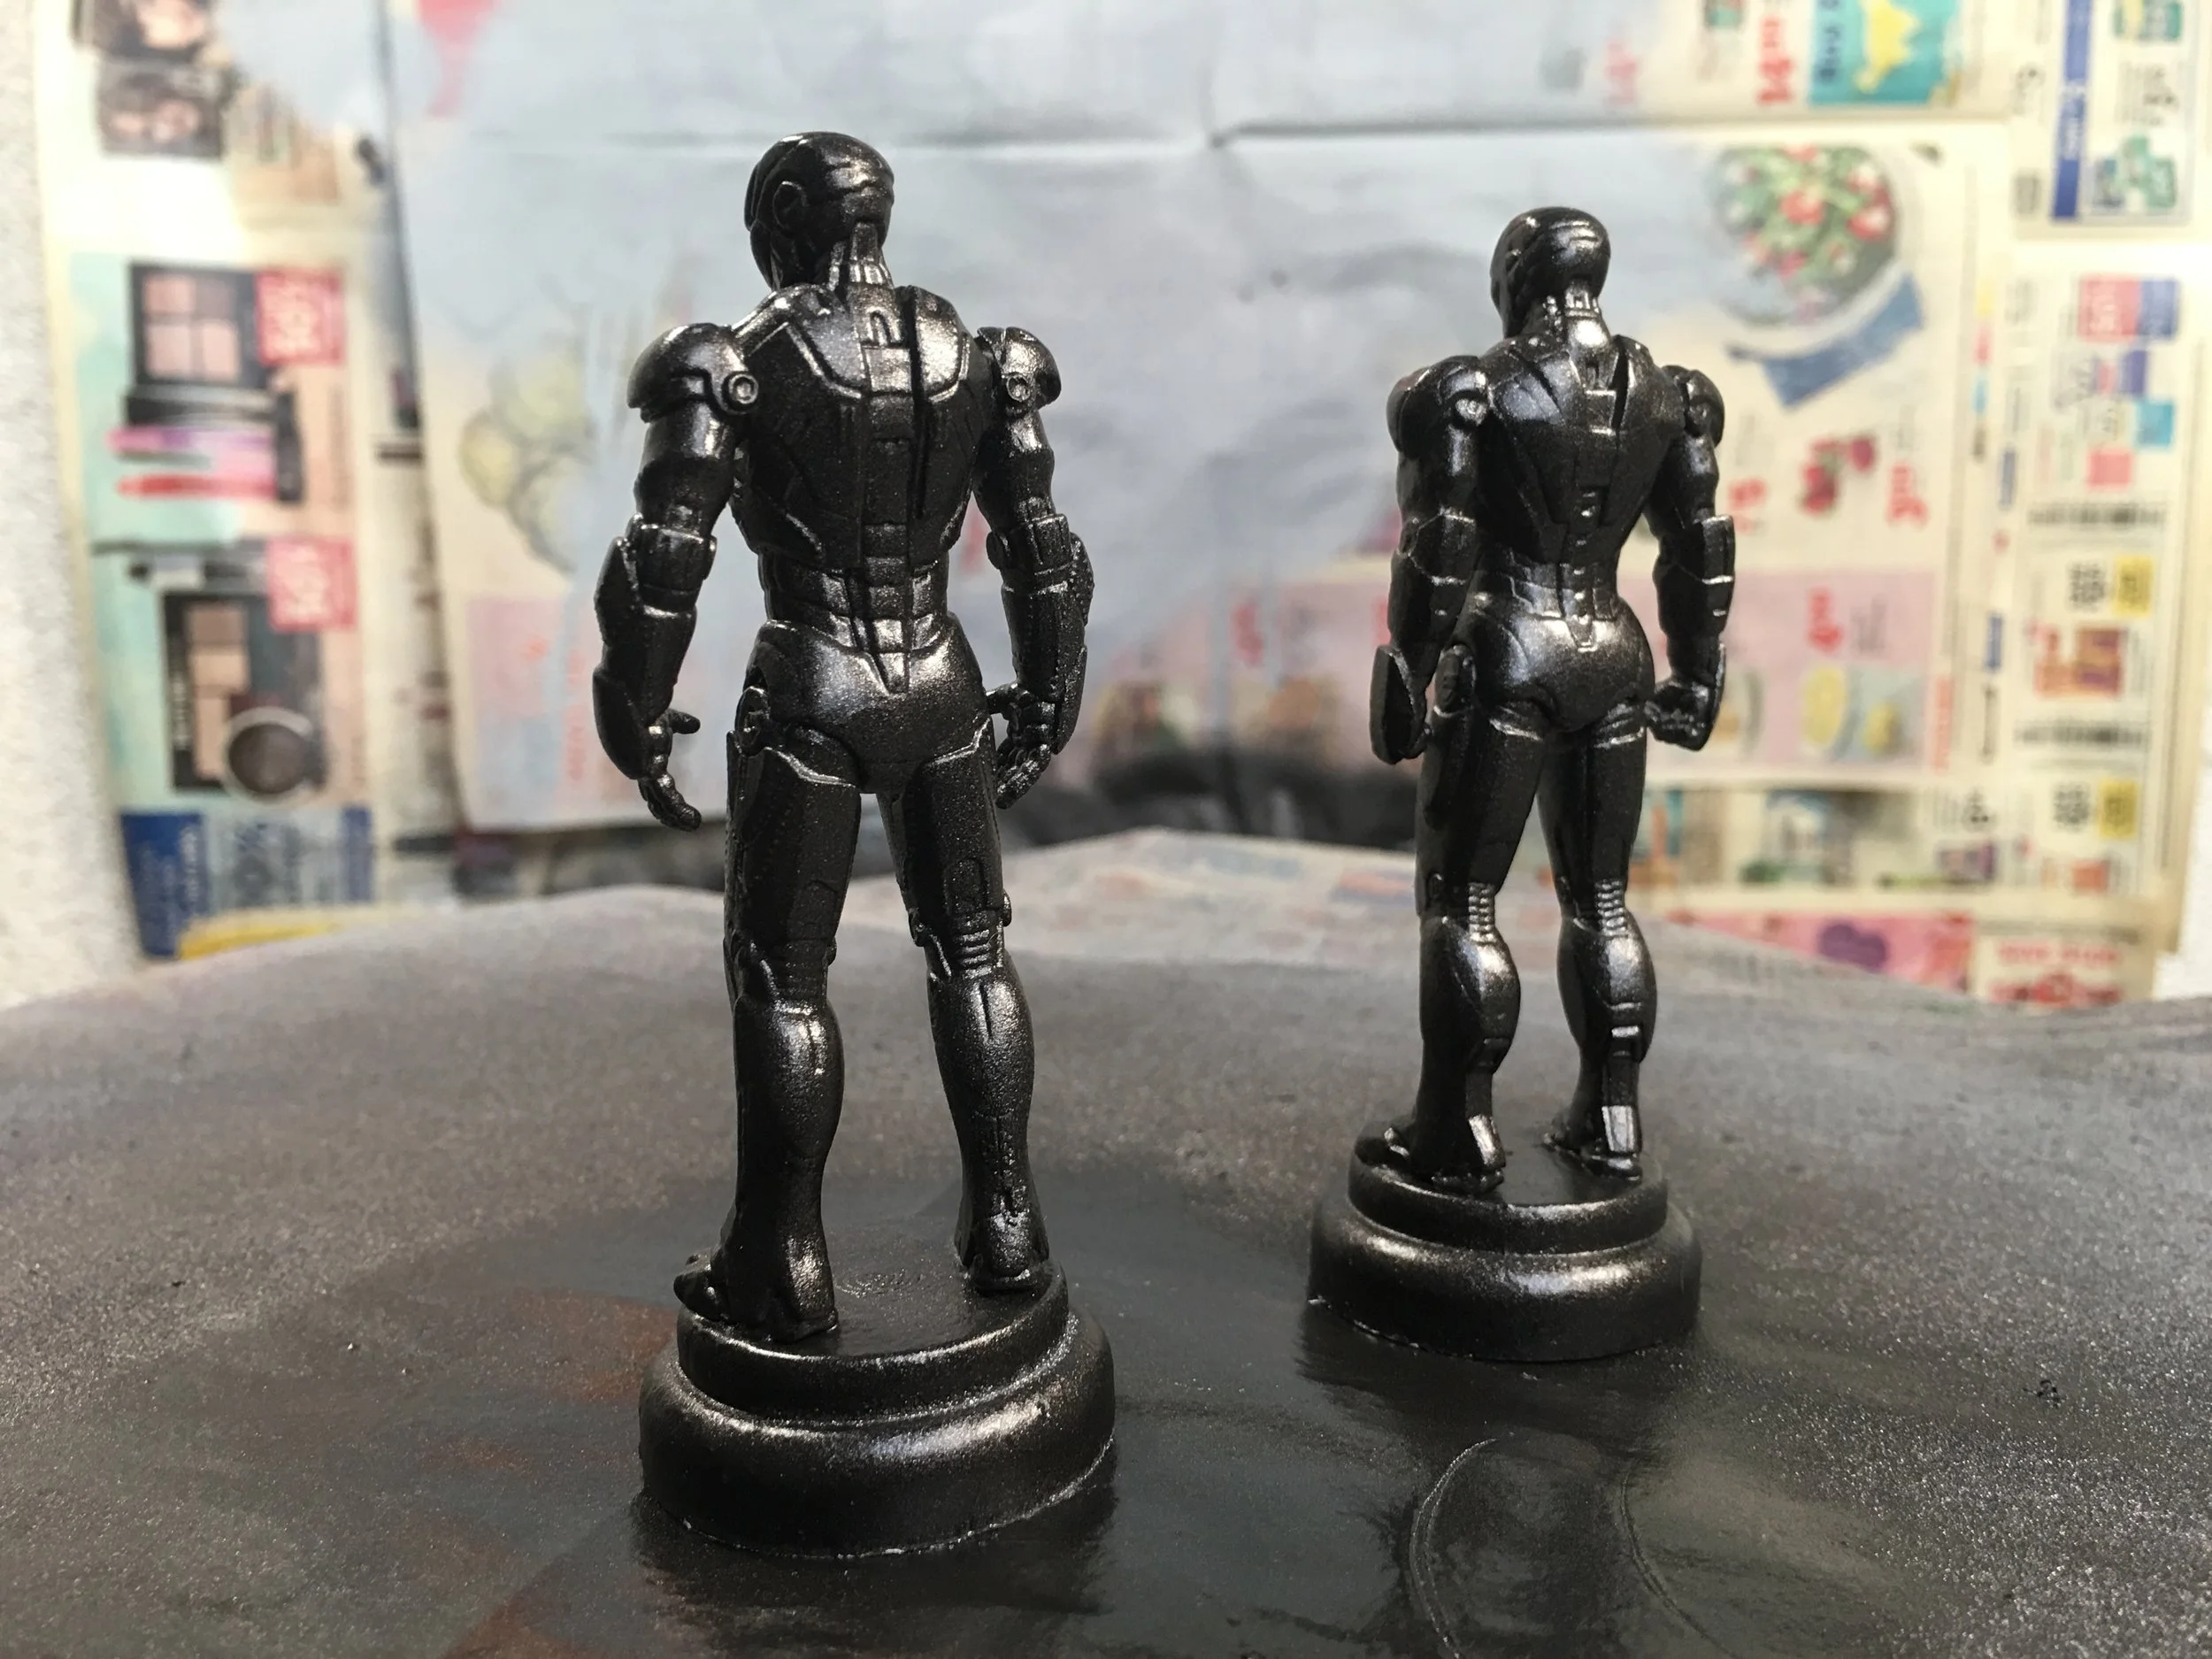
After multiple delays and setbacks, the wait is finally over — the Iron Man bronze statue Master Build is live!
In this Master Build, Christopher Armstrong reveals the assembly and painting of a miniature Iron Man capsule toy (Japanese gashapon) model kit, to resemble a cast metallic sculpture with realistic weathering effects. This step-by-step demo covers some of the key fundamentals of model making, including glue bonding, collecting reference material, sanding & surface preparation, and final paint application. Paint can be a powerful tool to boost the appeal of object (or to give it an effect of being a completely different entirely) and is used widely in film and special effects props. Anyone can use this simple process to transform any object, model, or 3d printed part into a convincing cast metal sculpture — perfect for creating custom trophies, movie props, or luxurious home decor pieces.
Materials used in this build:
-Iron Man Capsule Toy / Gashapon (www.ebay.com)
-5 Minute Epoxy (two part)
-Rust-Oleum Automobile Primer (Light Gray)
-Rust-Oleum Universal Metallic Paint (Oil Rubbed Bronze)
-Testors Acrylic Enamel (Flat Brass & Silver)
-Wood bases from hobby store
-Paper towels & Q-Tips
-Nitrile or Latex Gloves

1) Below is a collection of real-world bronze weathering reference imagery, which were taken from a trip to Disneyland. There’s nothing like studying from real-life reference, sine this will give this model an air of ultra-realistic authenticity. This reference will be critical to get the realistic bronze effects just right in this build:

2) Assembled miniature Iron Man capsule toy, glued to a small wood base with 5 min epoxy:
3) First primer coat is used to prepare the surface for spray paint. Automobile primer is used, since it has a higher paint solids content and dries much faster than typical canned primers:

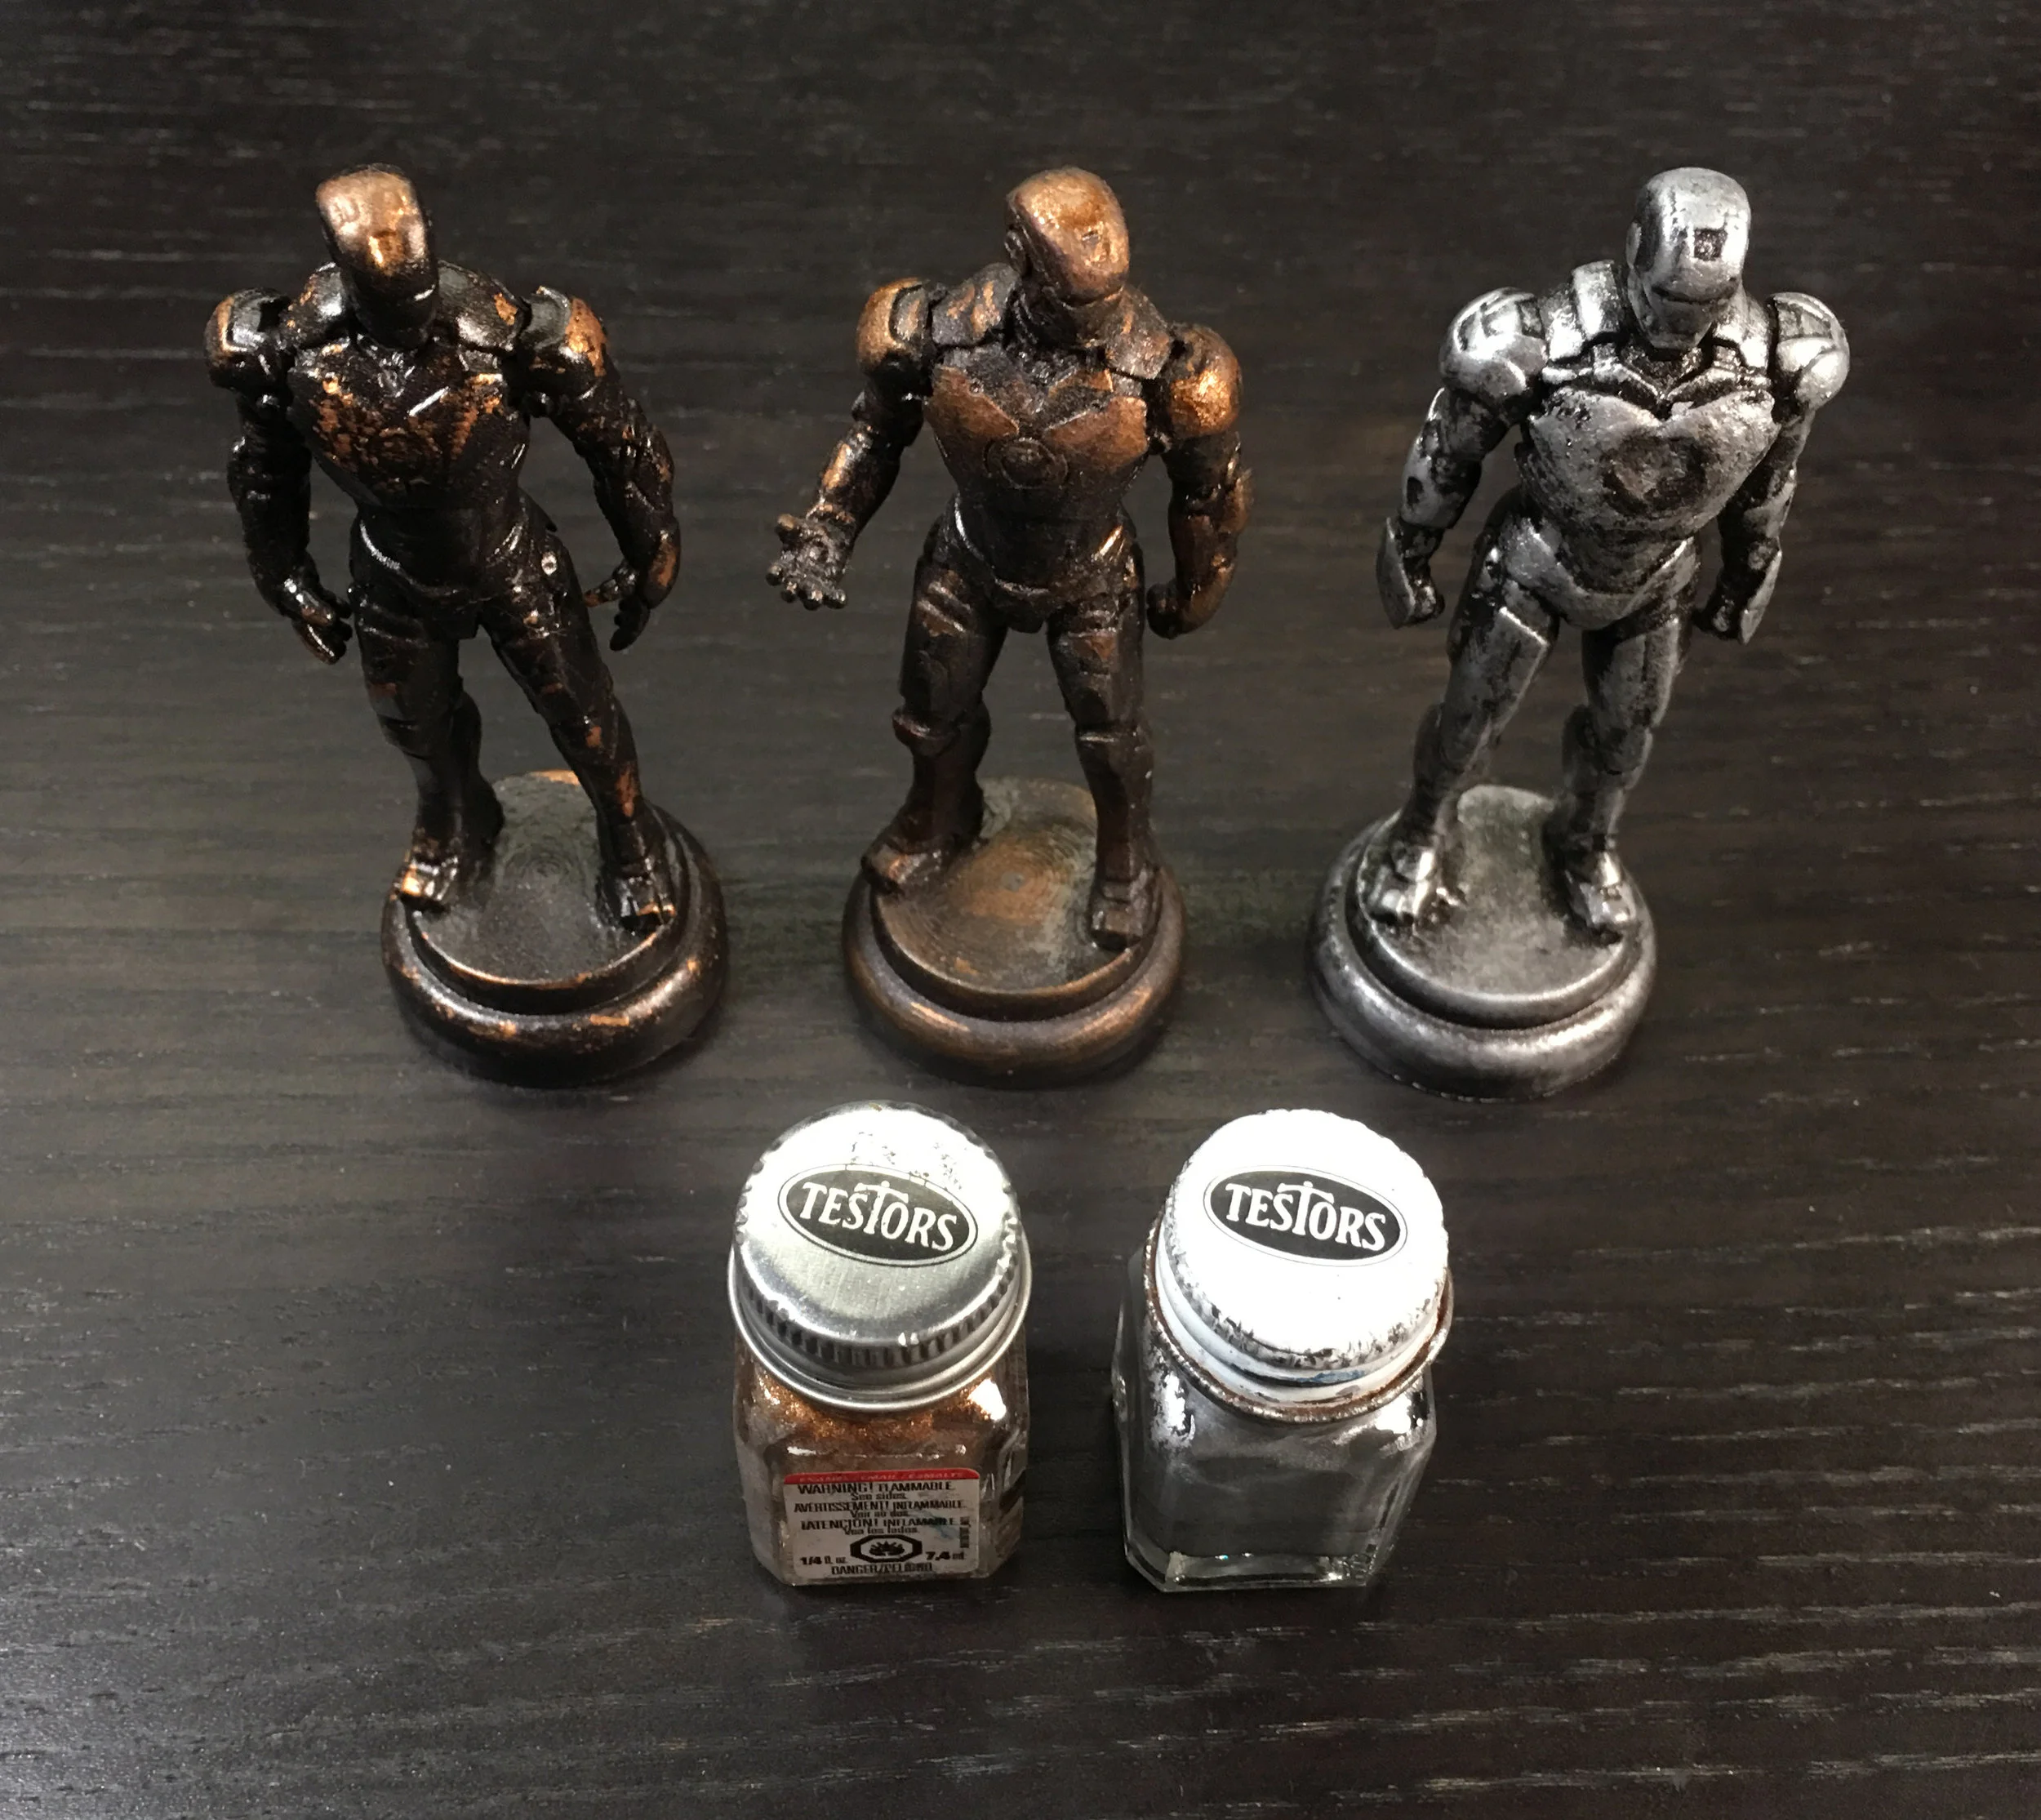
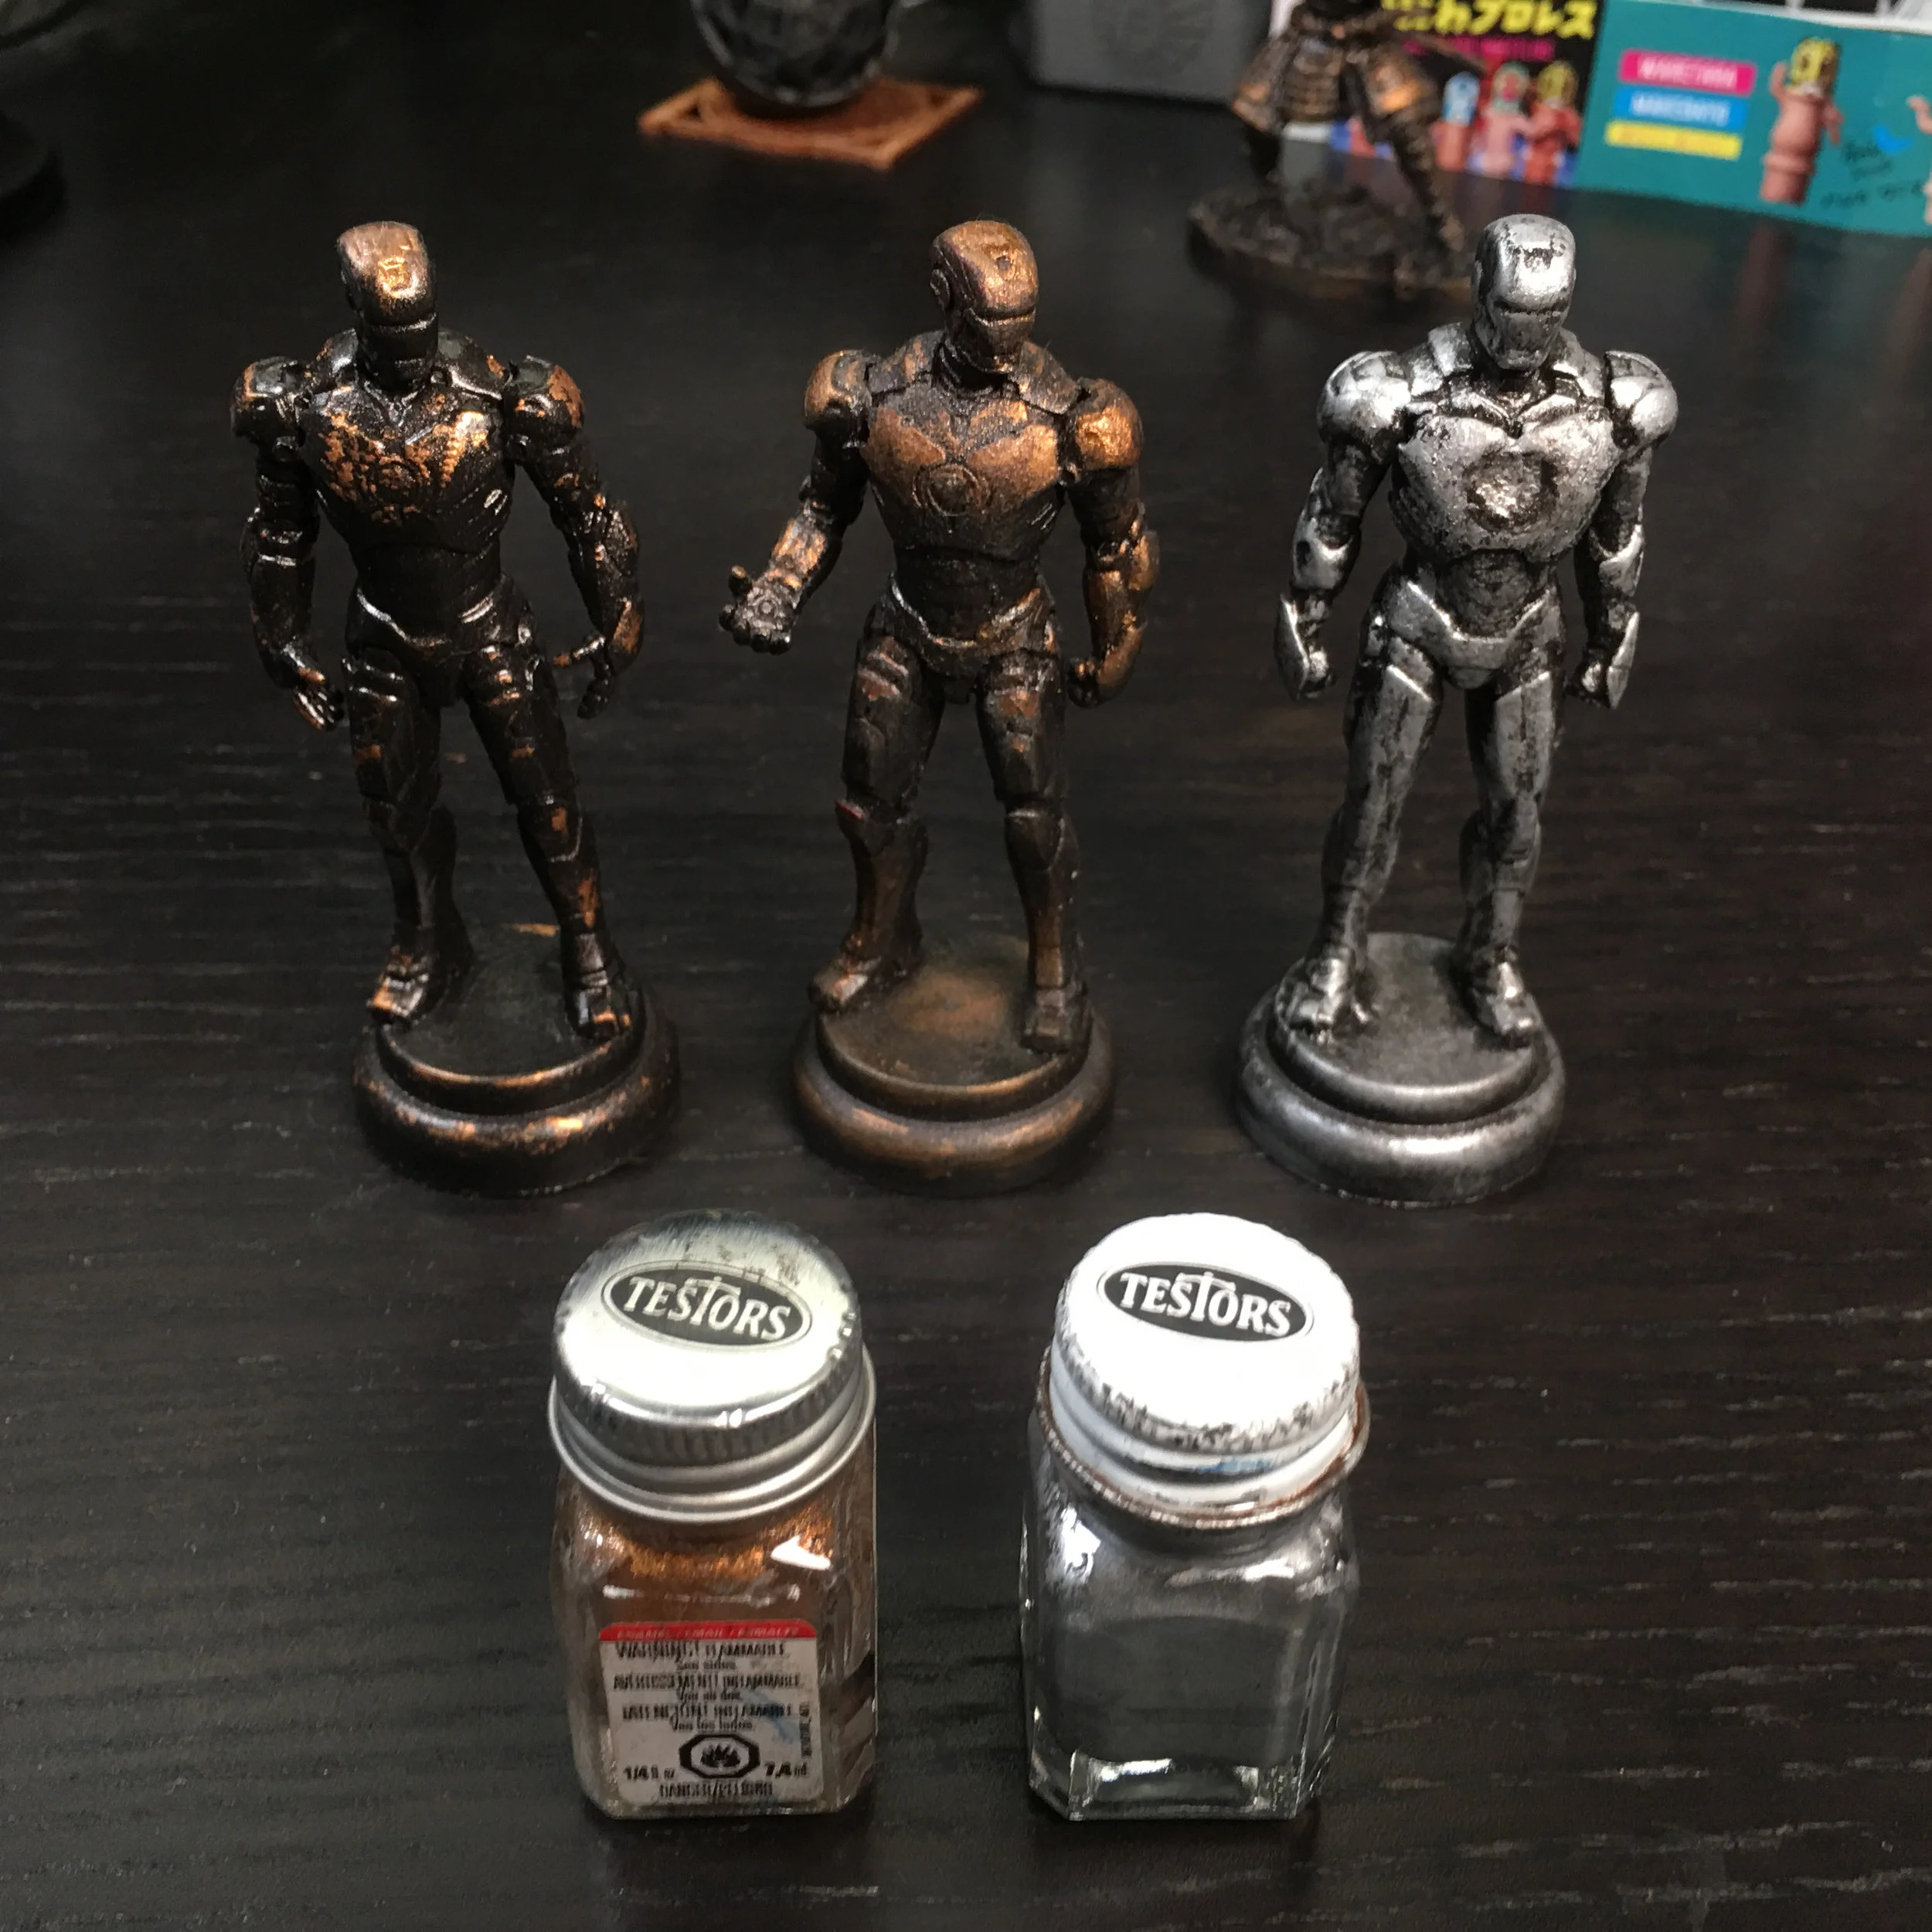
4) Oil Rubbed Bronze metallic paint coat is applied after the primer is allowed to fully dry:

5) After the base paint coat is allowed to fully dry (5-10 hours), a final layer of Testor’s arcylic enamel paint is applied to give a convincing weathering effect:

Take your Maker game to the next level with The Maker's Field Guide: Master Maker Edition!
More step-by-step pro builds like this one can be found in the all new Master Maker edition of The Maker's Field Guide — available now as both a book & ebook in the online store. Take your maker game to the next level and become a true design, model making, and fabrication master!
Maker Faire 2019 Report — San Mateo, California
Our visit to the landmark Maker Faire event, in the heart of Silicon Valley.
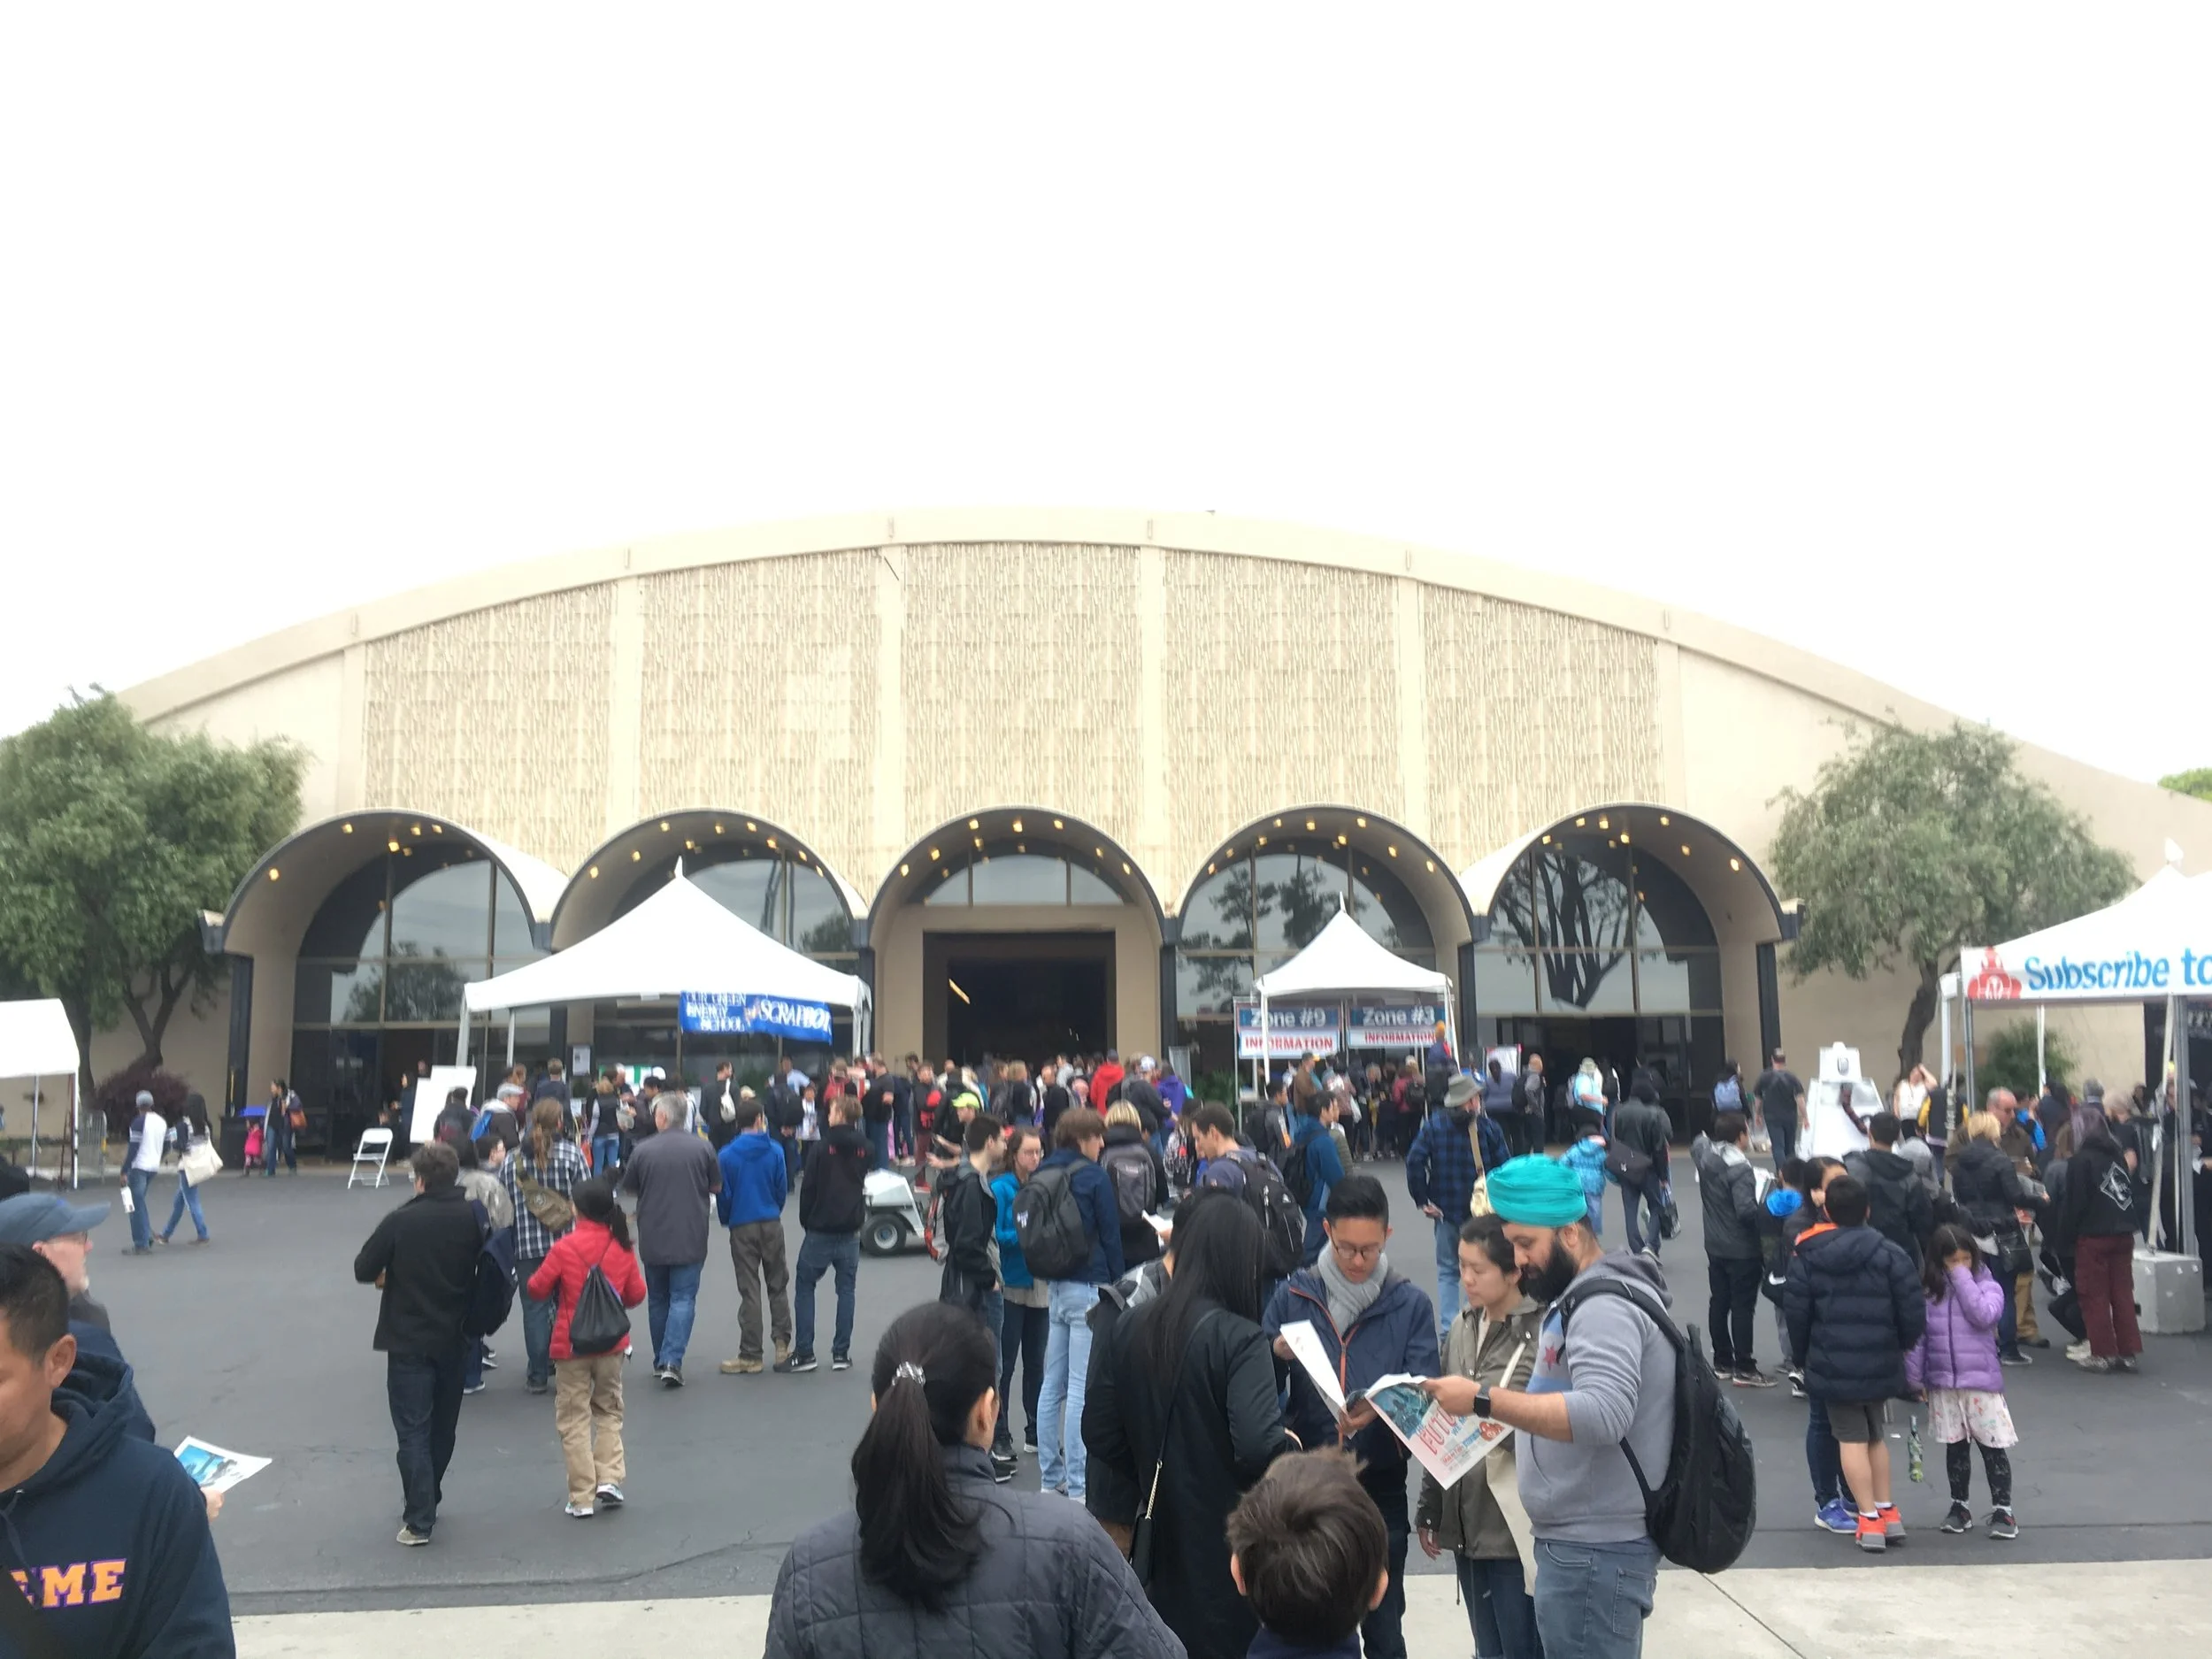
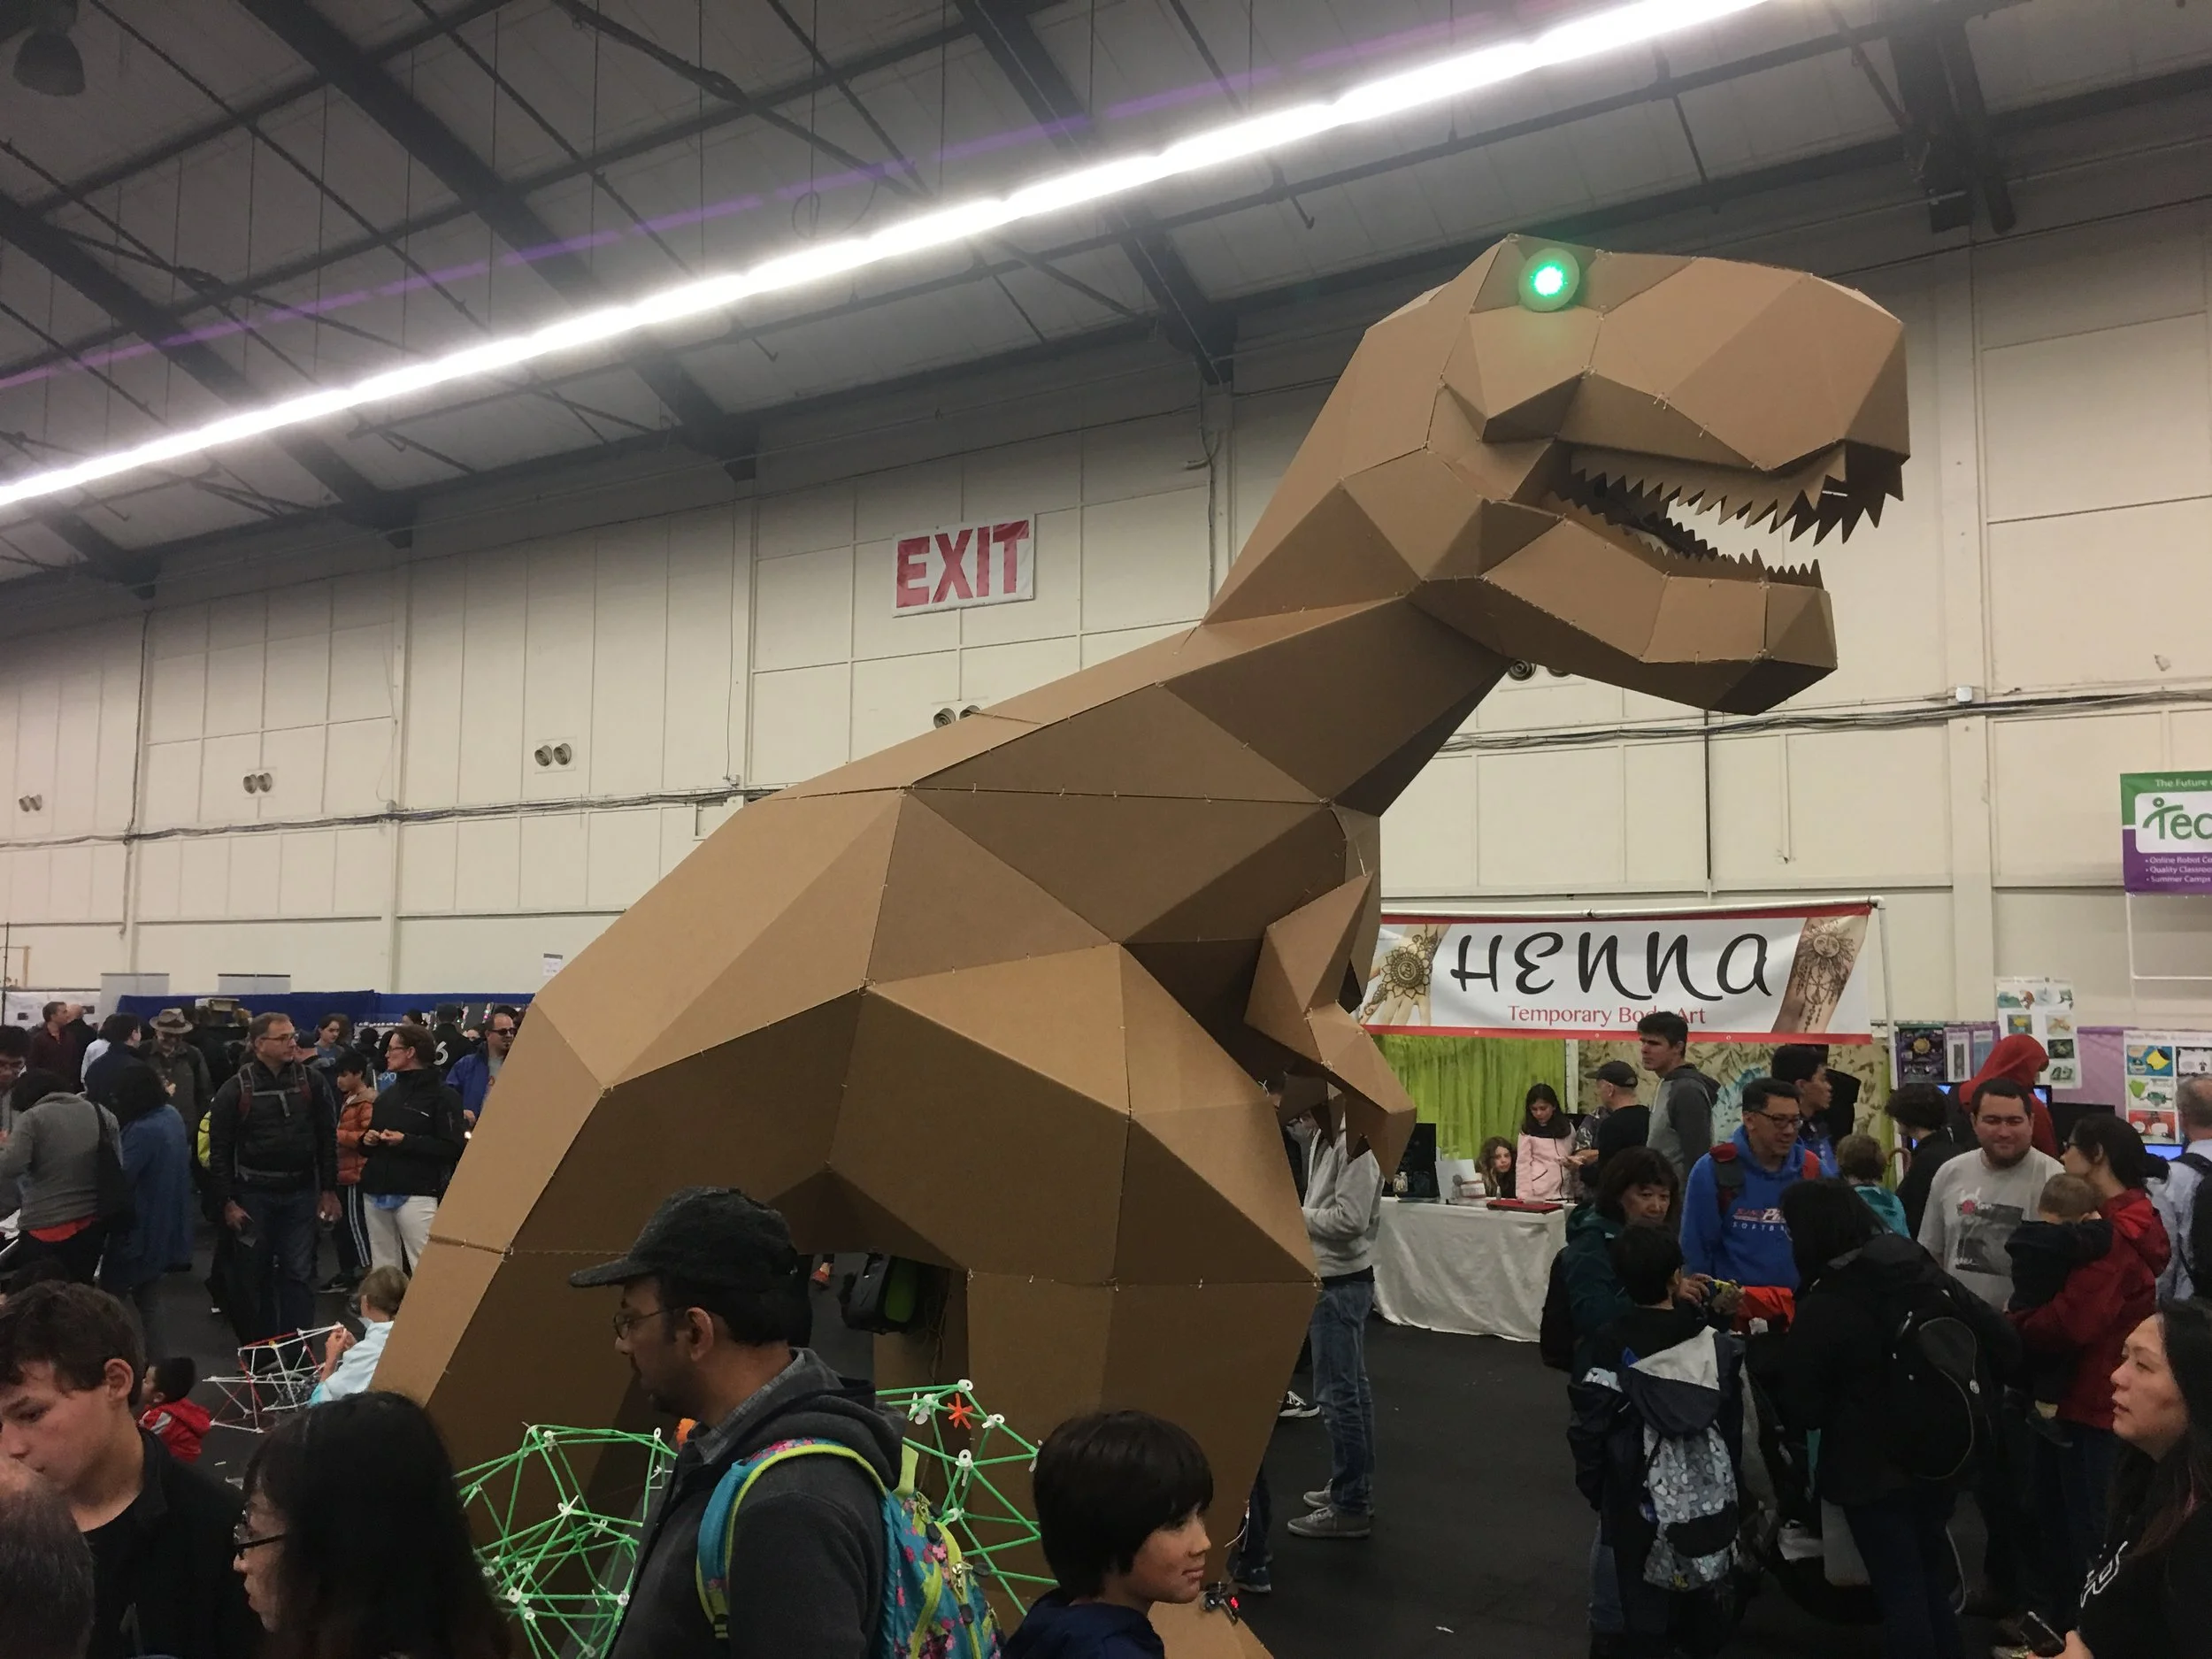
We recently visited the Maker Faire in the San Francisco Bay Area last weekend, for a meet and great and to introduce the book to this extremely passionate community. The show was an incredibly cross-collaborative fusion of design, engineering, technology, DIY, and arts & crafts — from 3d printing, to drone battles, Star Wars baseball, and everything in between. It was especially exciting to see so many young children there, having such close exposure to the revolution in manufacturing known as the Maker Movement, from such an early age (we’re quite jealous actually, that we didn’t have access to something like this at such a young age). Many of these kids will grow up to become the next great engineers, designers, and entrepreneurs of the future, and will be responsible for building new technologies which we can only dream of today.
If you haven’t been, we definitely recommend stopping by a Maker Faire in your area if you ever get the chance. The key takeaway from the show was a boundless optimism towards the future, and what’s possible through new ideas — which is a viewpoint we share entirely. Here are a few highlights from the event, enjoy!


This installation was completely hand made (from tape!) by the artist Danny Schieble, known as Tapigami:


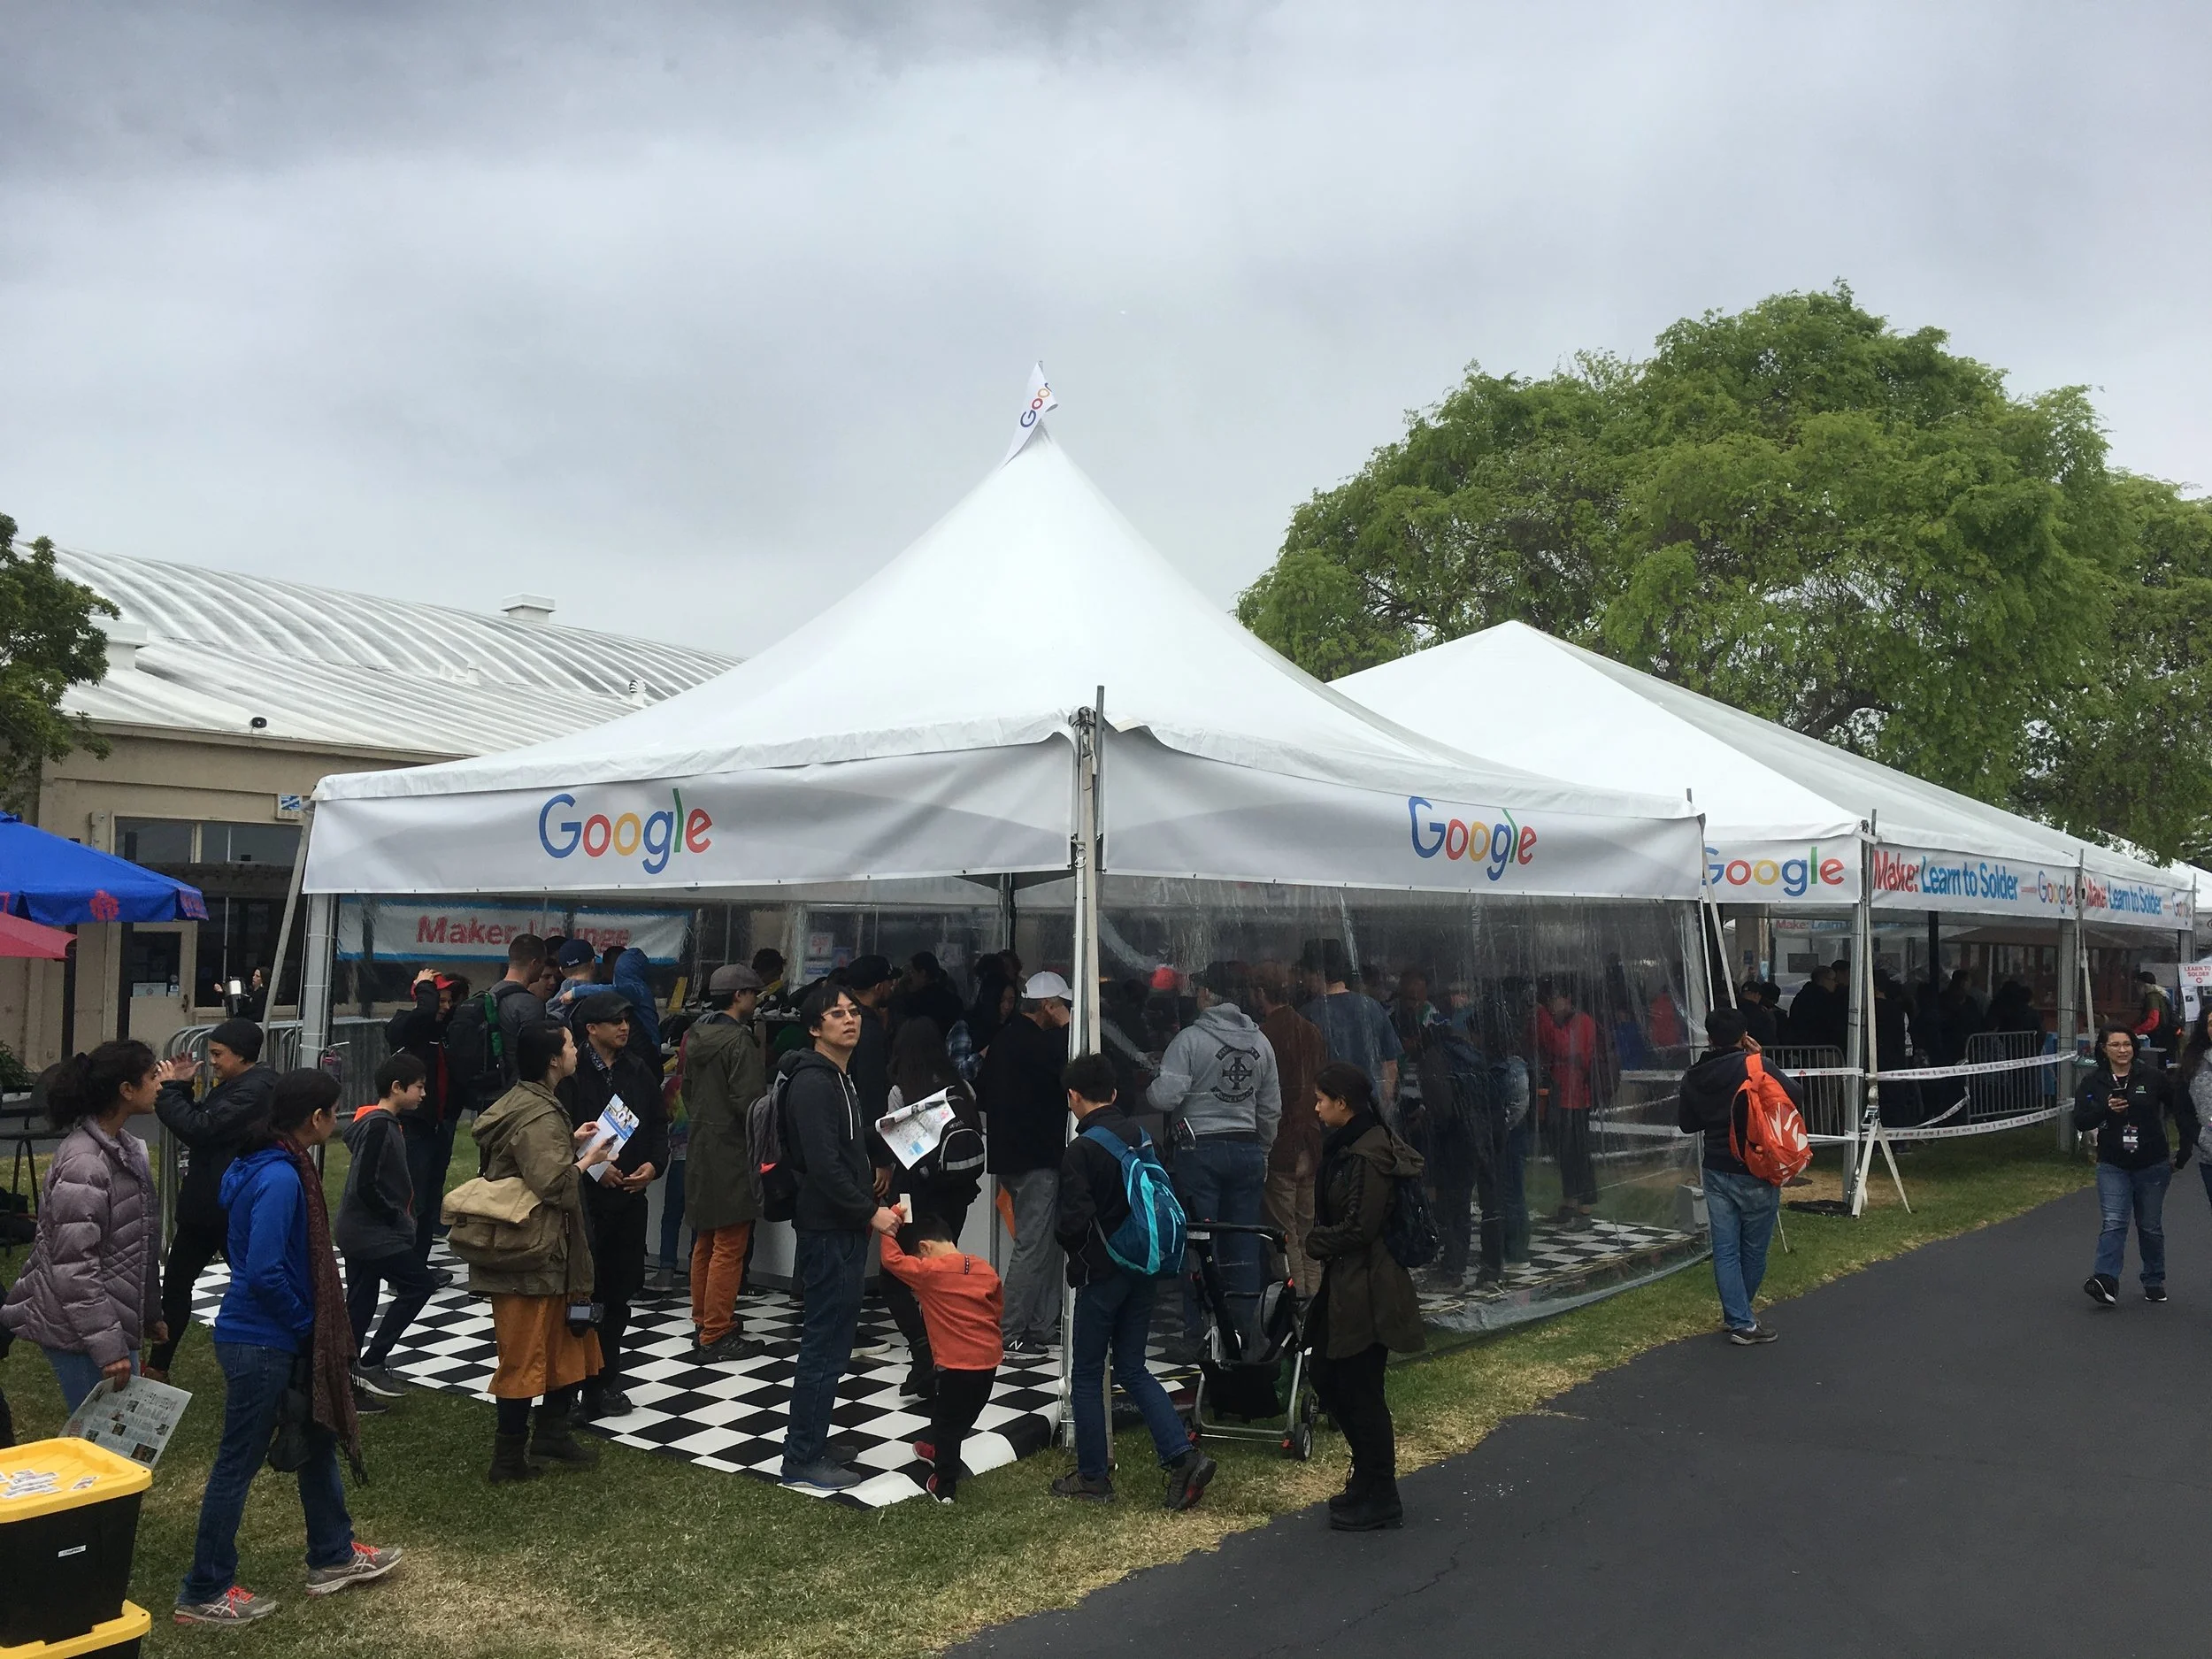
Technology corporate sponsors like Google appeared for a show and tell, and to host DIY workshops like learning to breadboard and solder:
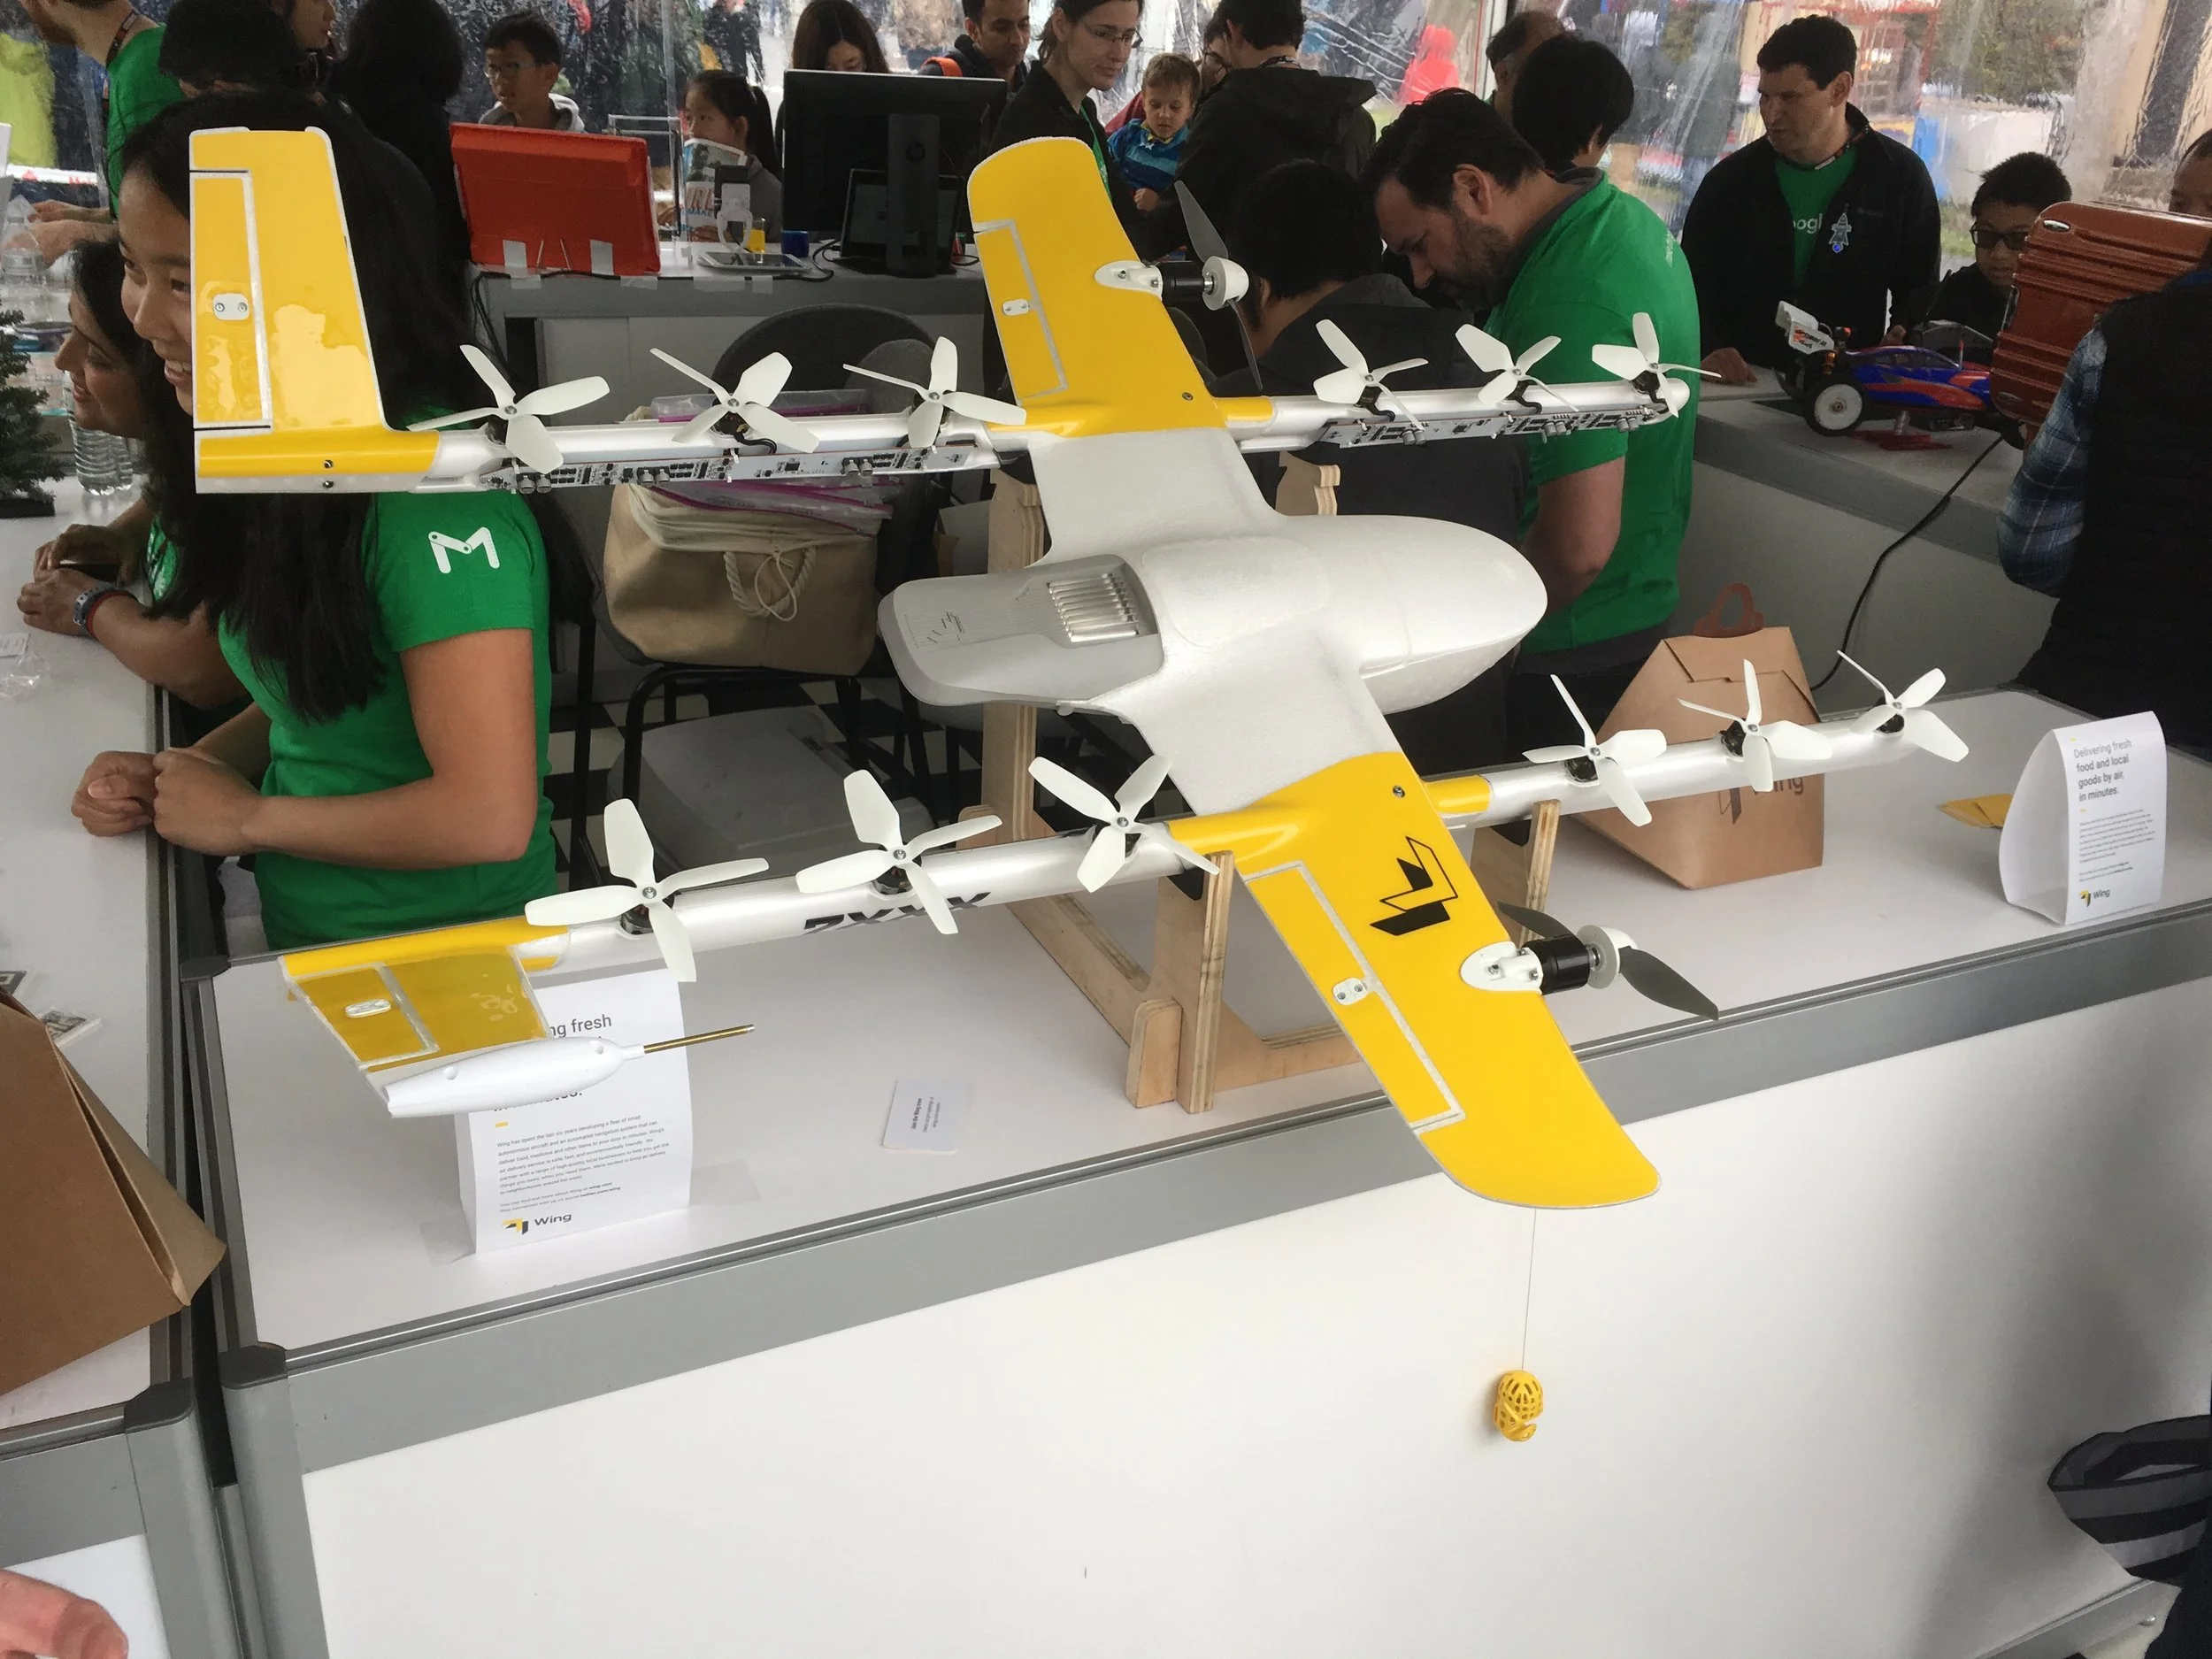
A Google project that’s currently under development — a package delivery drone:
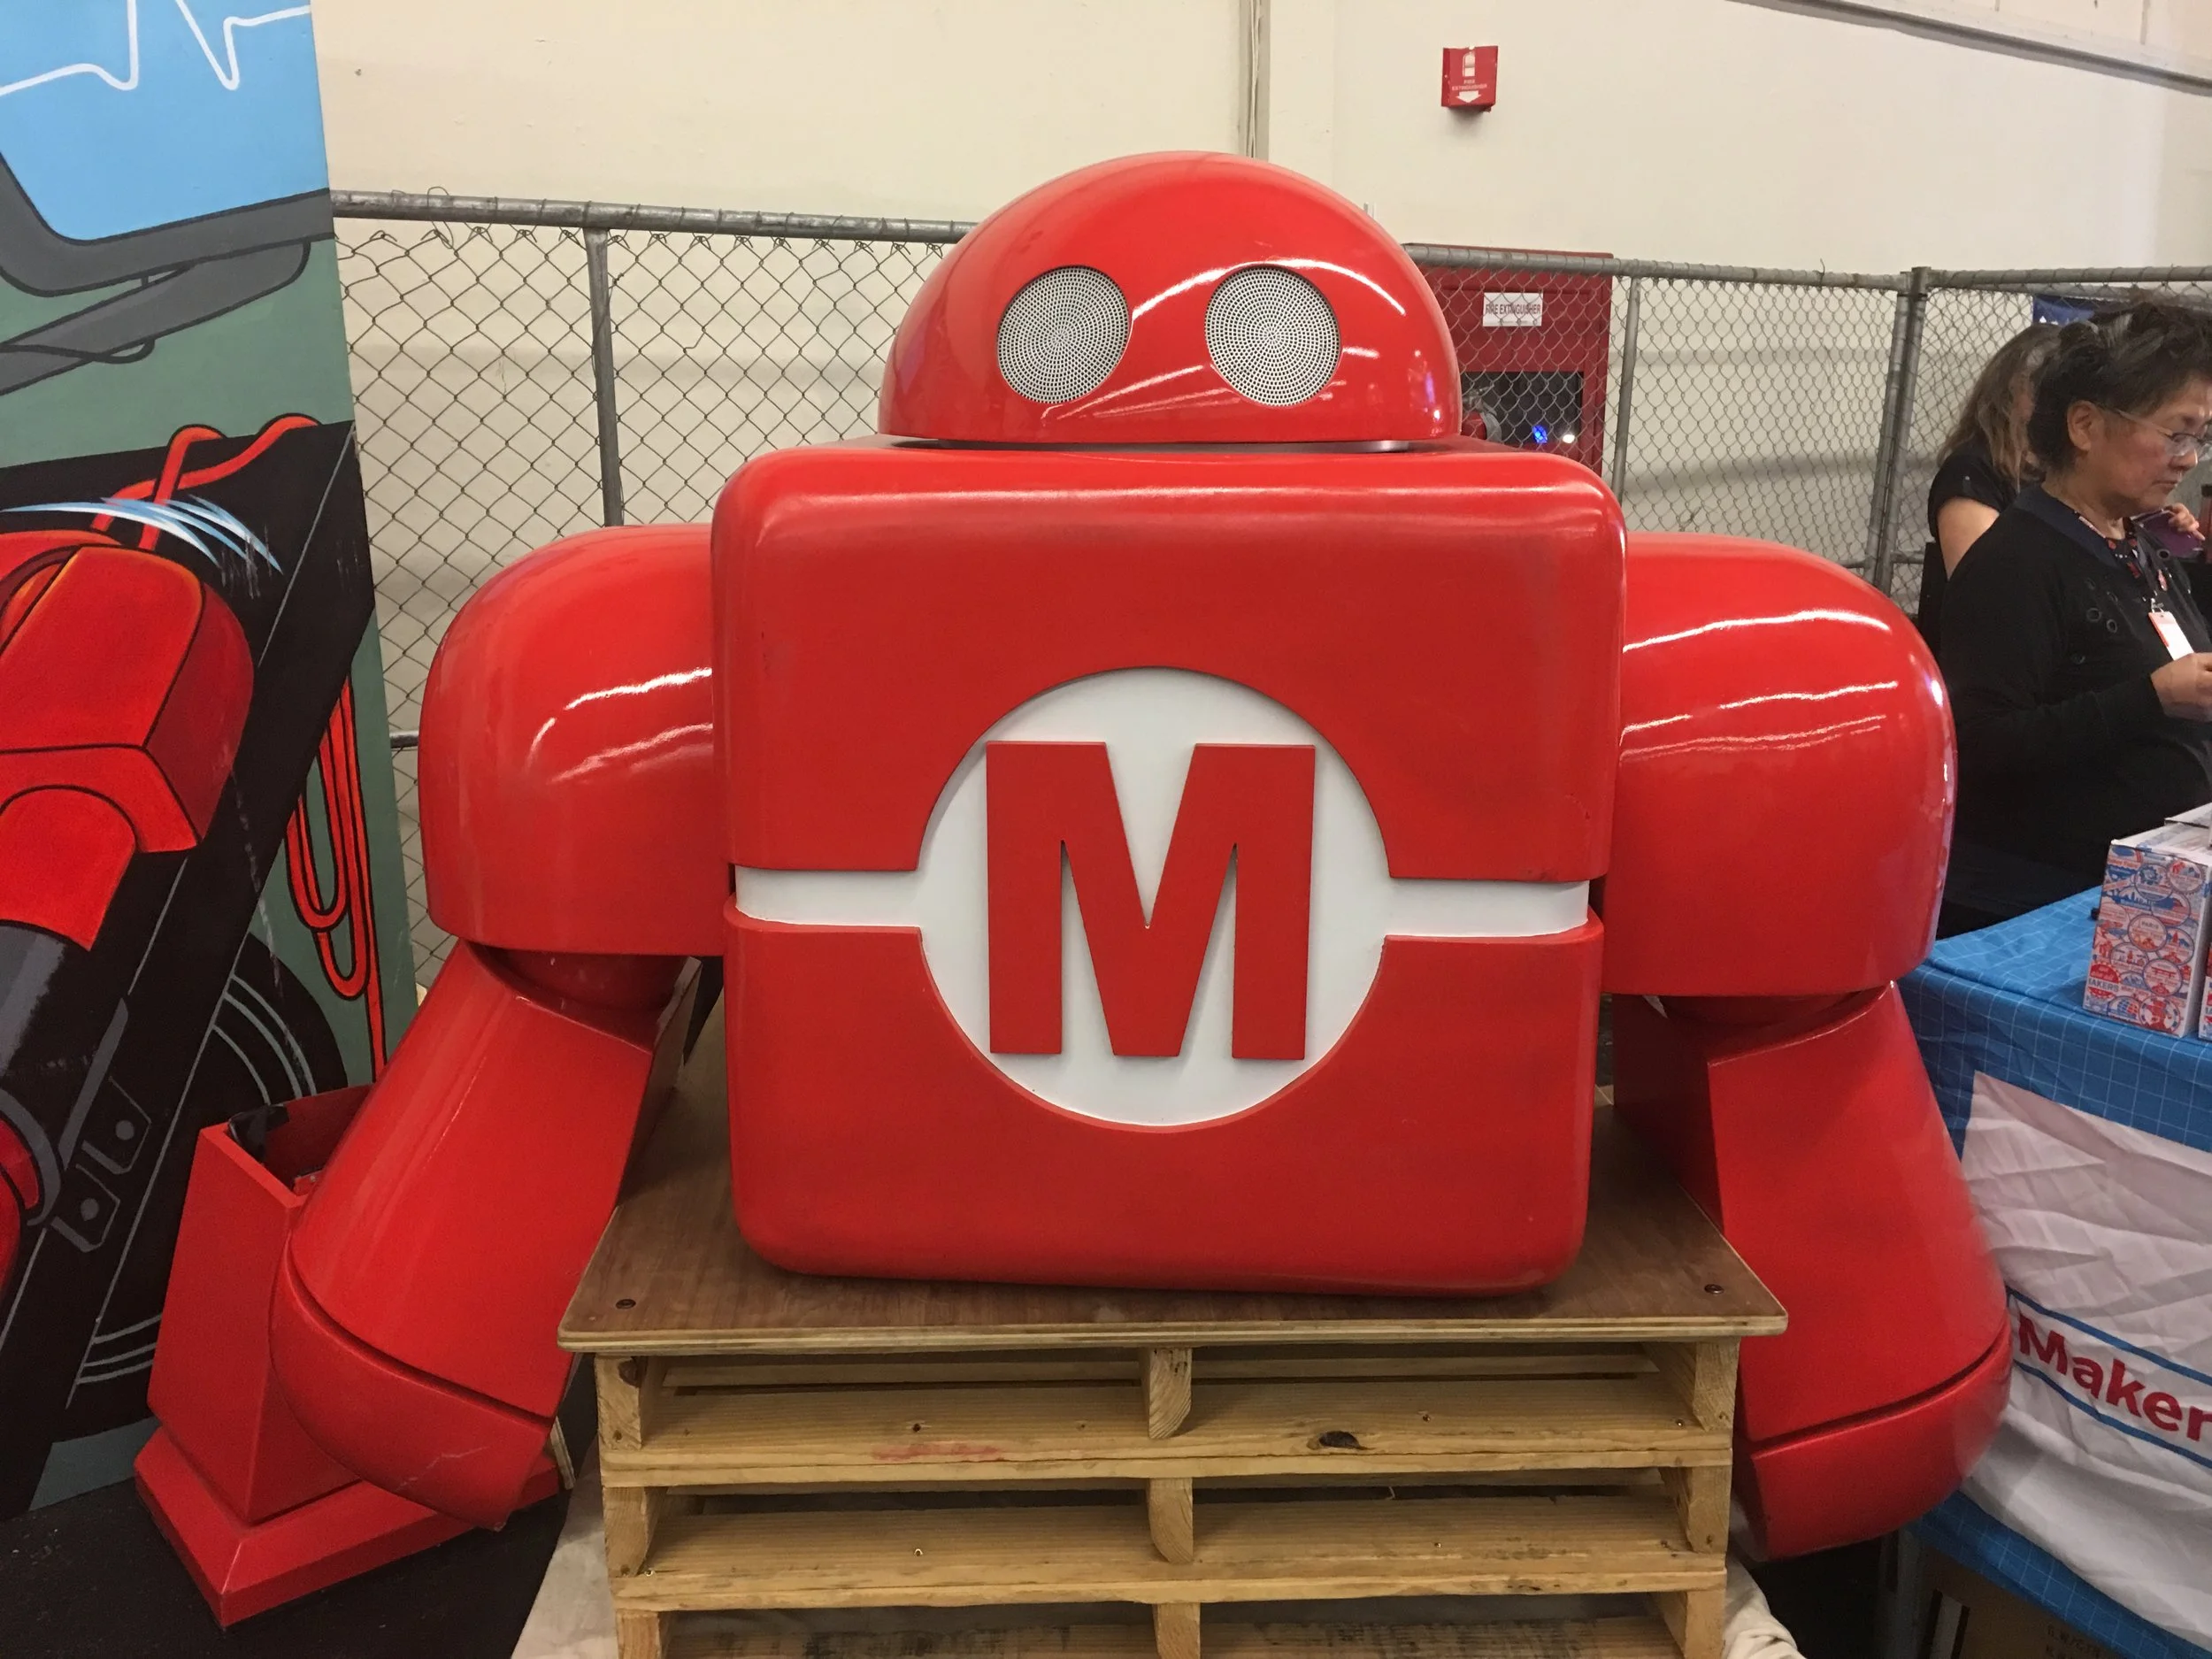
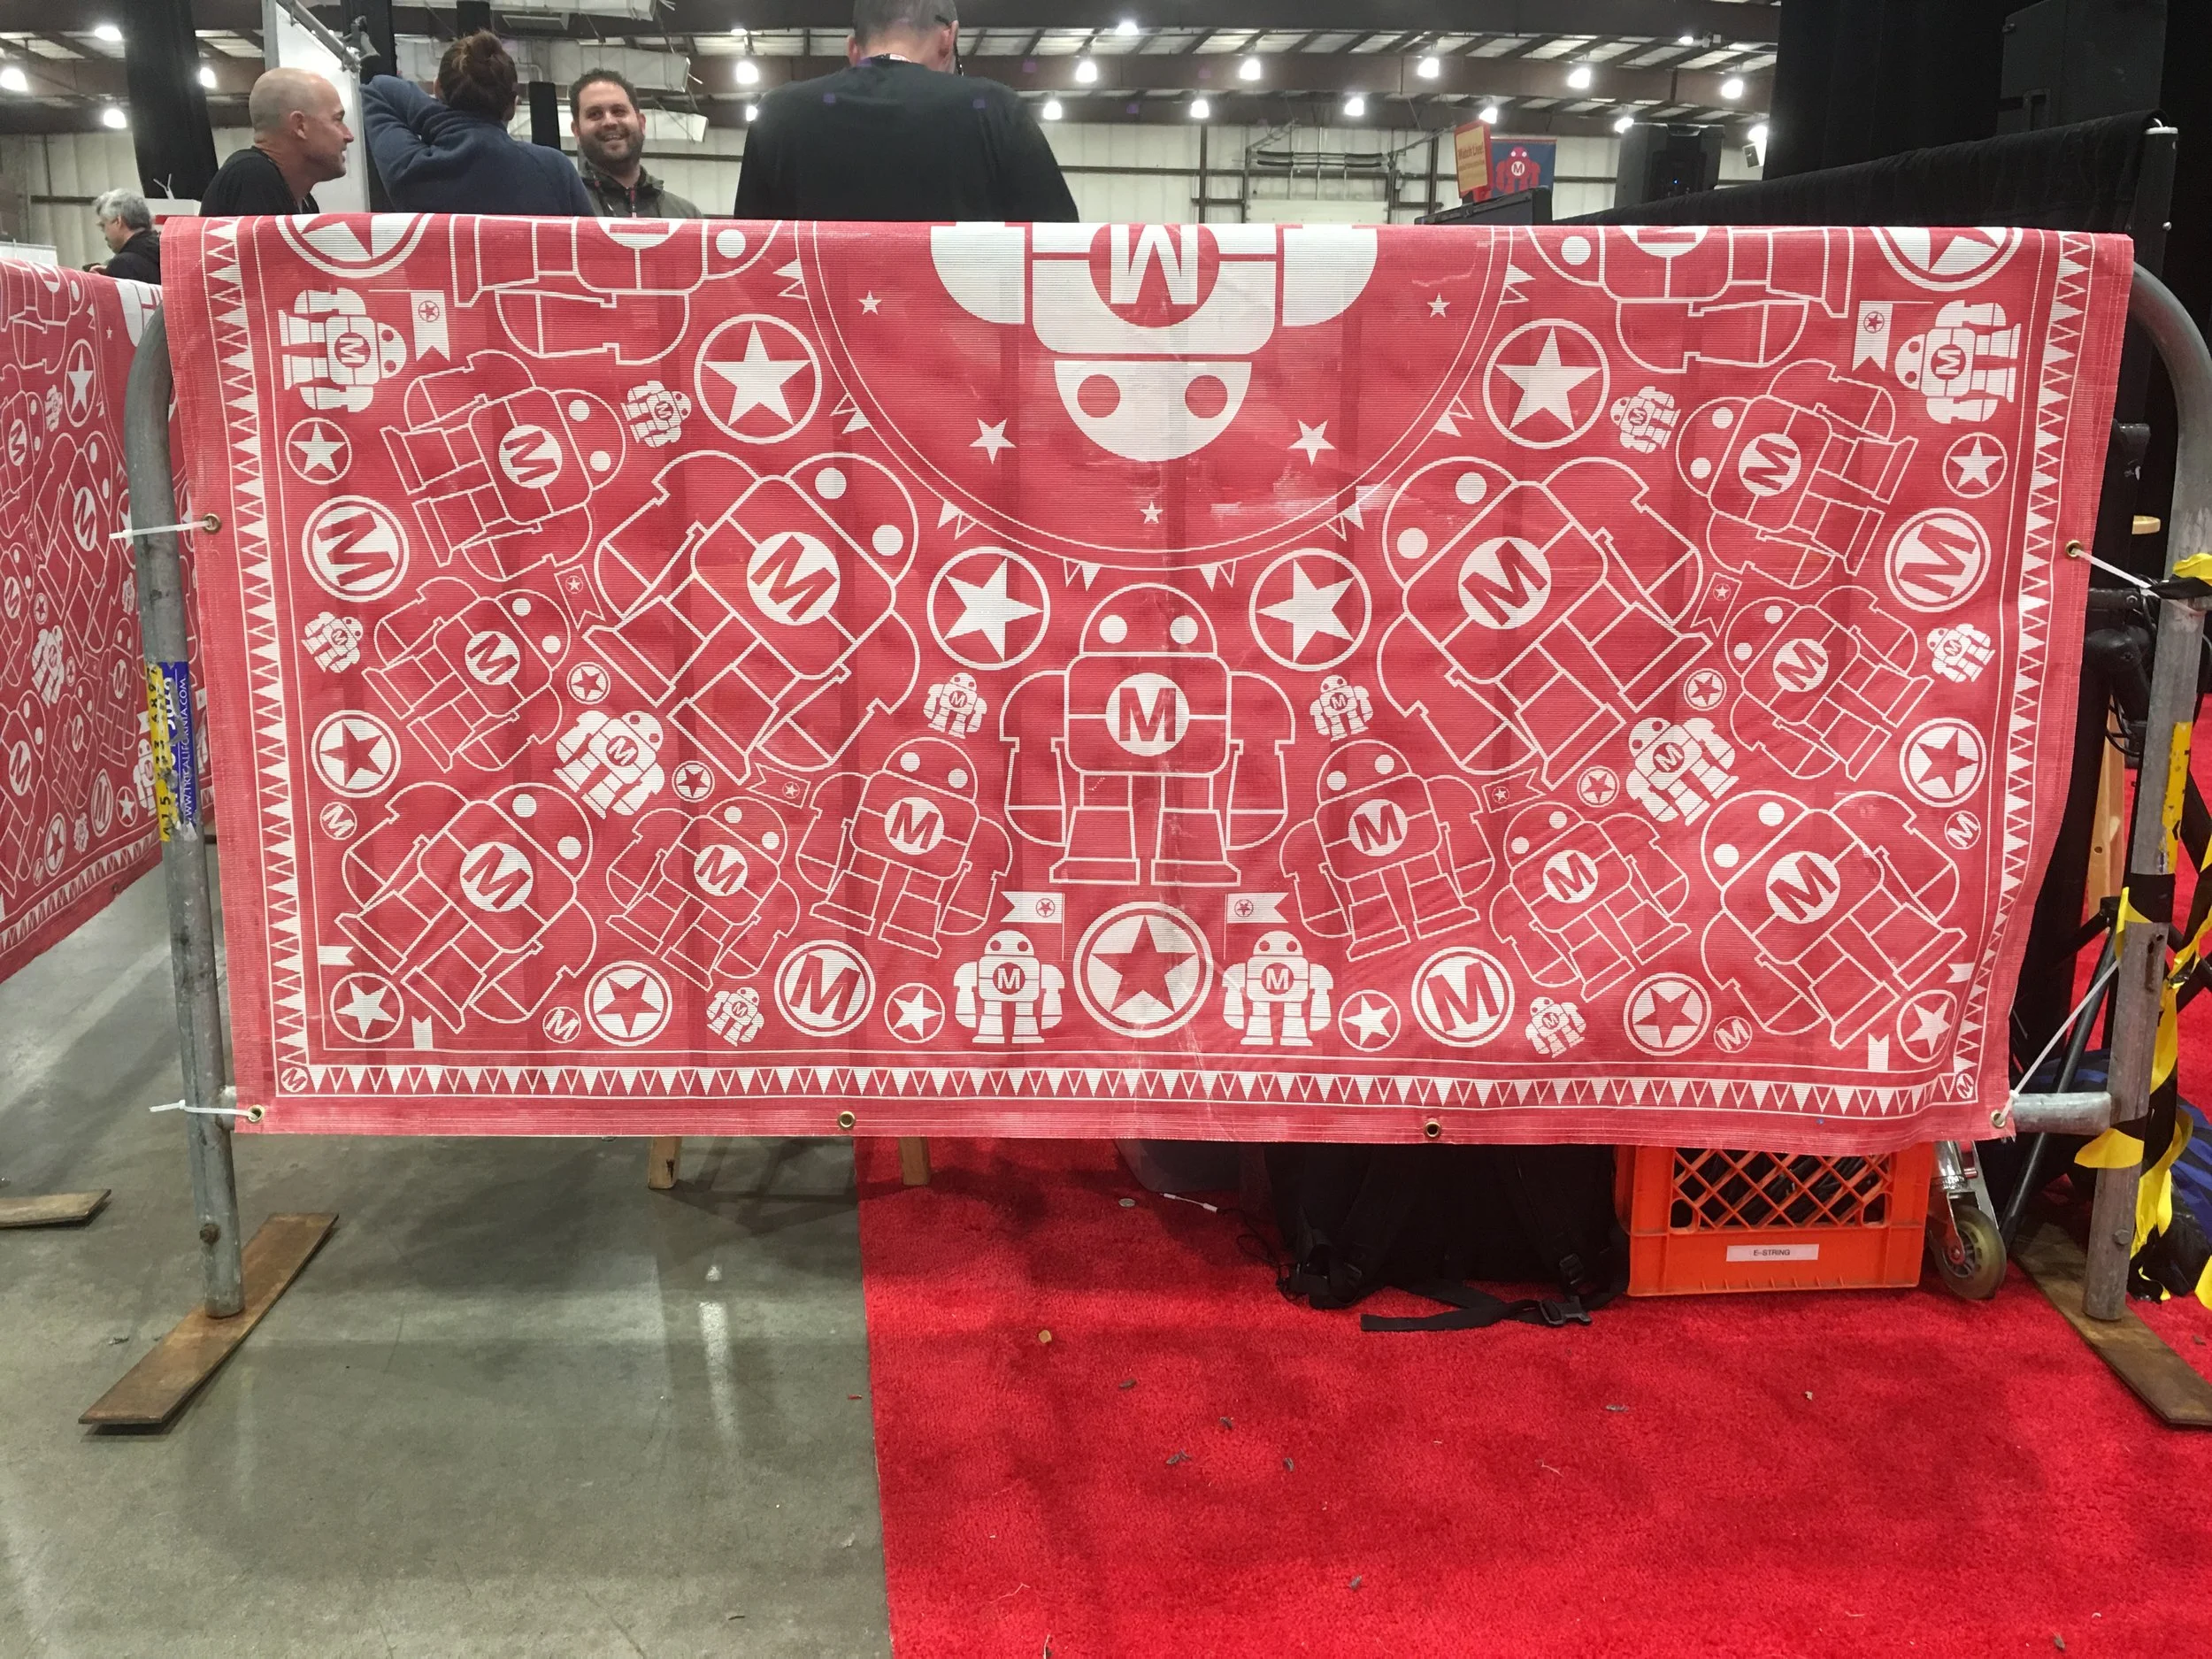
Makey, the official mascot robot of the Maker Faire was literally everywhere around the event:

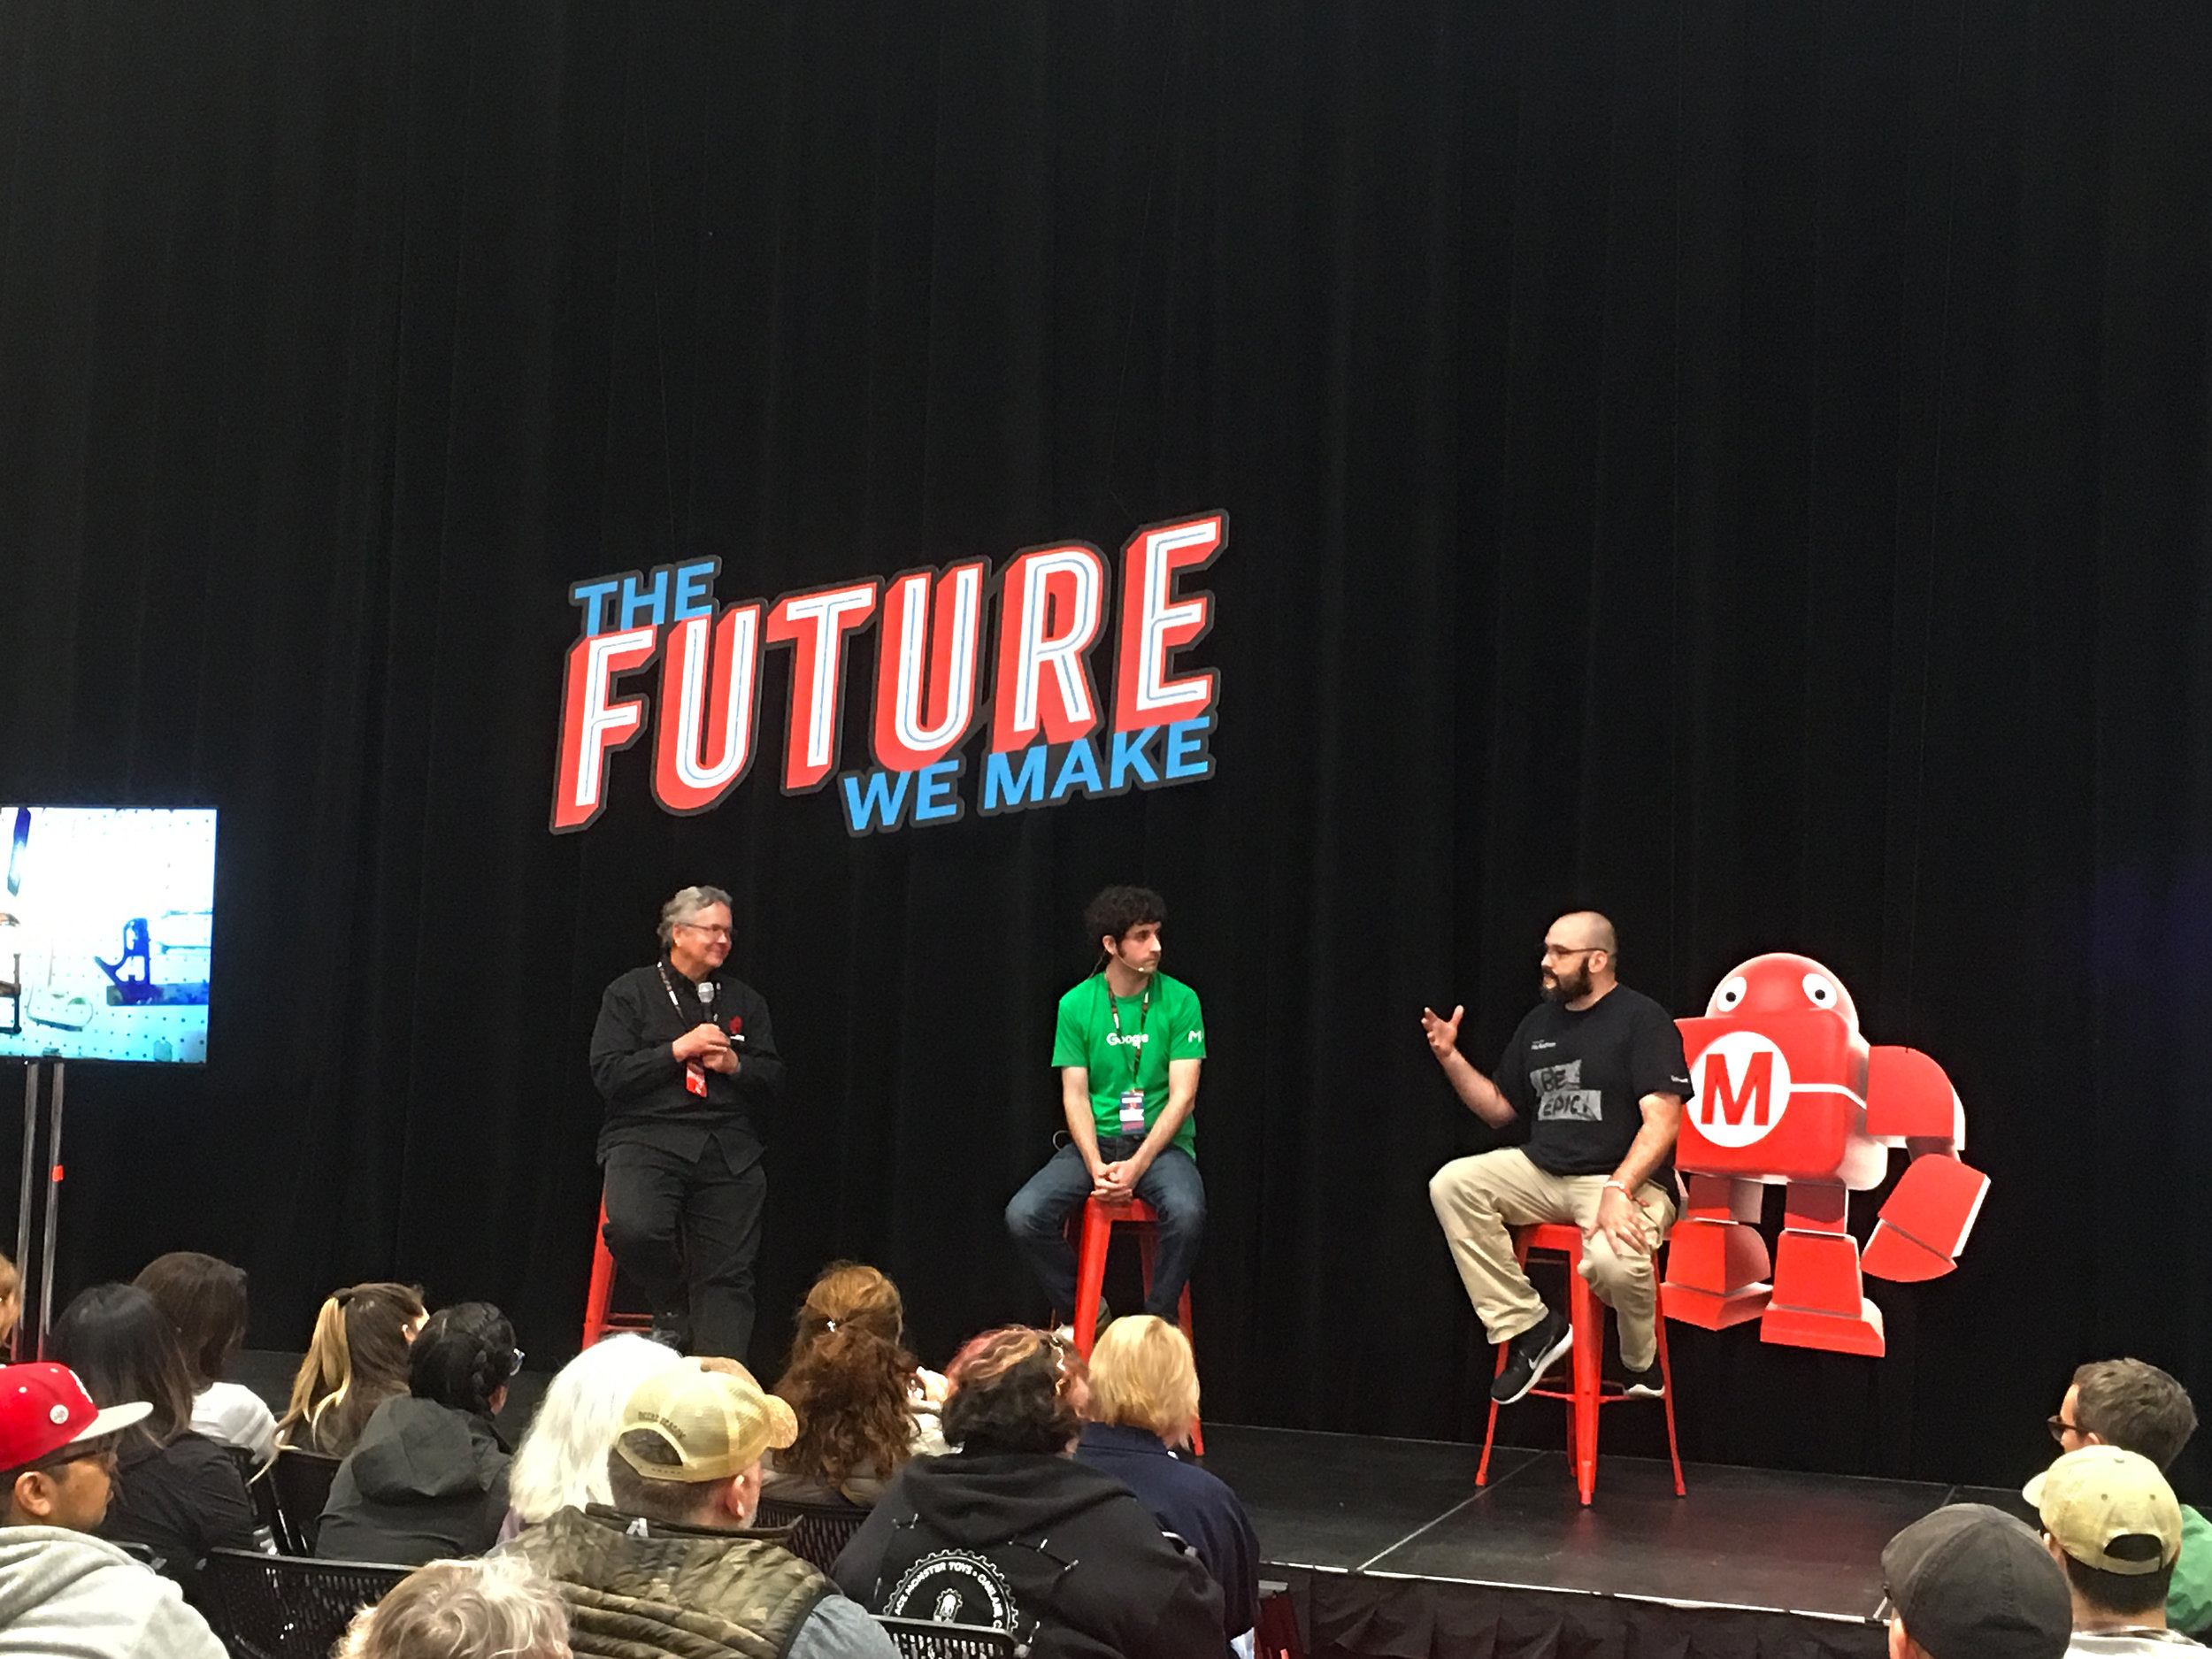
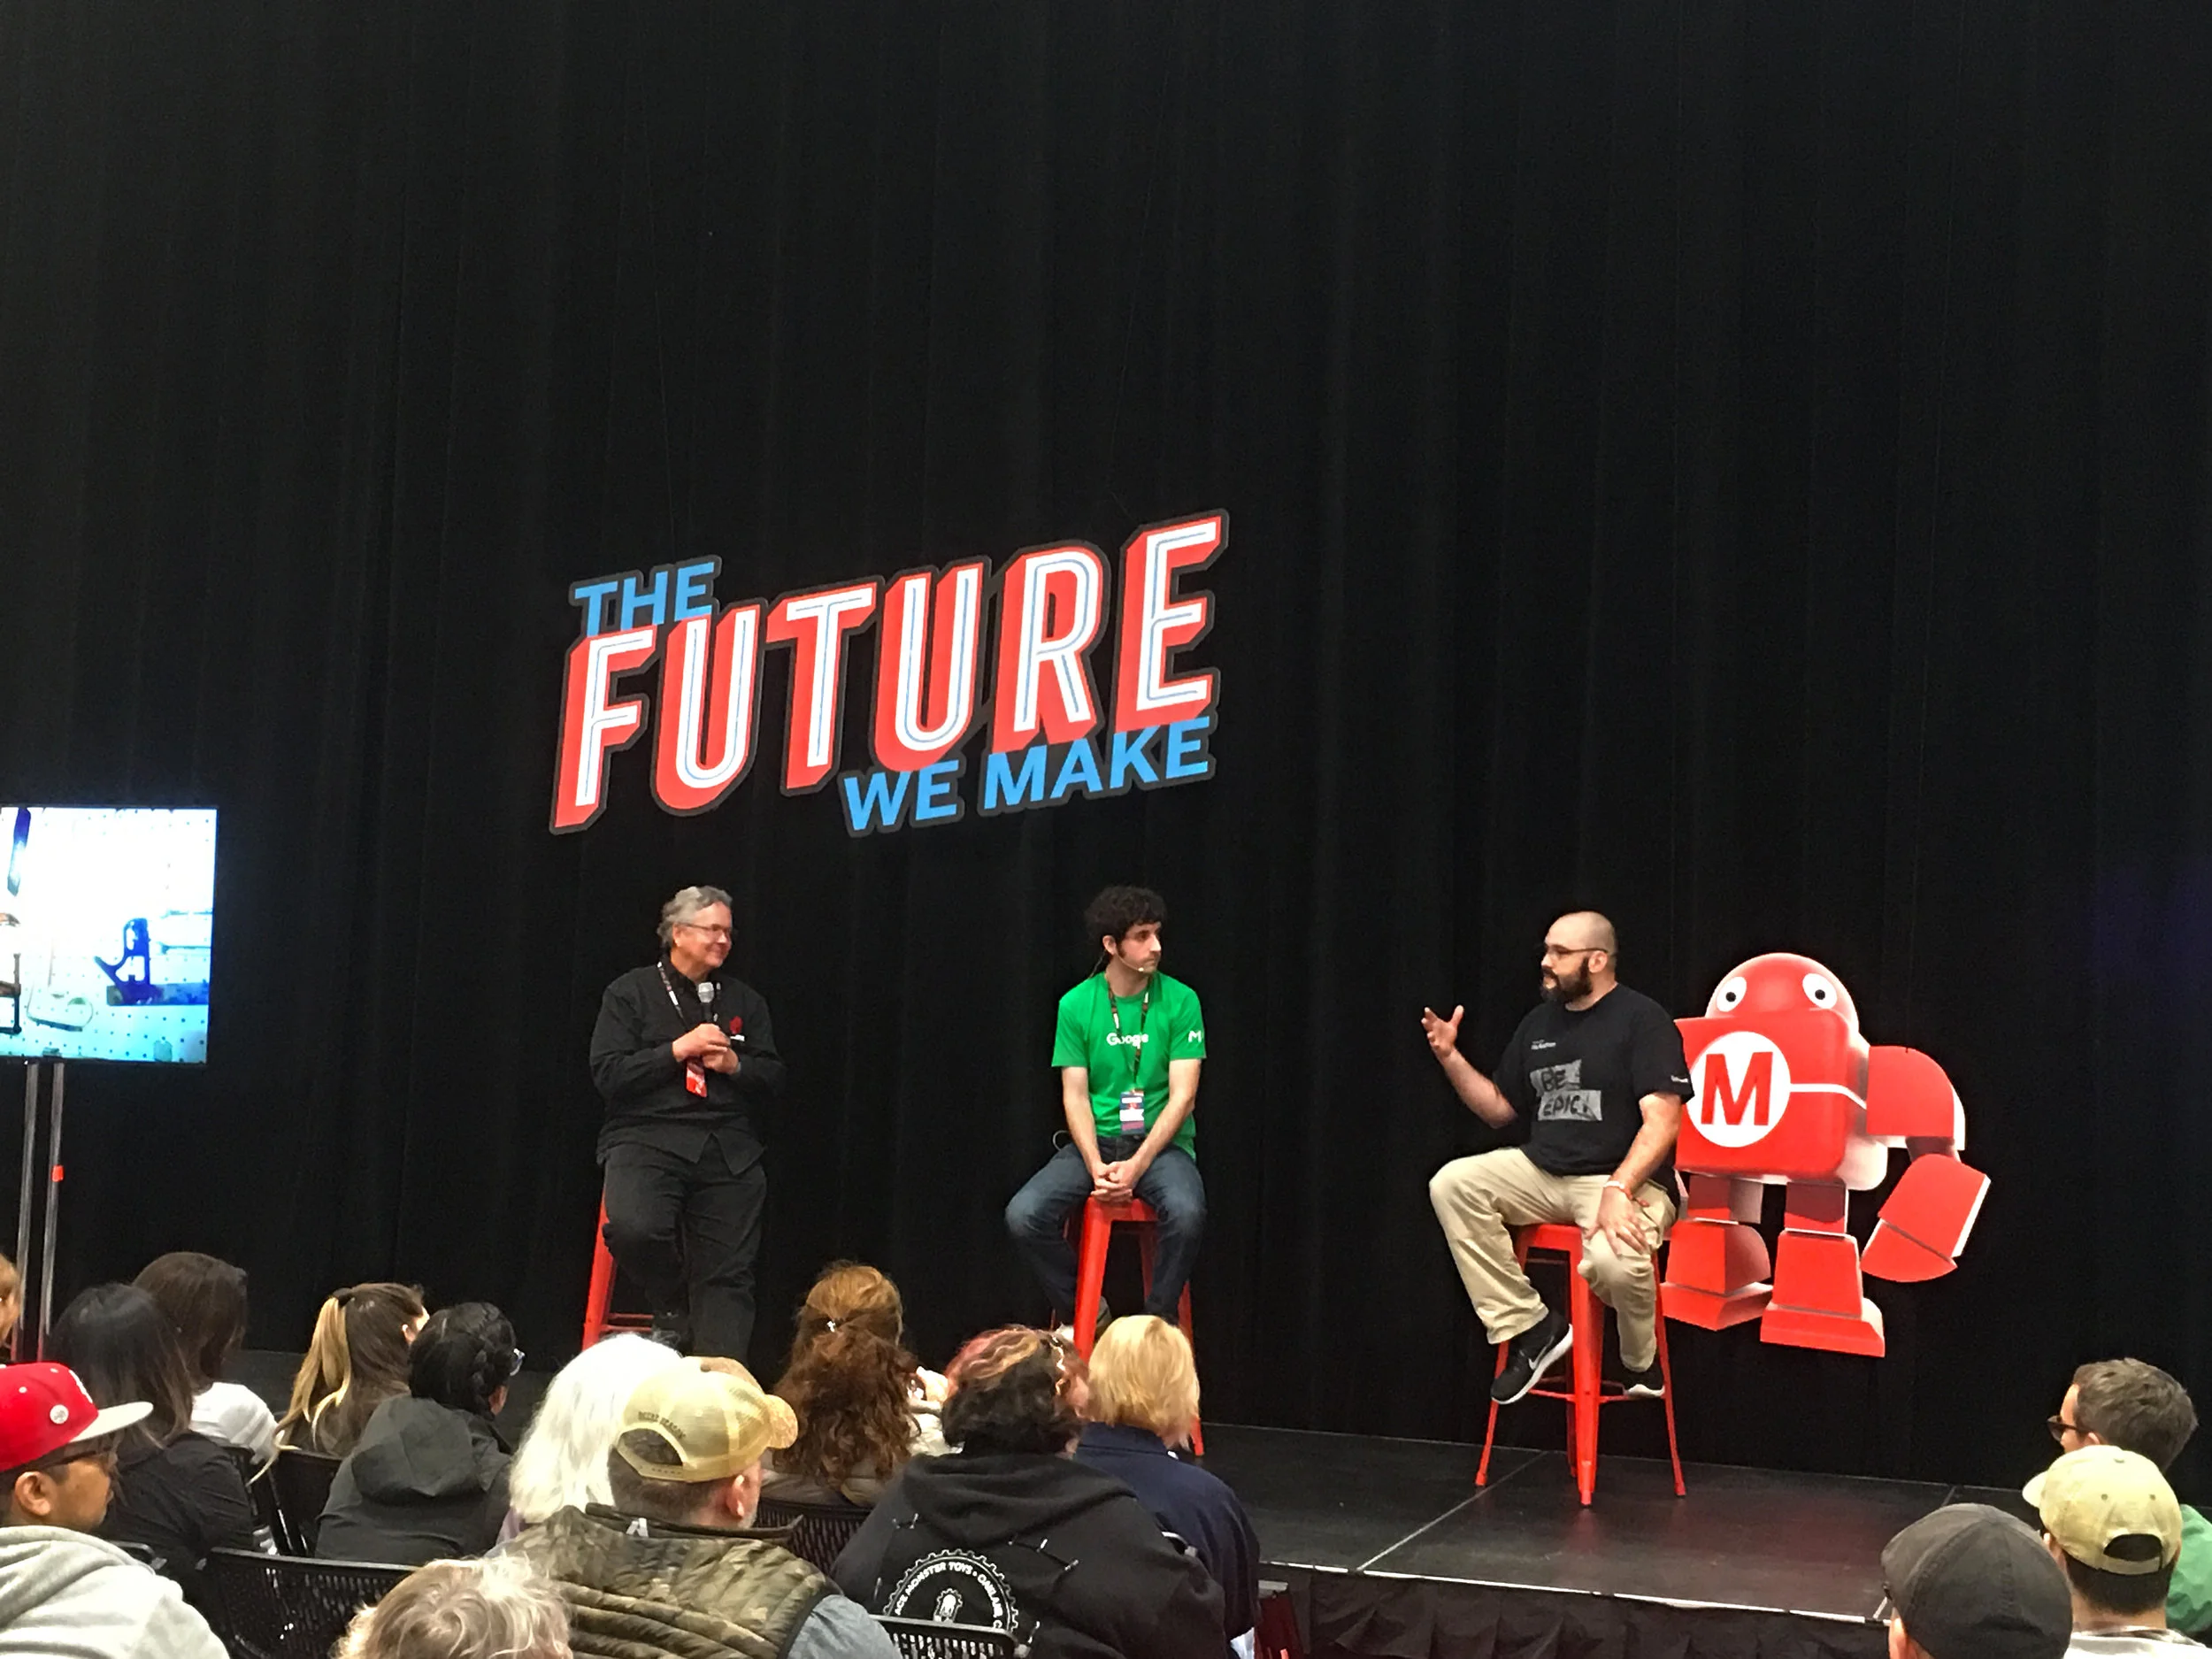
Many great speakers appeared at the show, from Startup entrepreneurs to DIY youtube influencers and everything in between. This talk were a few employees from Google. The man on the left is Dale Dougherty, the founder / CEO of Make: magazine and the creator of the first Maker Faire in 2007:
Star Wars baseball — this display used an automatic ball pitching machine, where the lightsaber would light up and make sound effects after the balls were hit:

HUGE molded plywood skateboard — those trucks are custom cast aluminum, and the large wheels are cast out of Smooth On urethane resin!


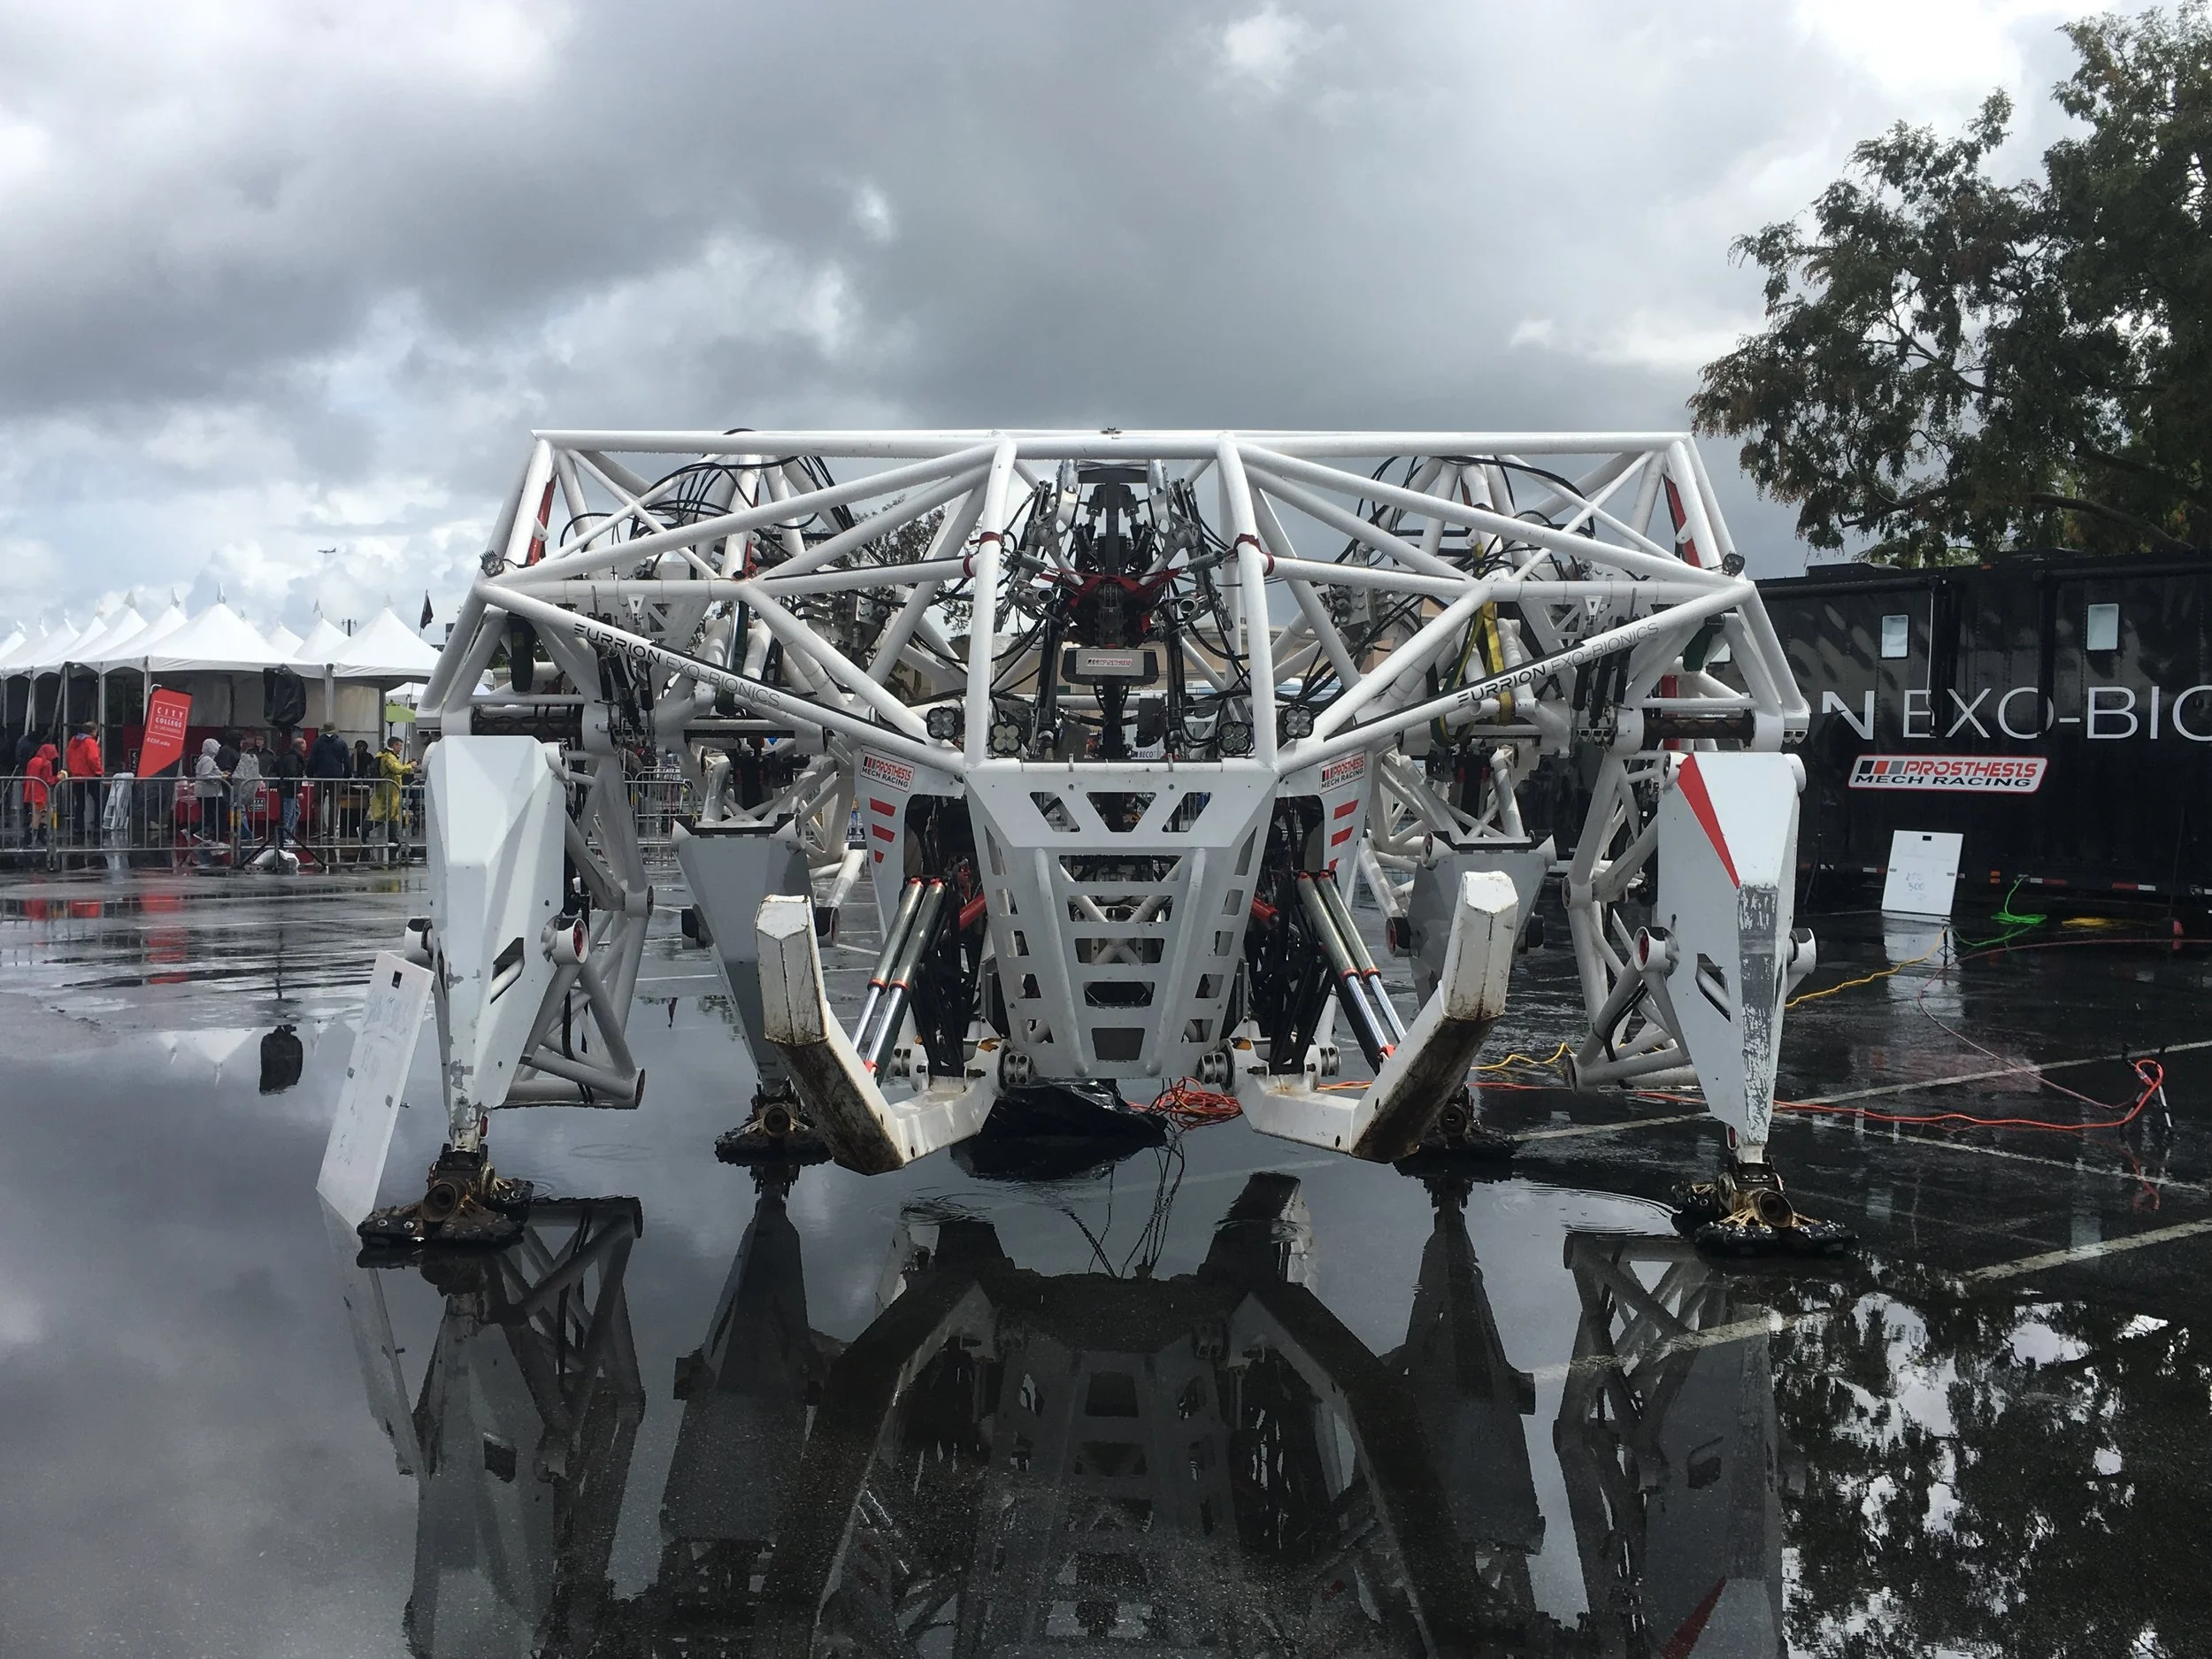
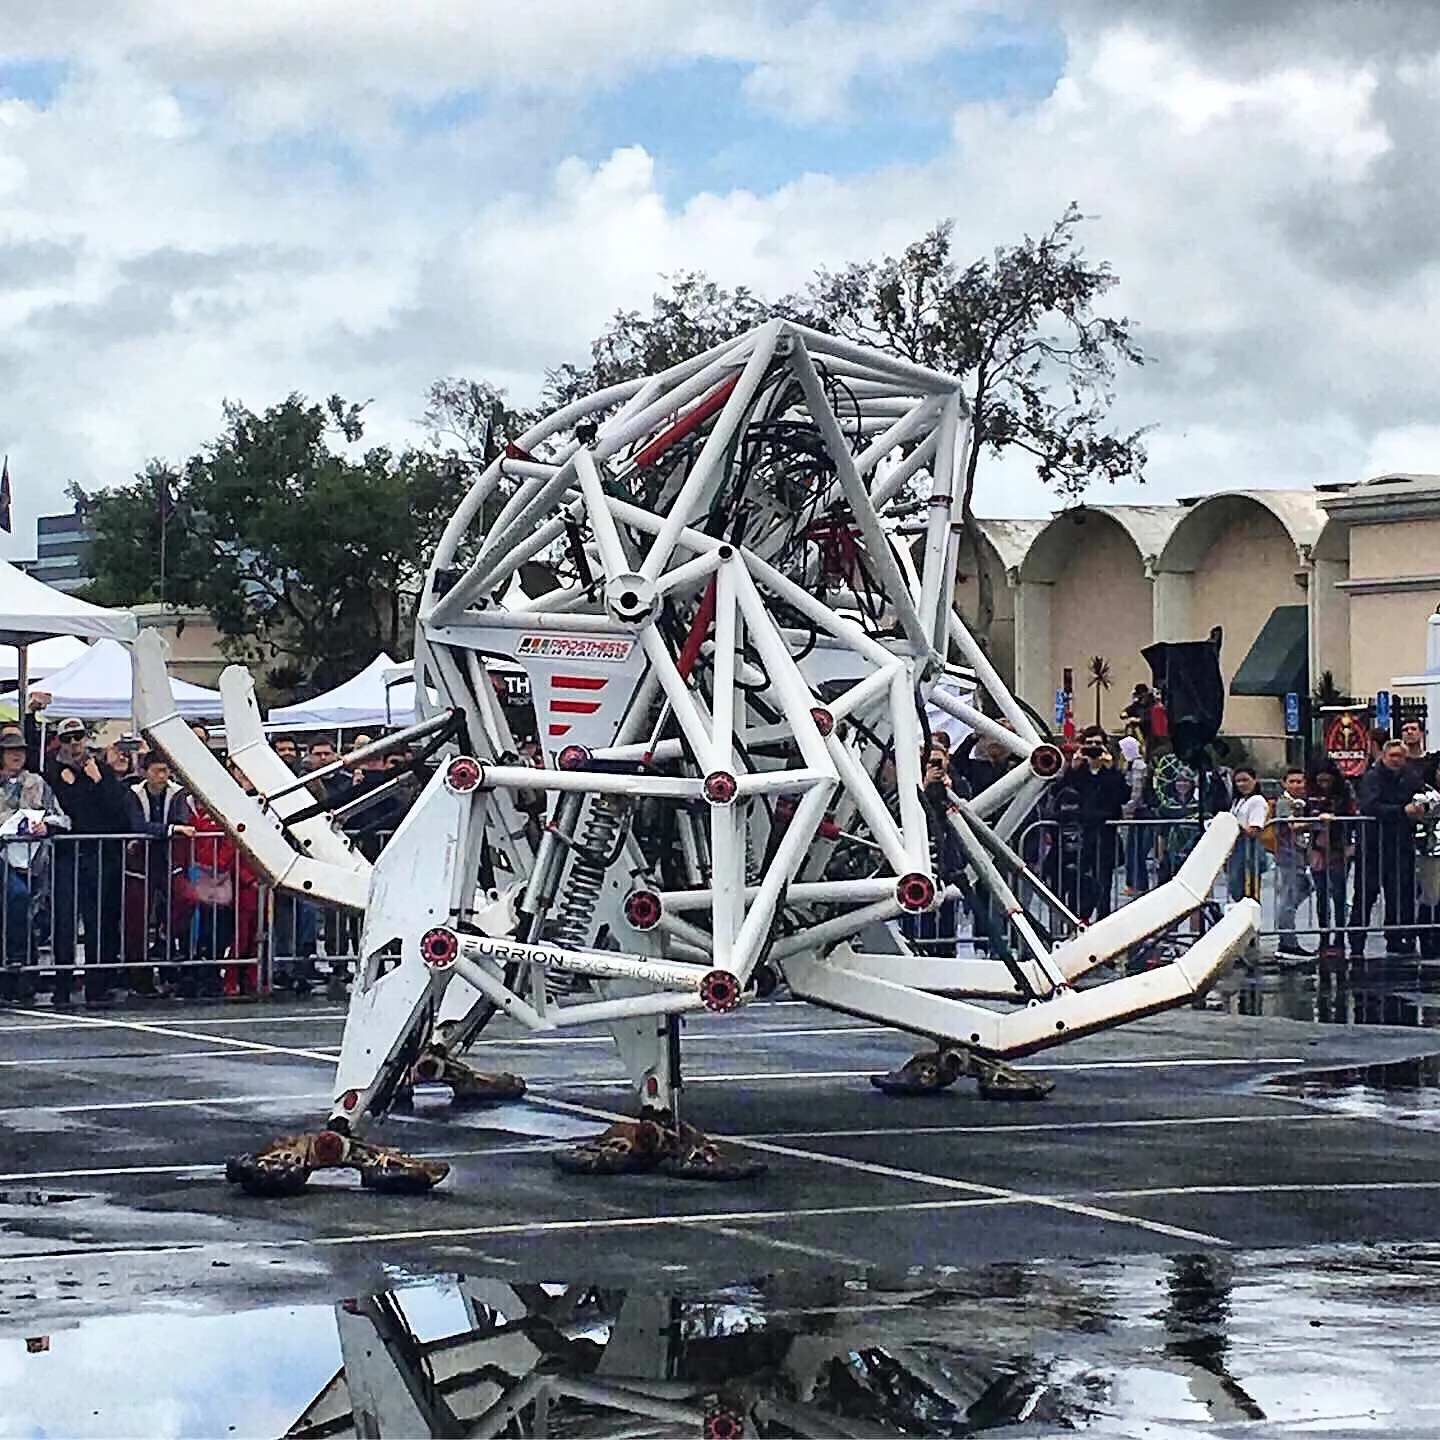
This impressive human-powered quadrupedal mech design by Furrion Exo Bionics stold the show in the outdoor courtyard:

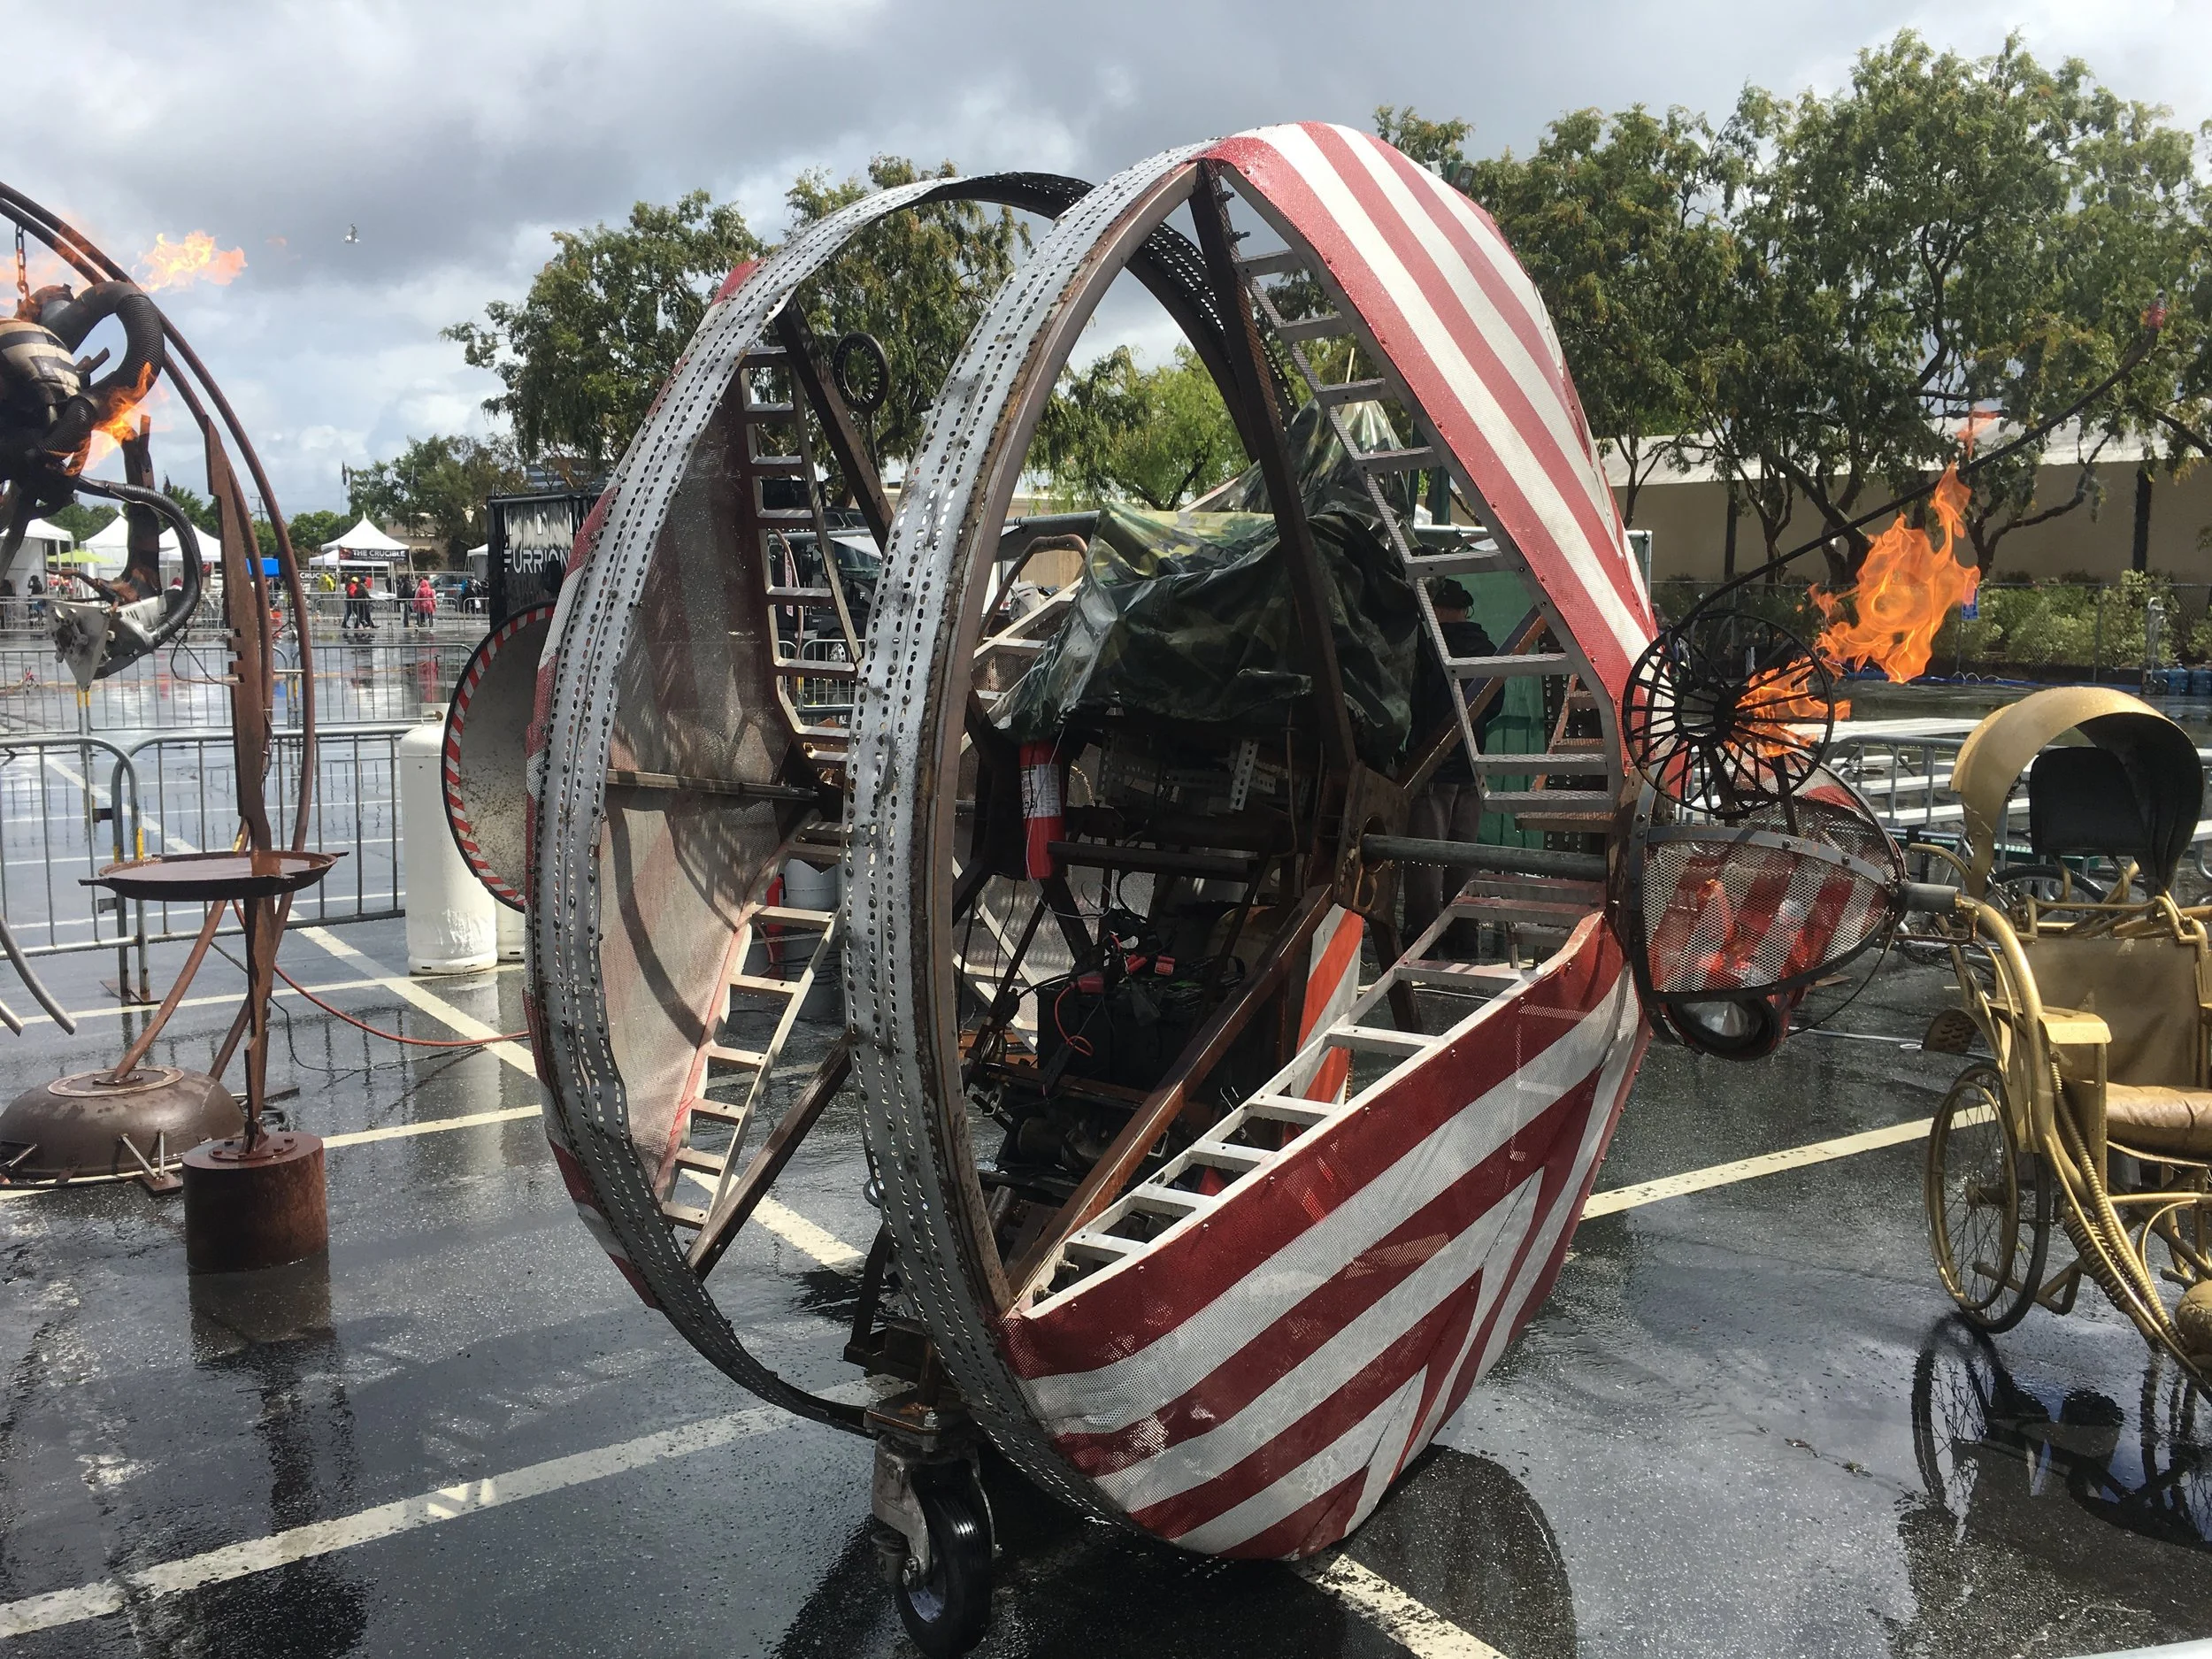
Crazy Monowheel design by a local burning man artist, spotted at the outdoor courtyard:
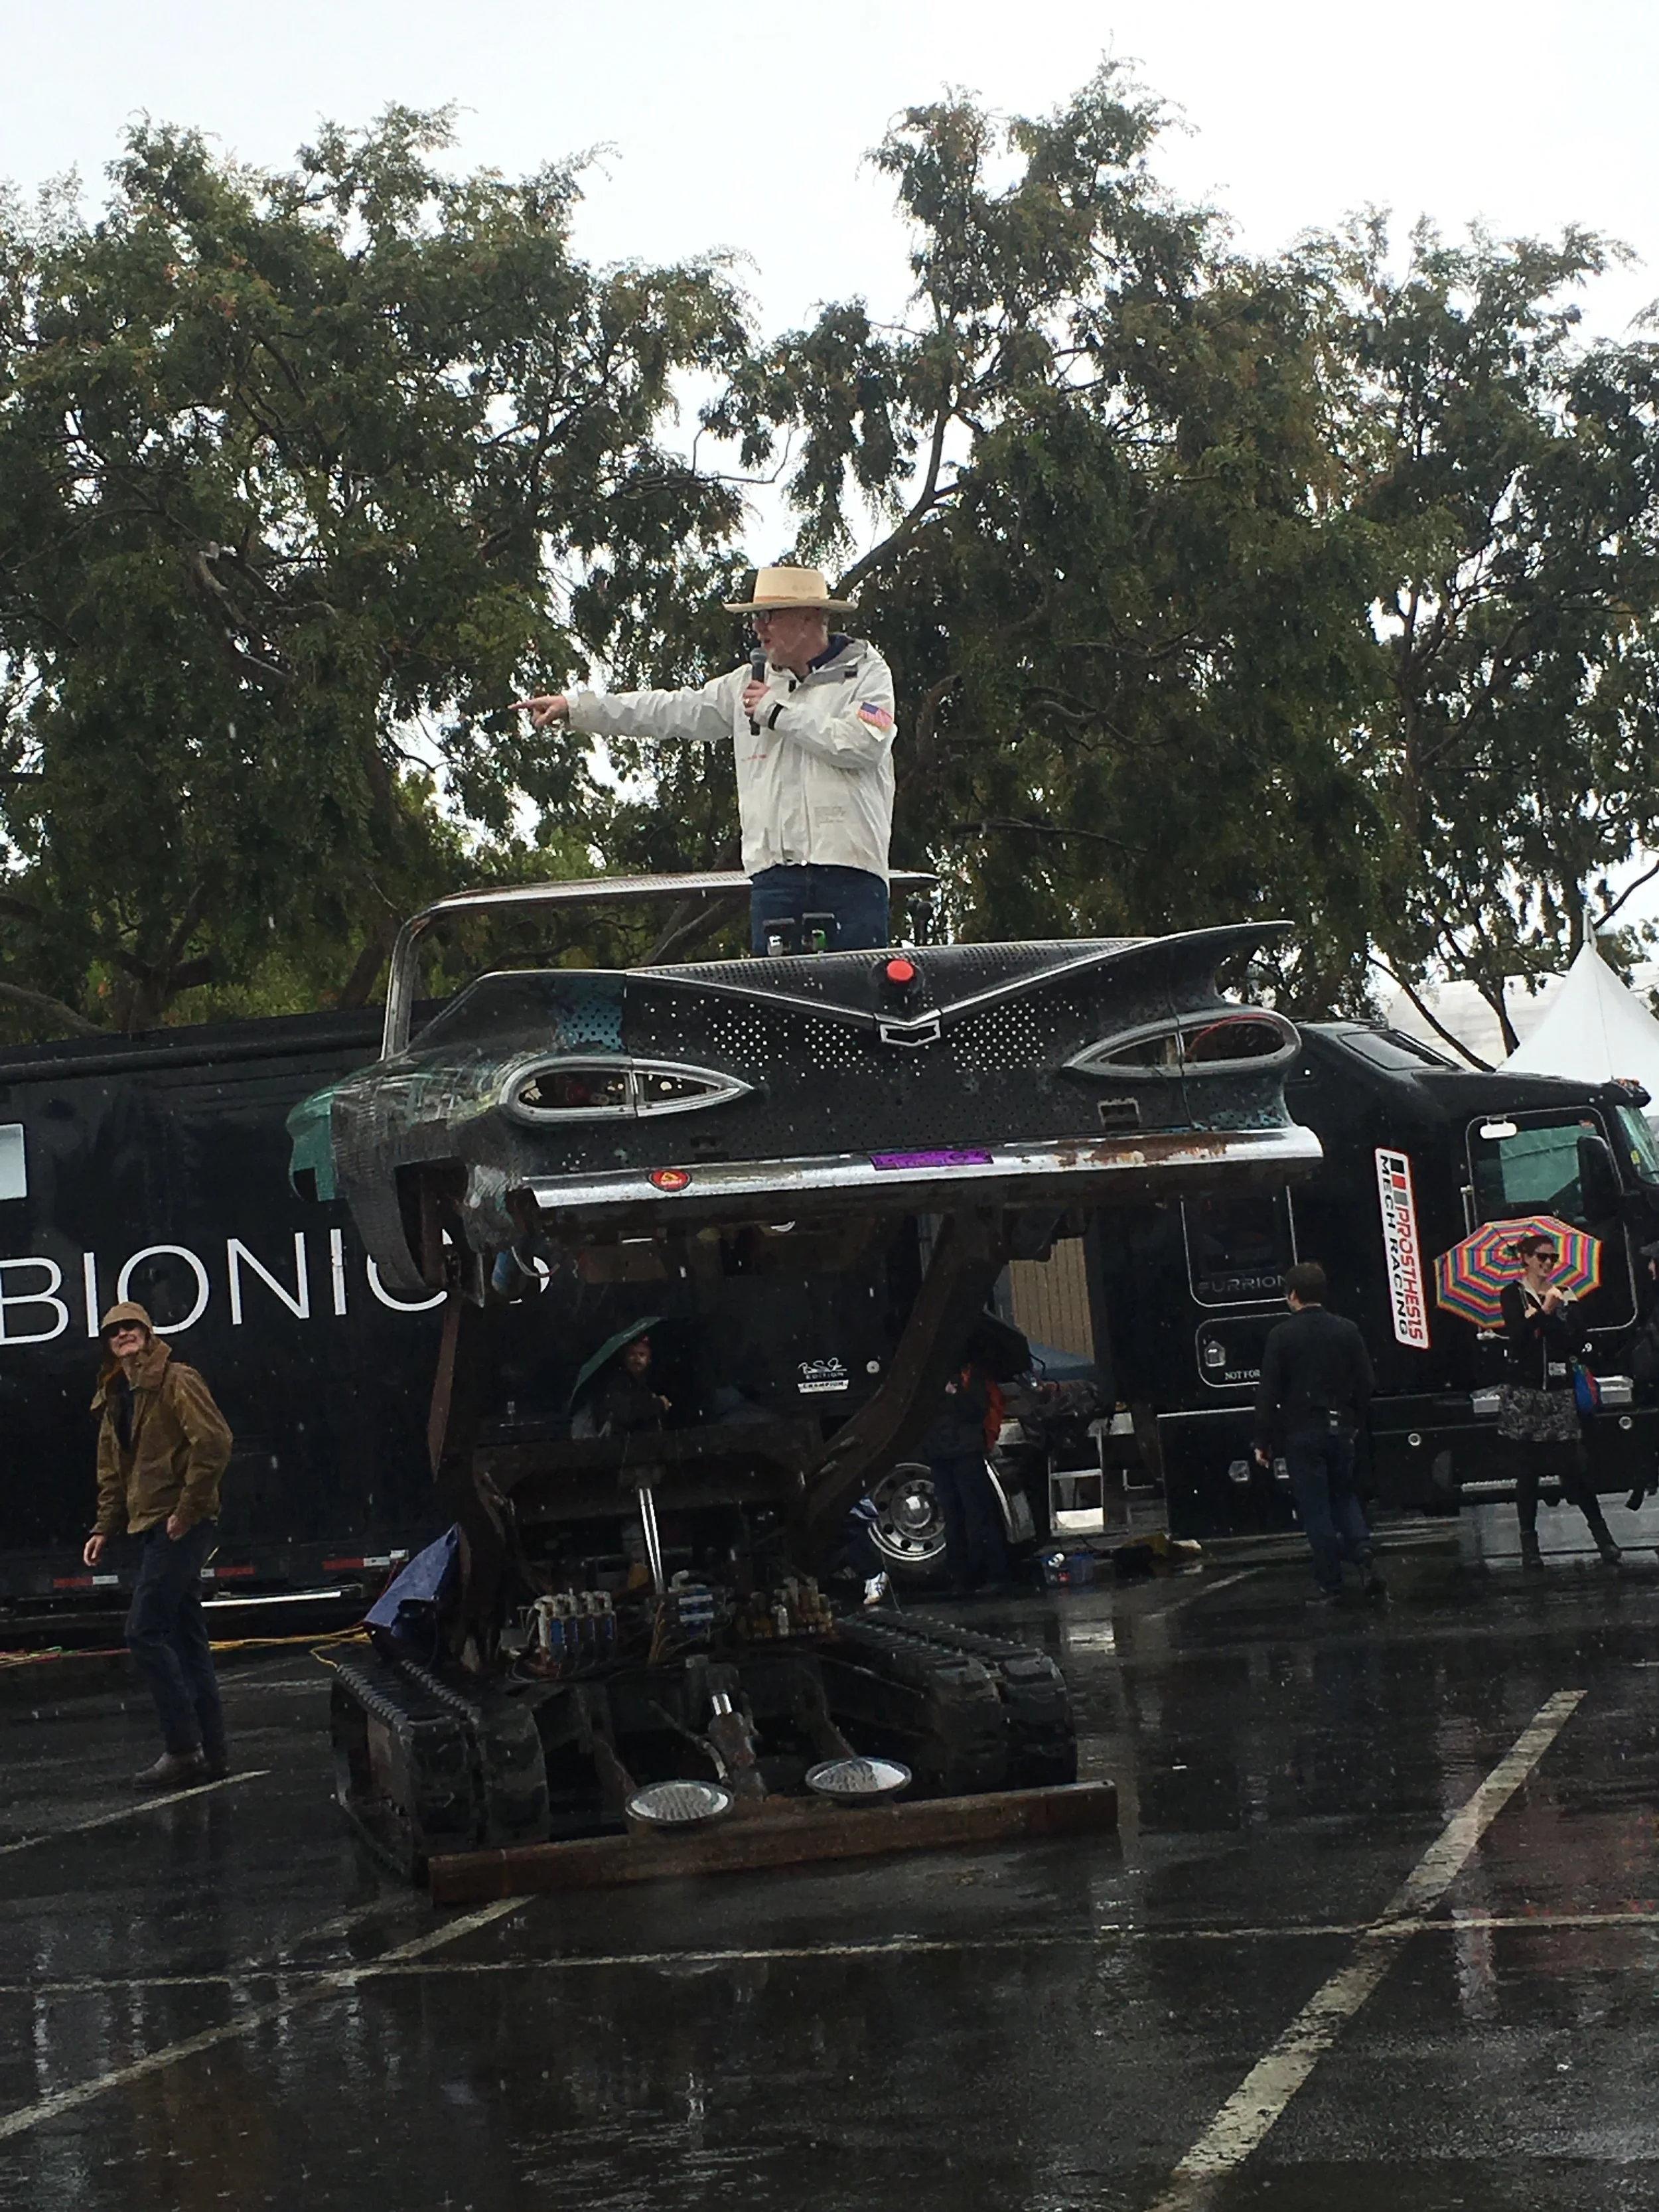
Adam Savage giving his Sunday Sermon, in the pouring rain atop a custom Mad Max style hydraulic vehicle:
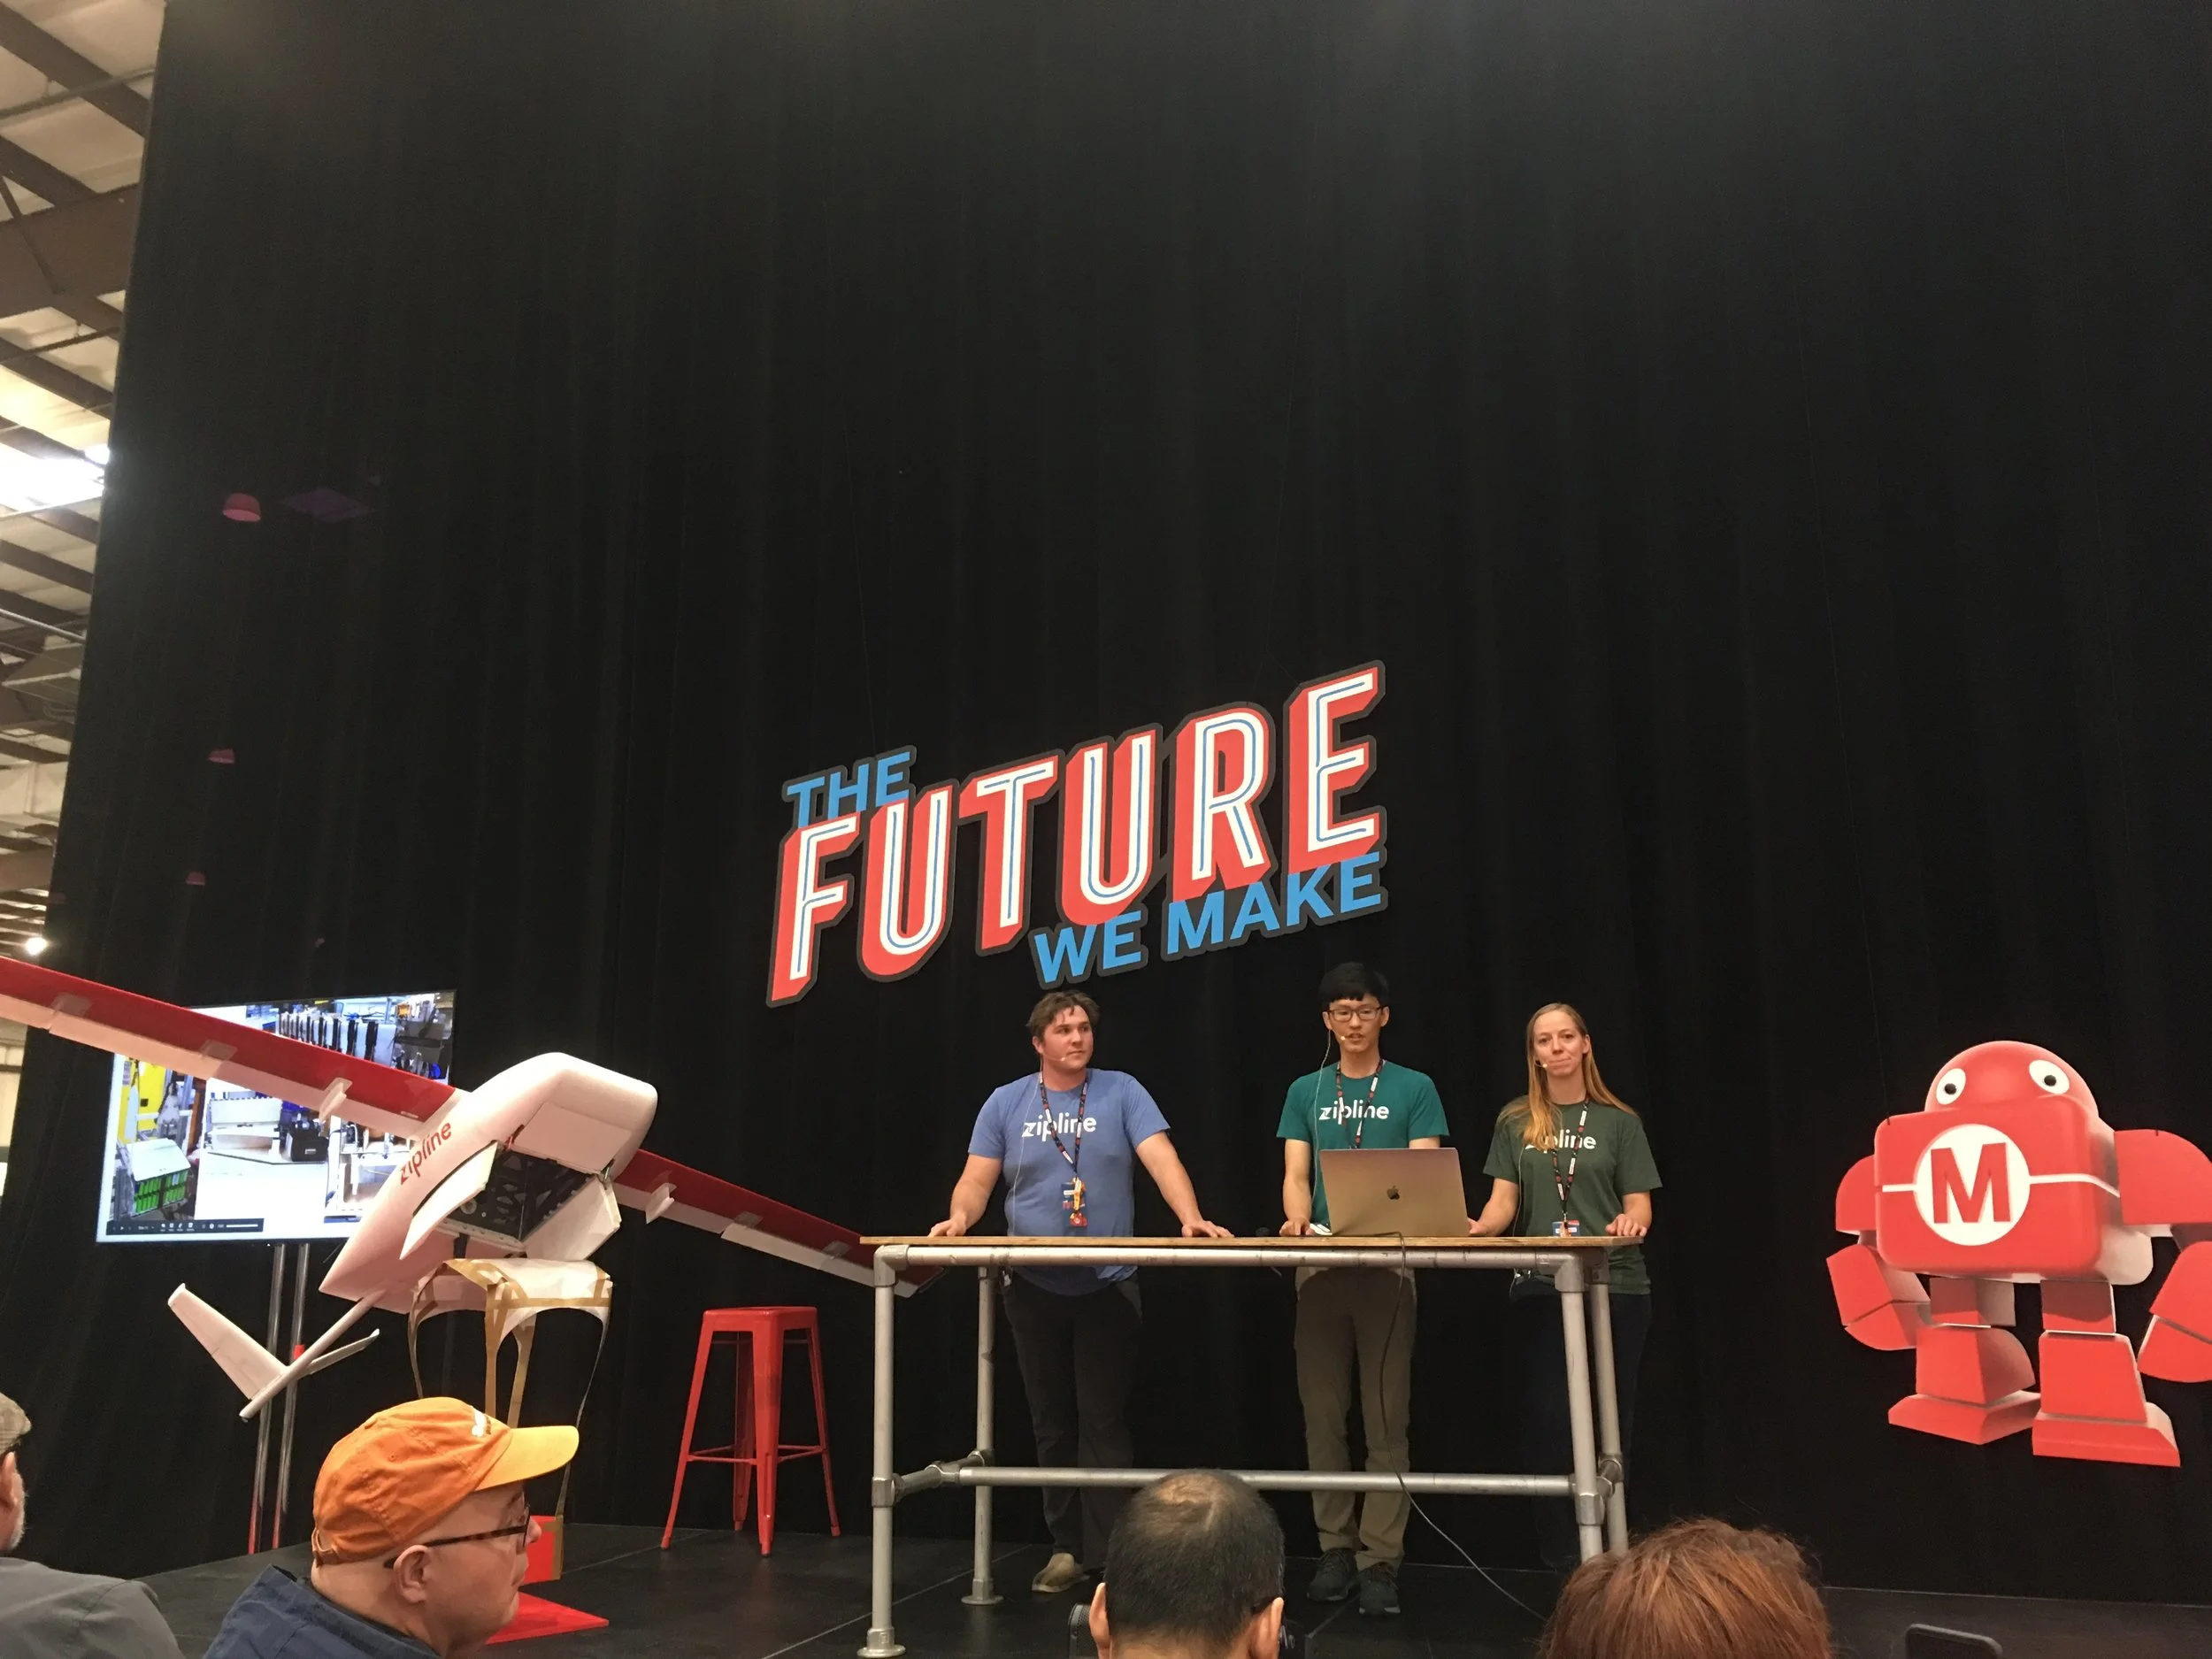
Silicon Valley startup company Zipline, giving a presentation on their autonomous medical delivery aircraft:
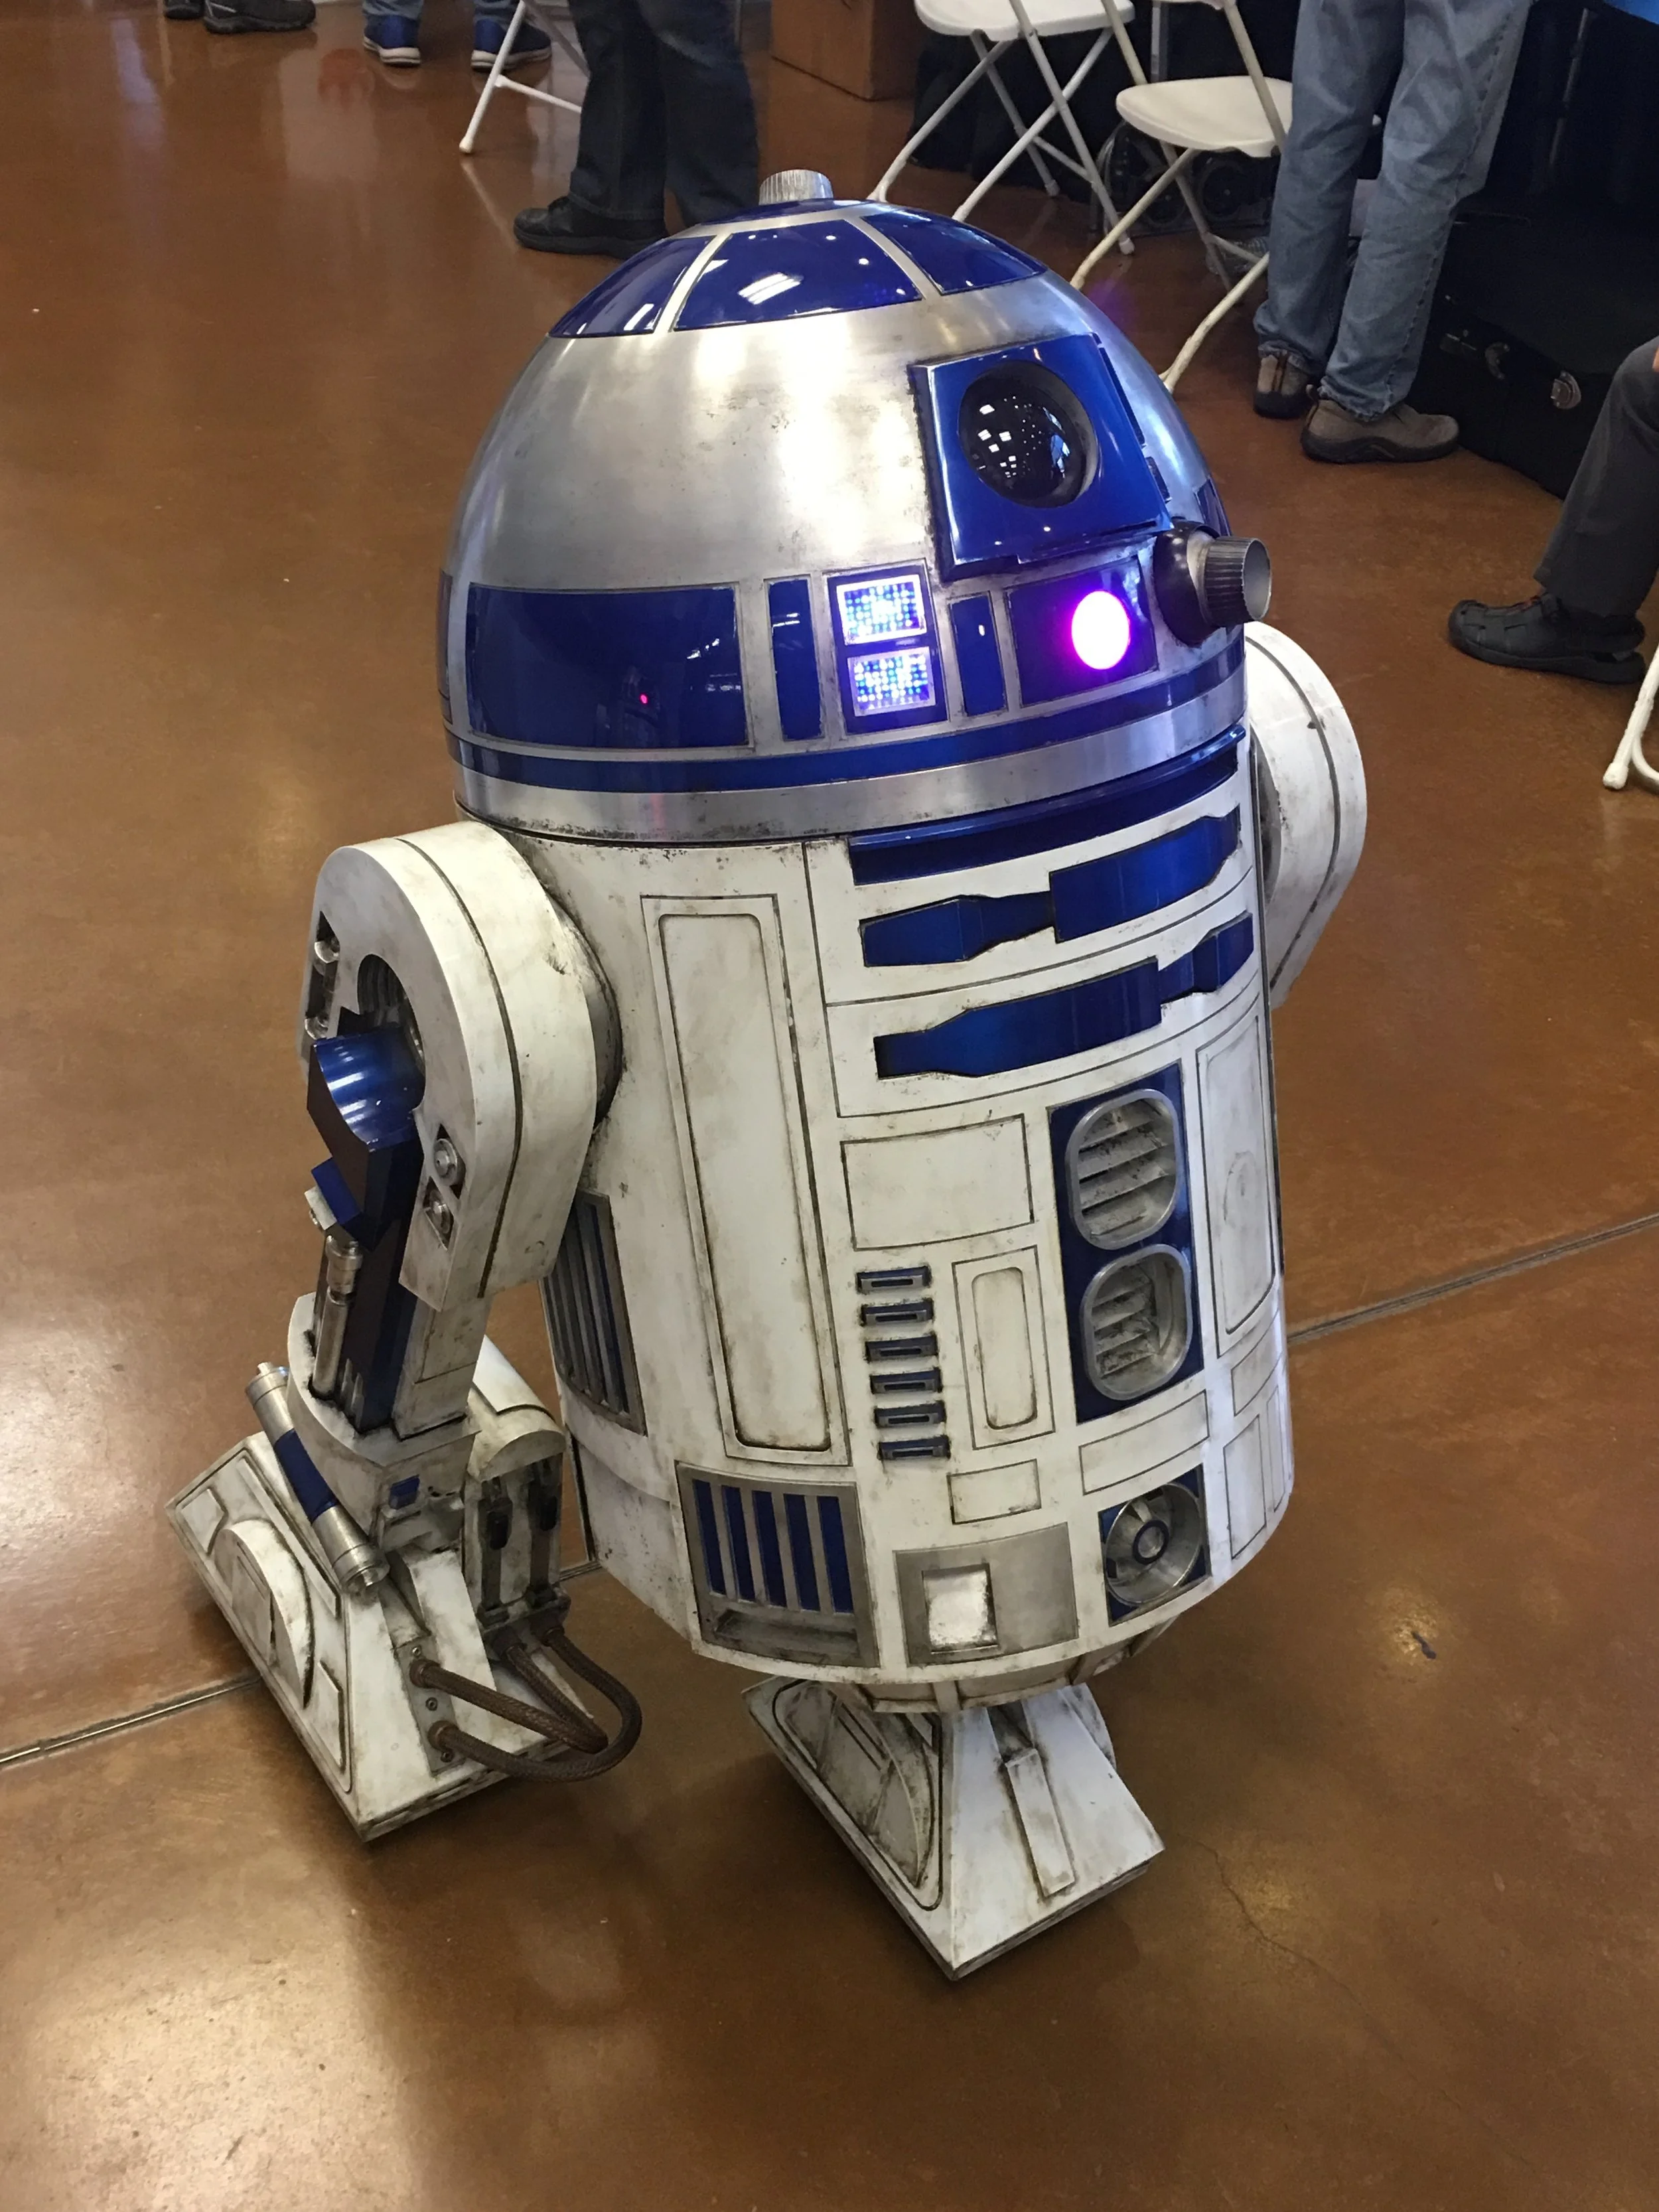
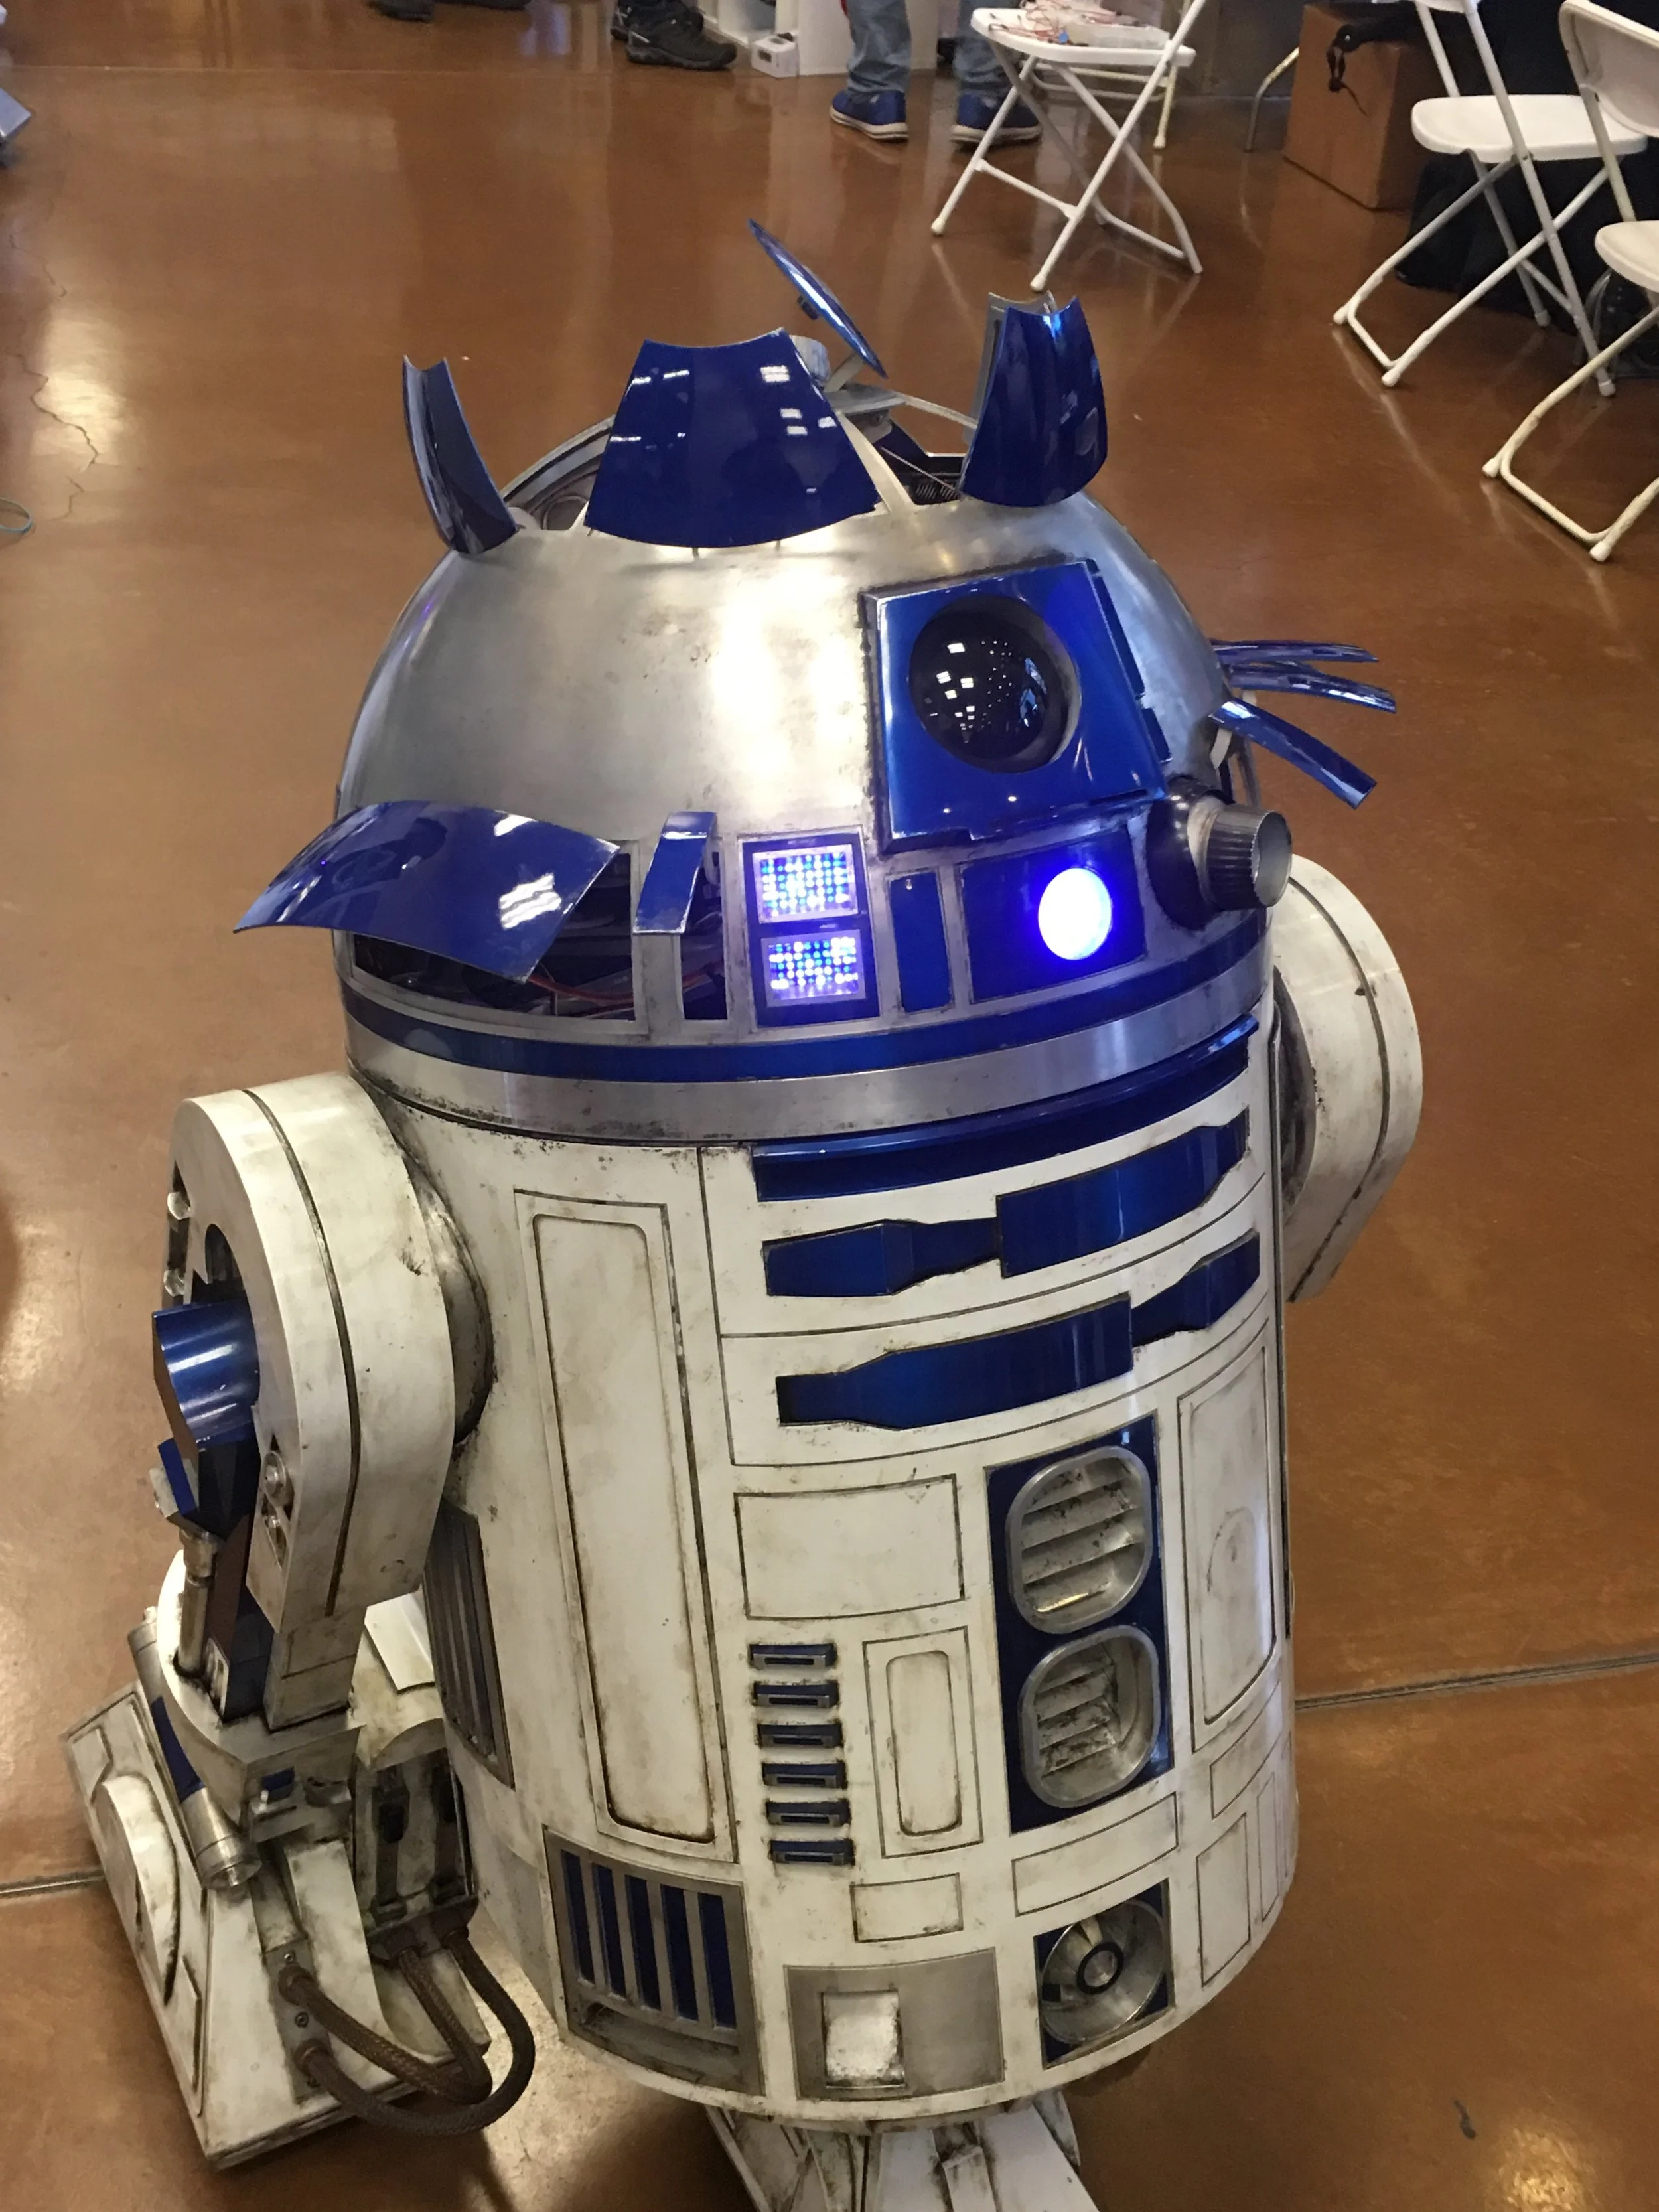
Of course, Star Wars was on display everywhere throughout the show. There’s even a local home-built R2D2 club in Silicon Valley:
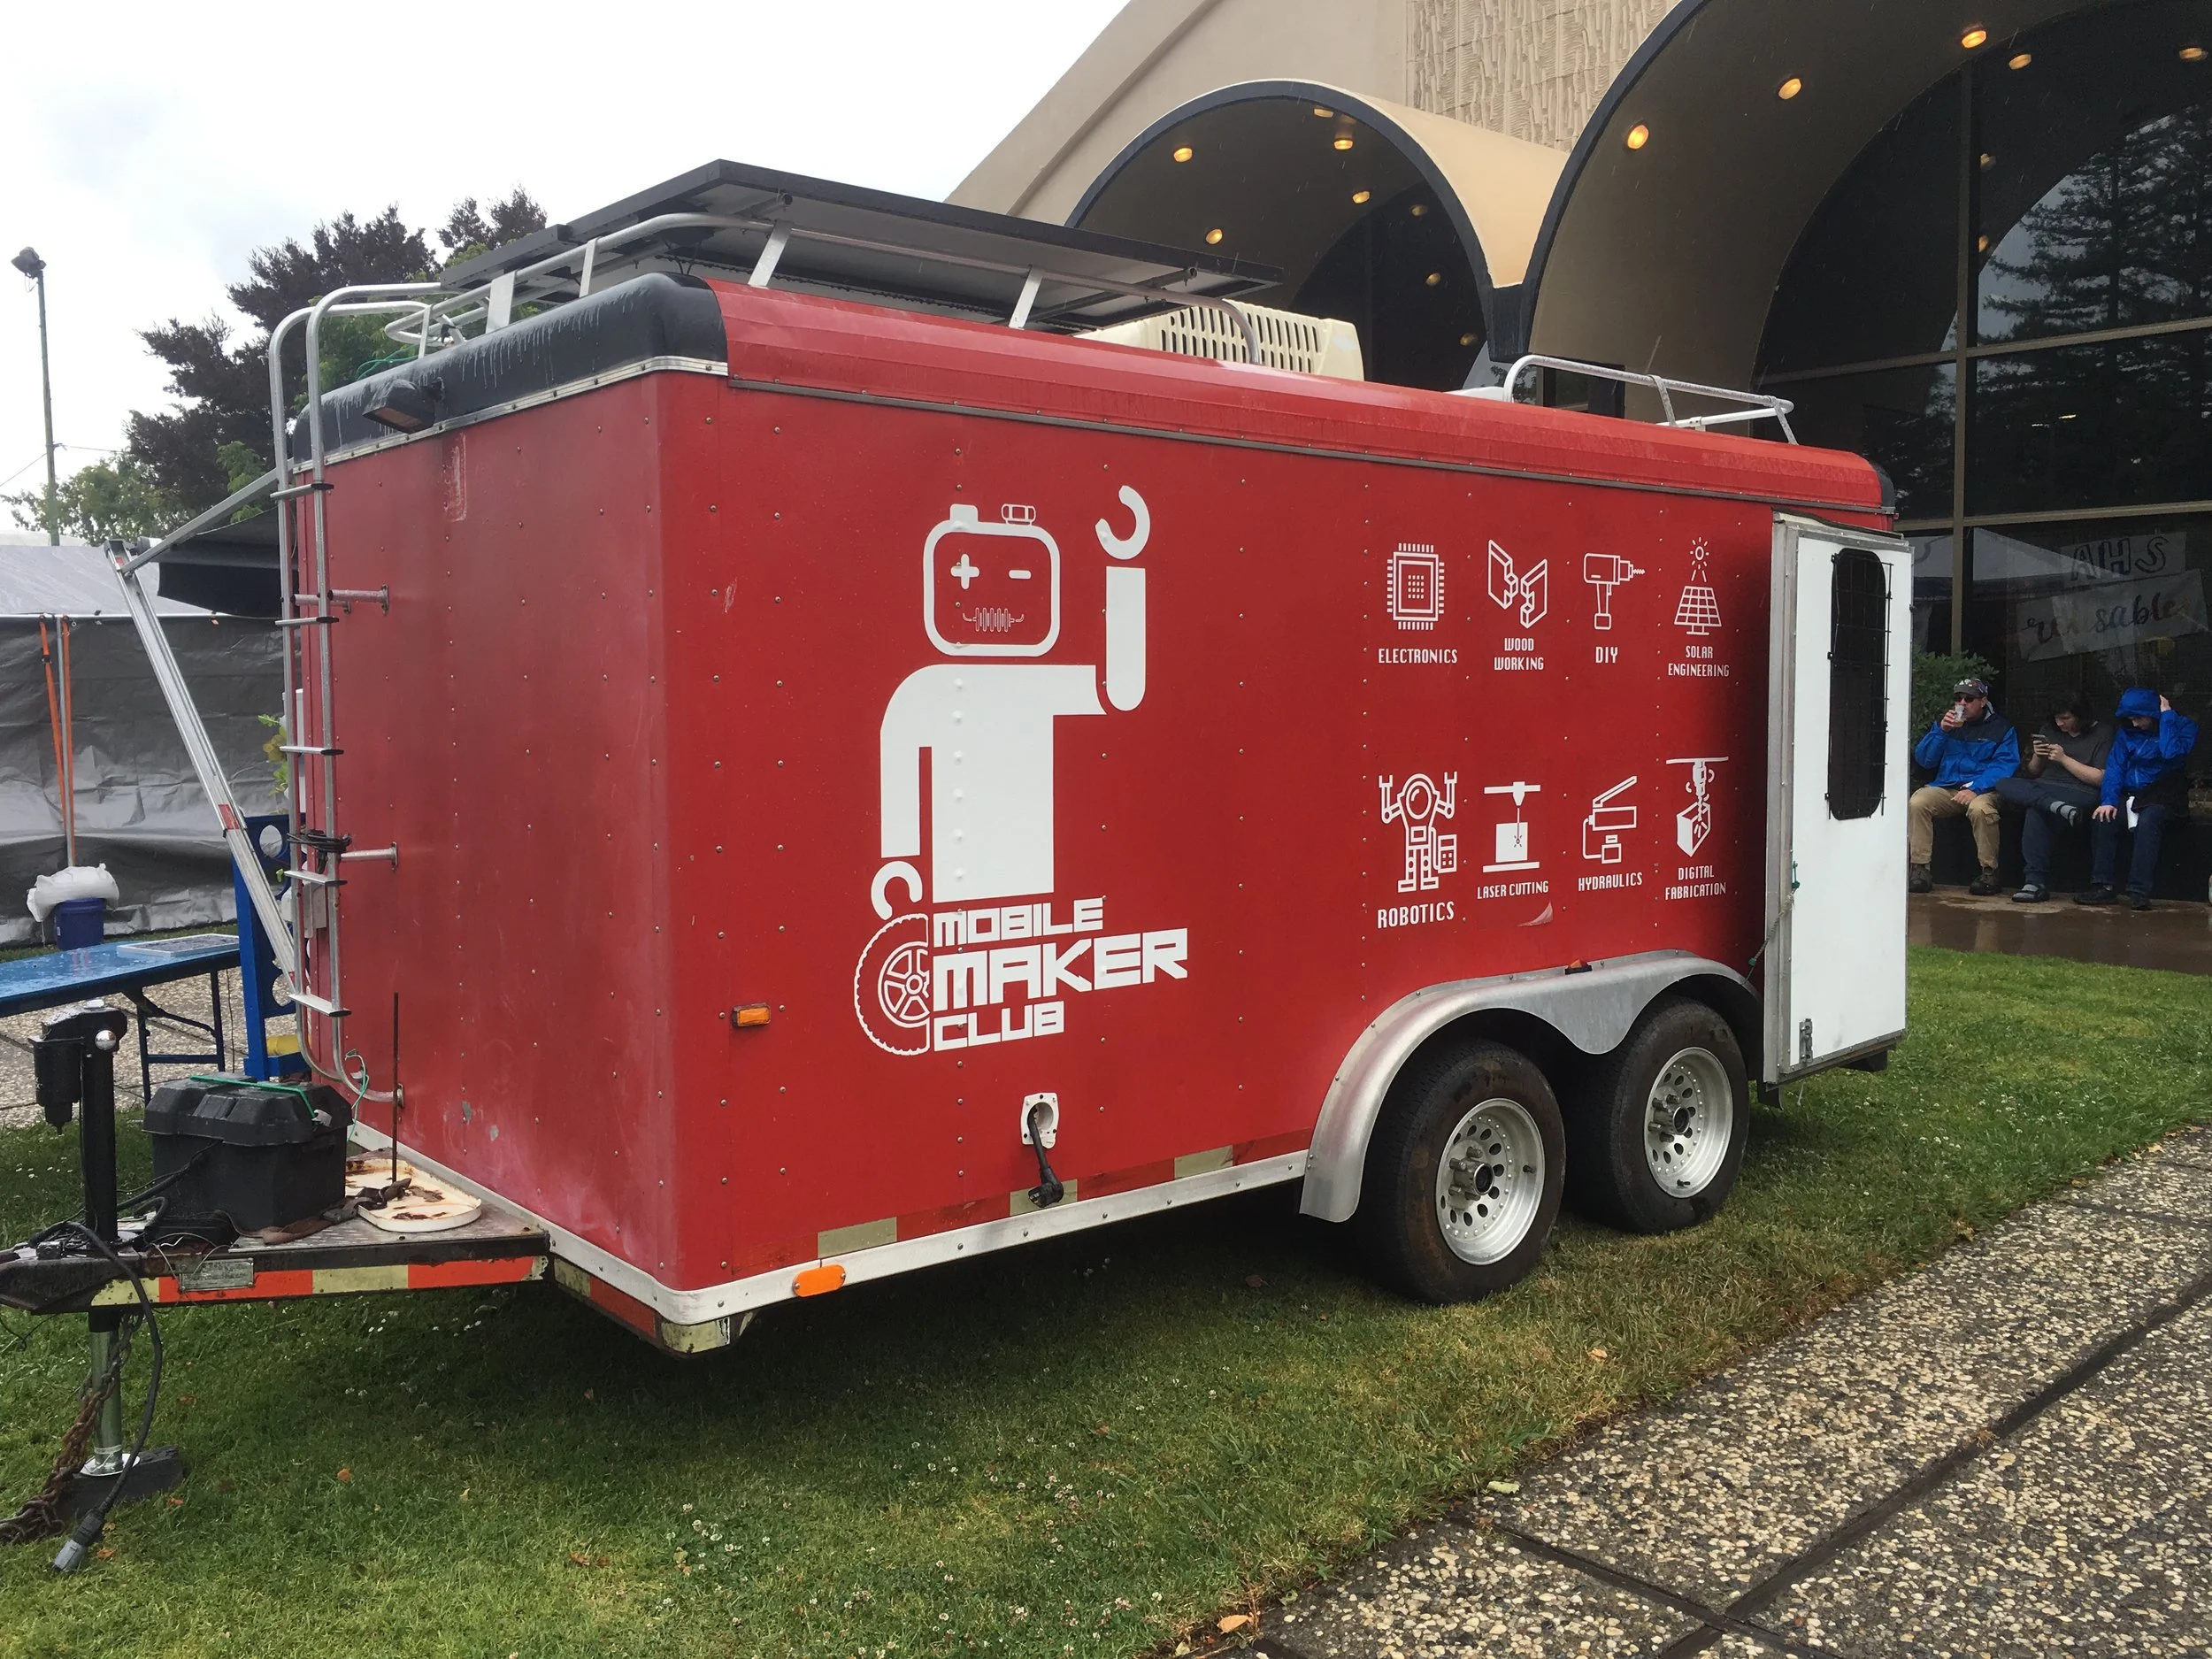
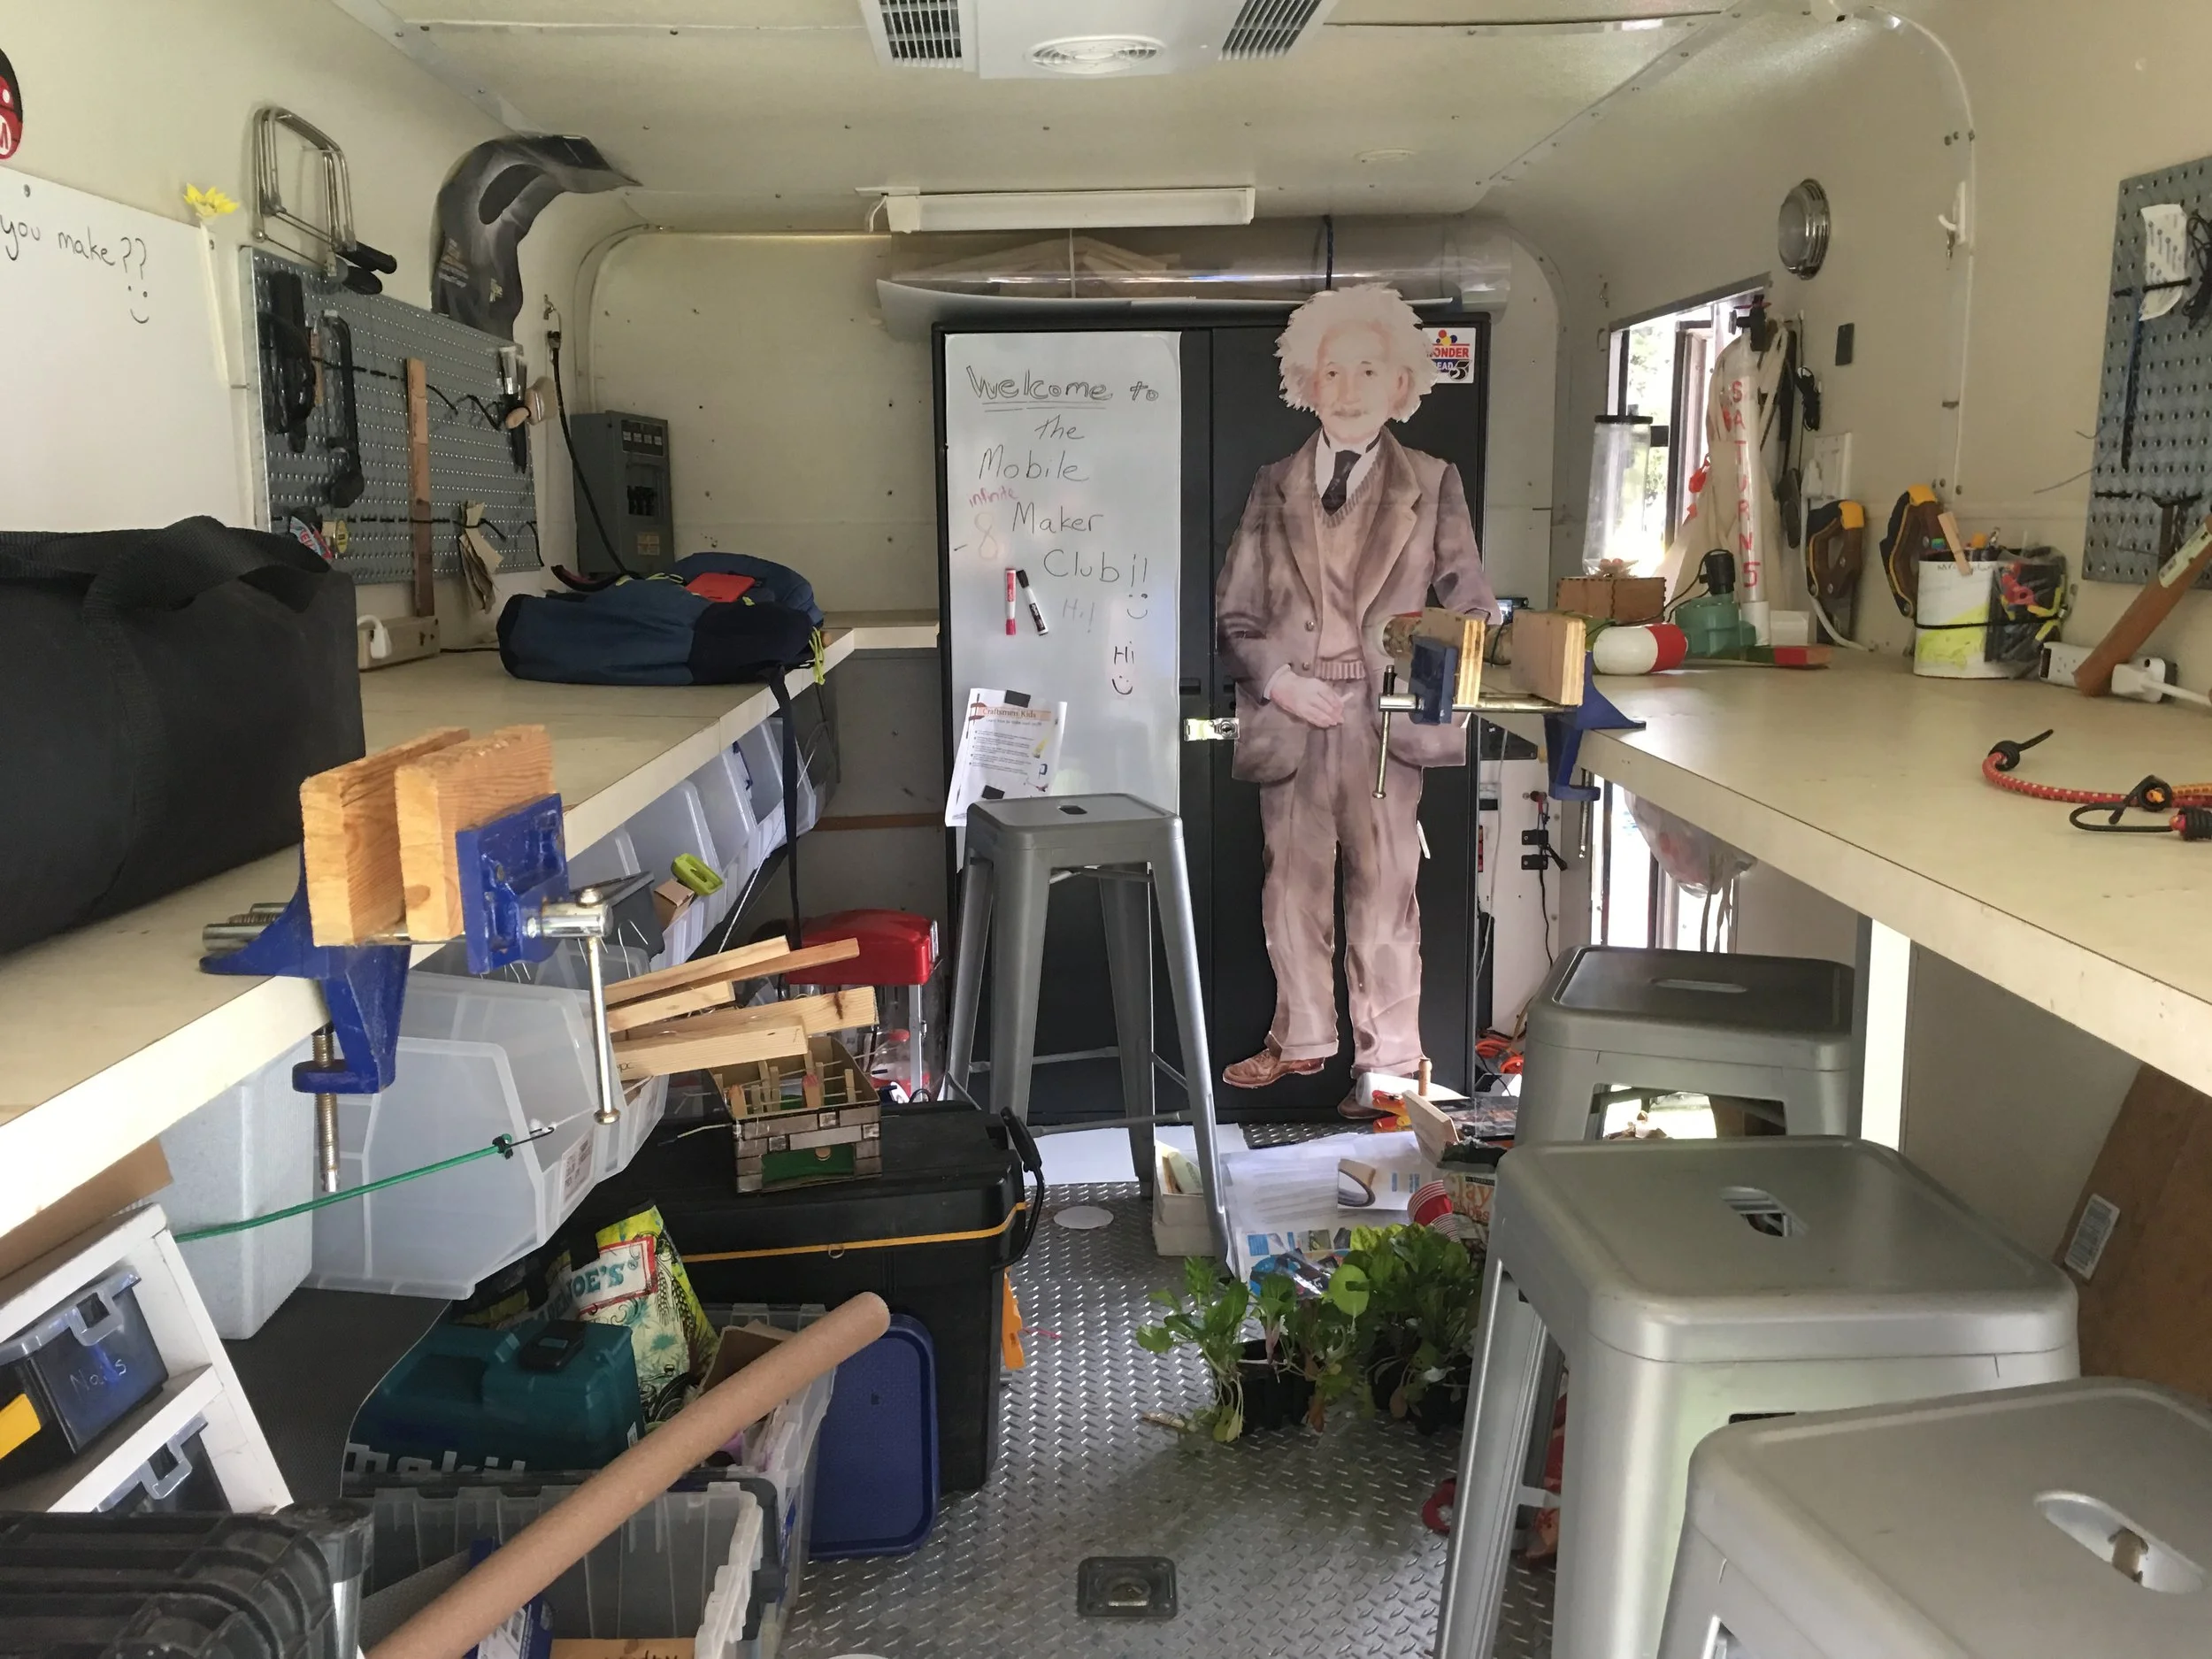
Now even mobile maker spaces are popping up! What better way to encourage STEM and creative tinkering than this?:
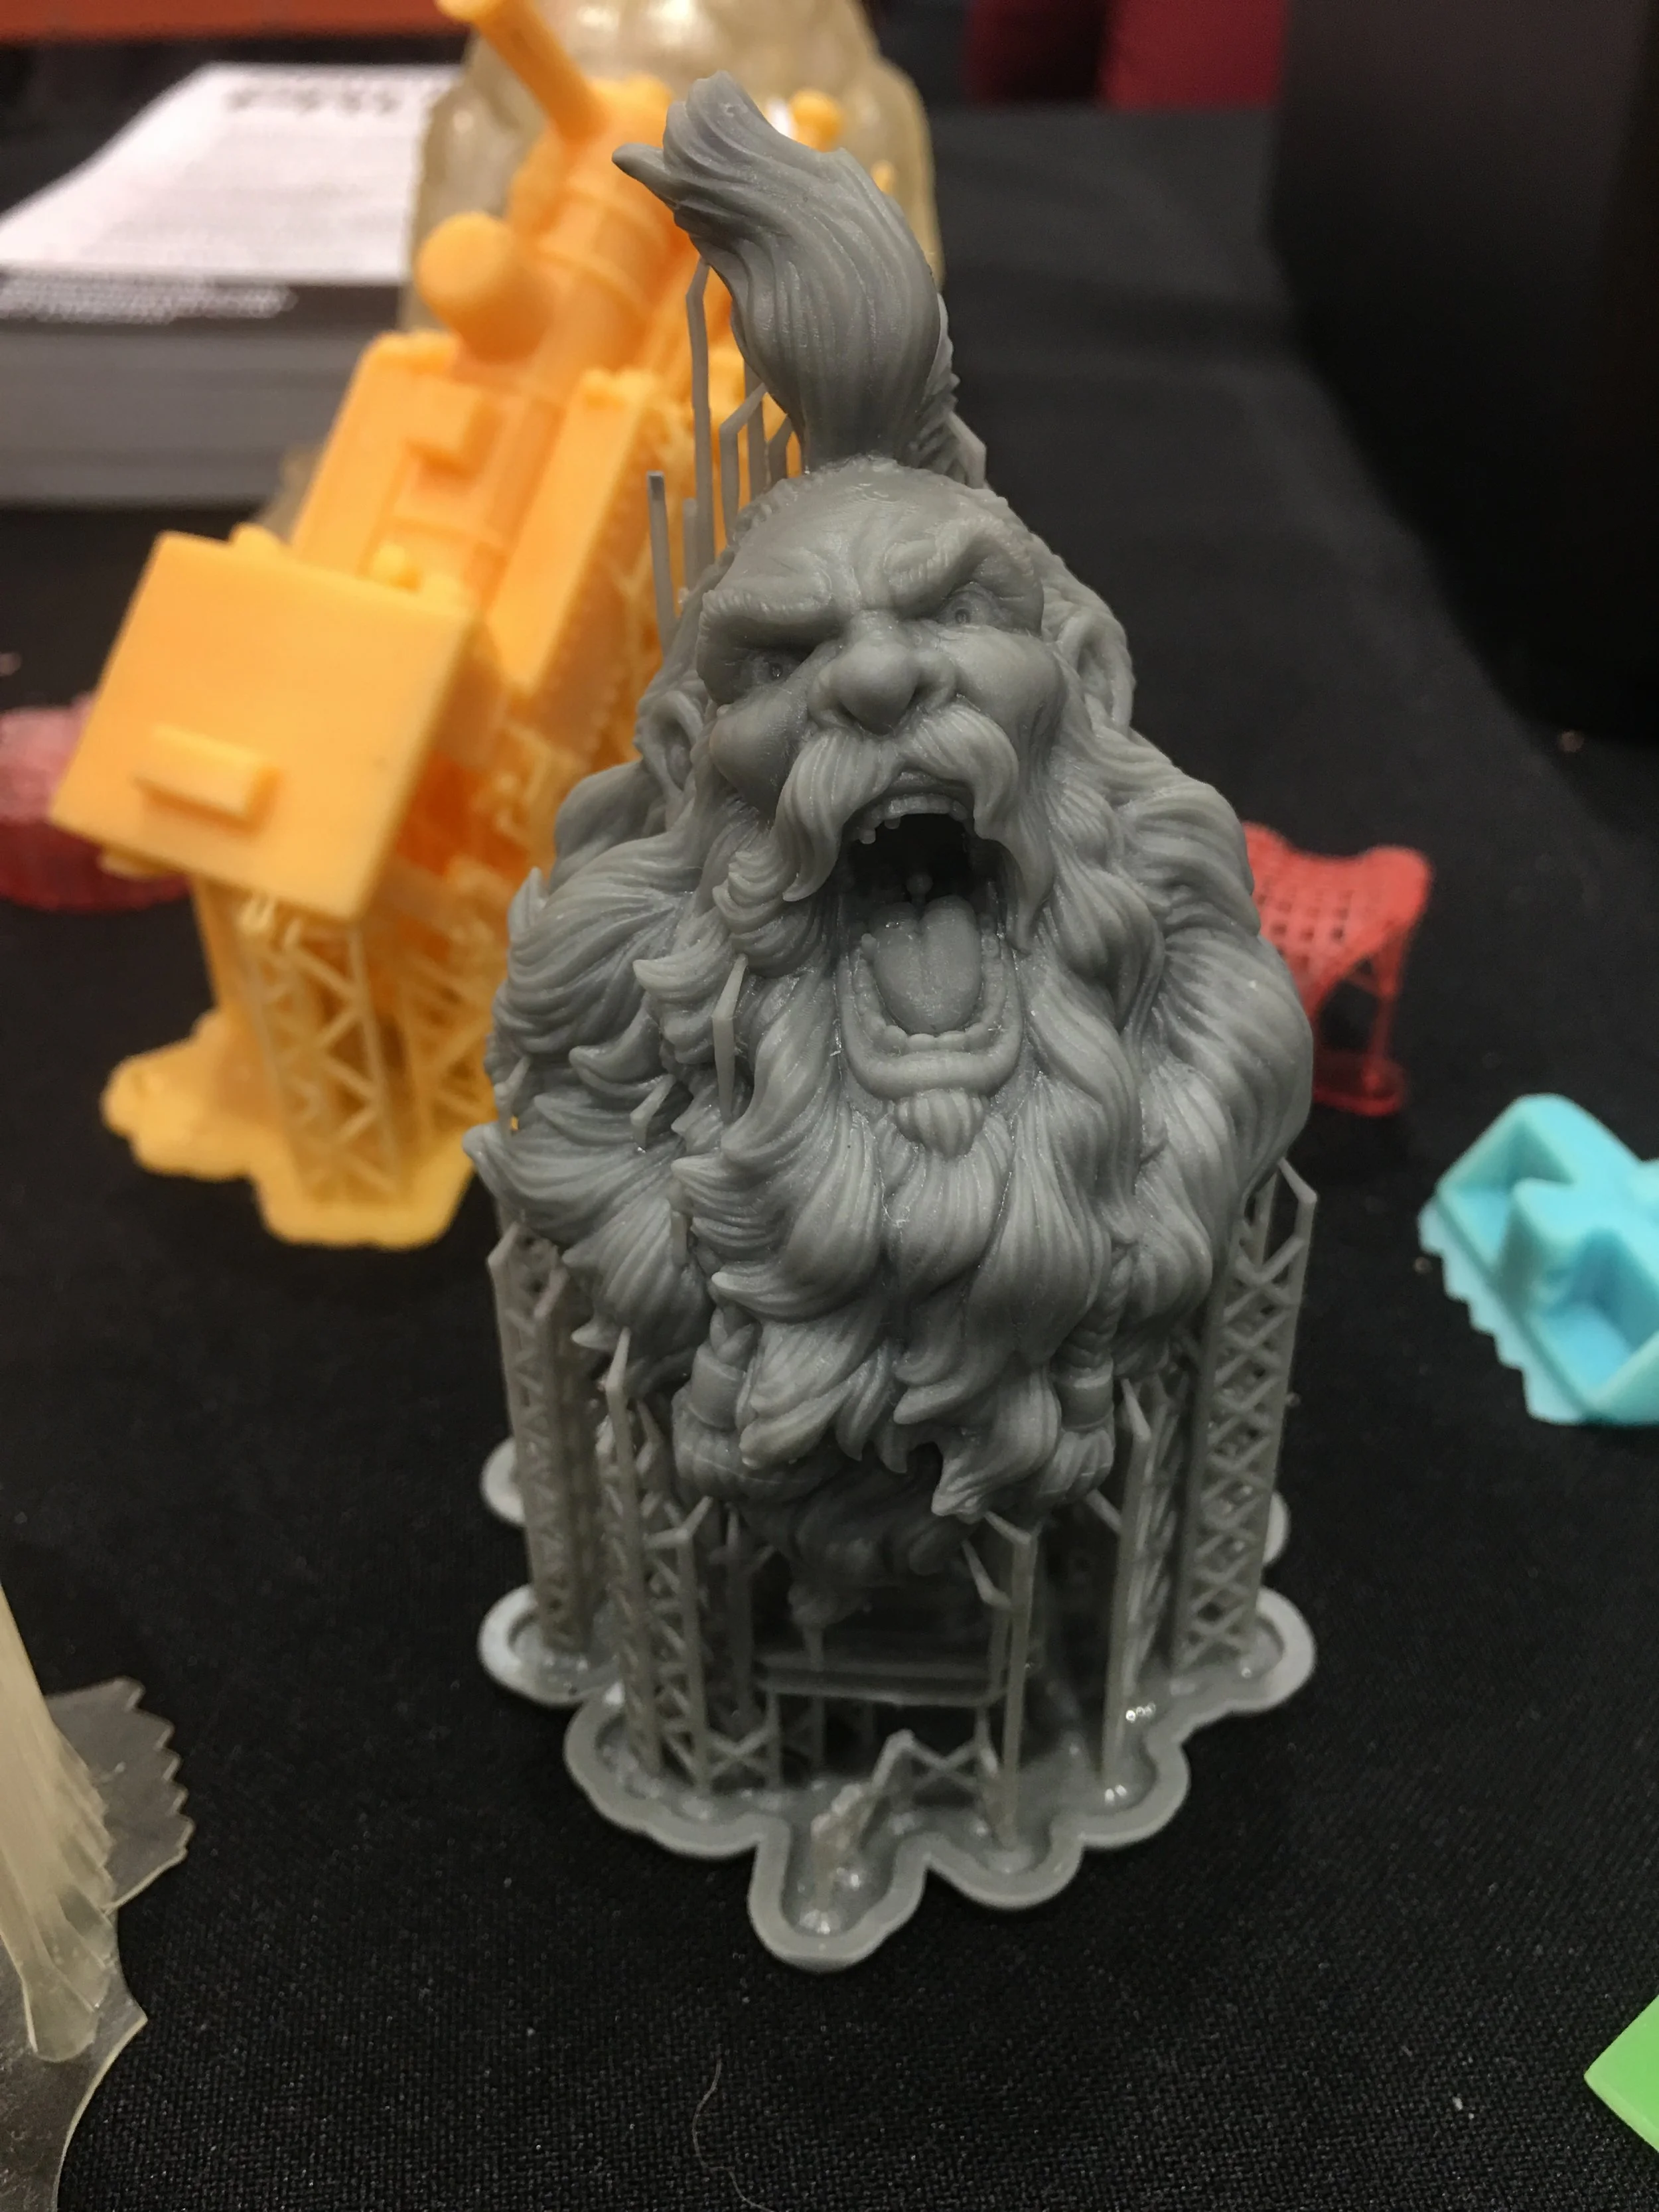
Intimidating fantasy prop armor by Hoku Props:

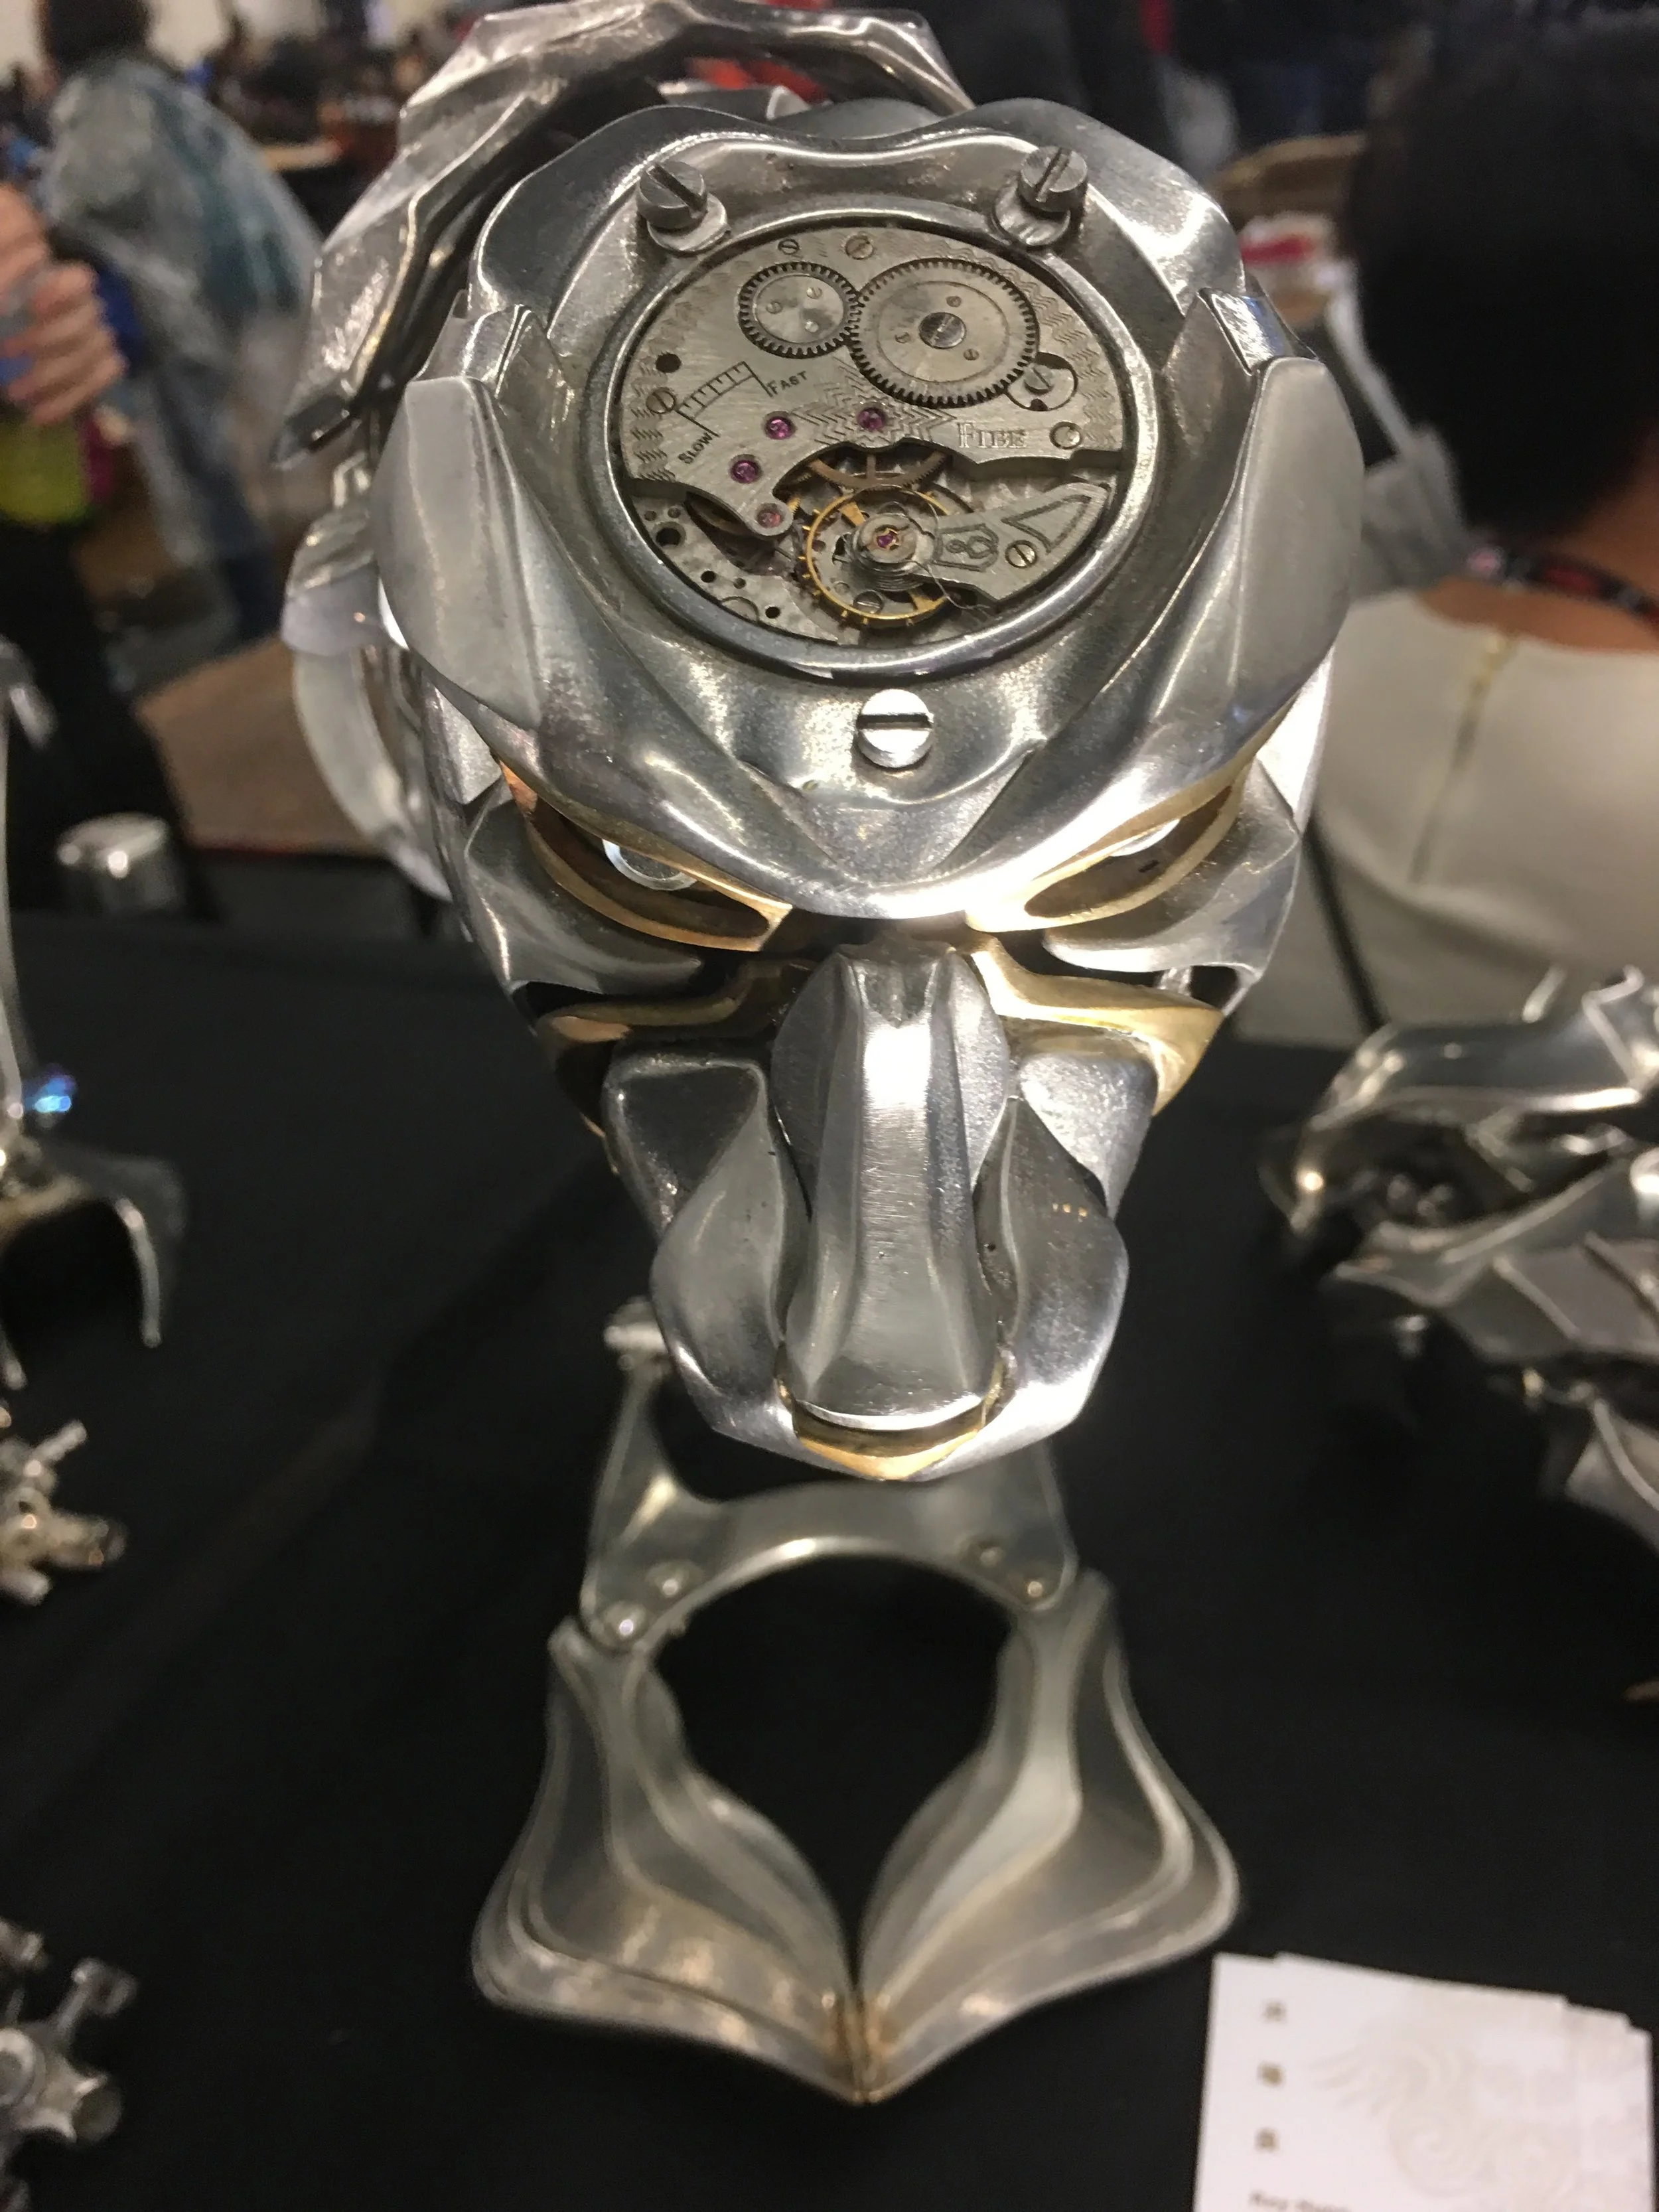
Impressive cast metal anatomical sculptures by Taiwanese artist / founder Roy Hung of Perkūnas Studio:


One of the more memorable pieces from the show — a customized steampunk 3d printer by the team at Josef Prusa:

Gotta love Iron Man…This bust was 3d Printed in SLA (stereolithography):


The Maker's Field Guide: Book & Ebook Available Now
These tips and more can be found in The Maker's Field Guide — the most advanced guide to making anything on the planet. Written from a professional industrial designer with over 8+ years experience in the industry. Now available as digital ebook or premium quality coffee table book through the online store!

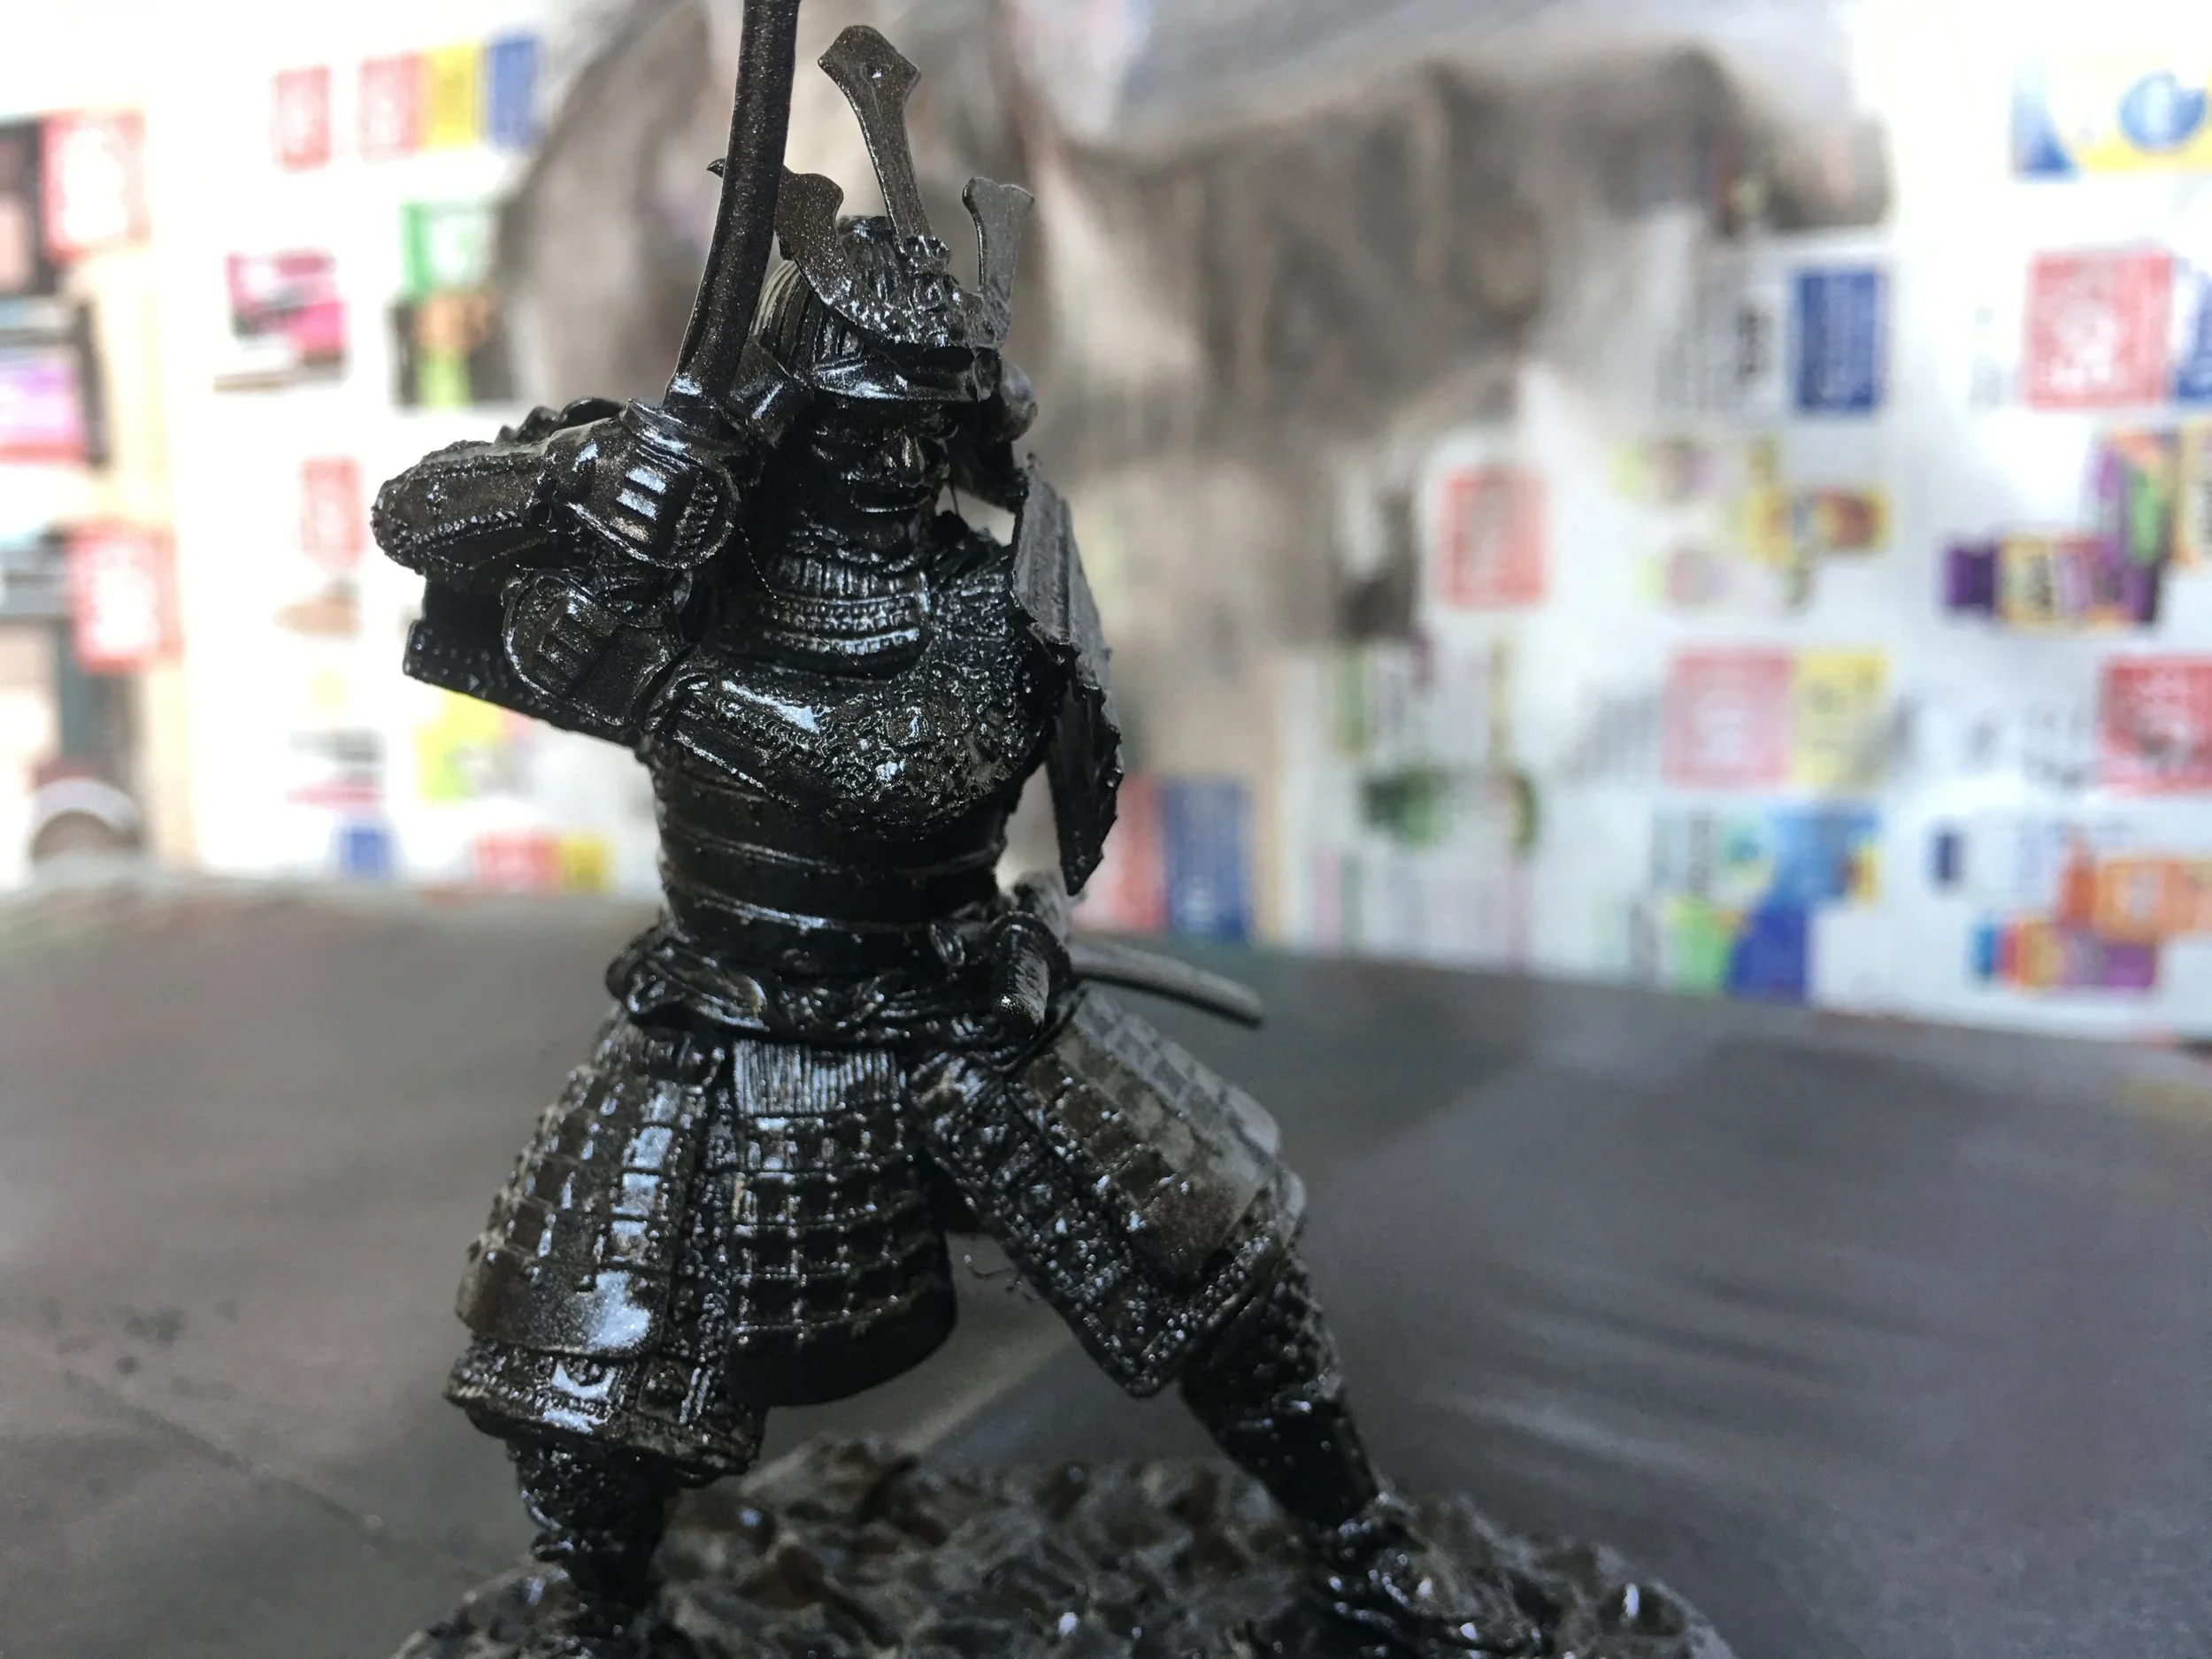
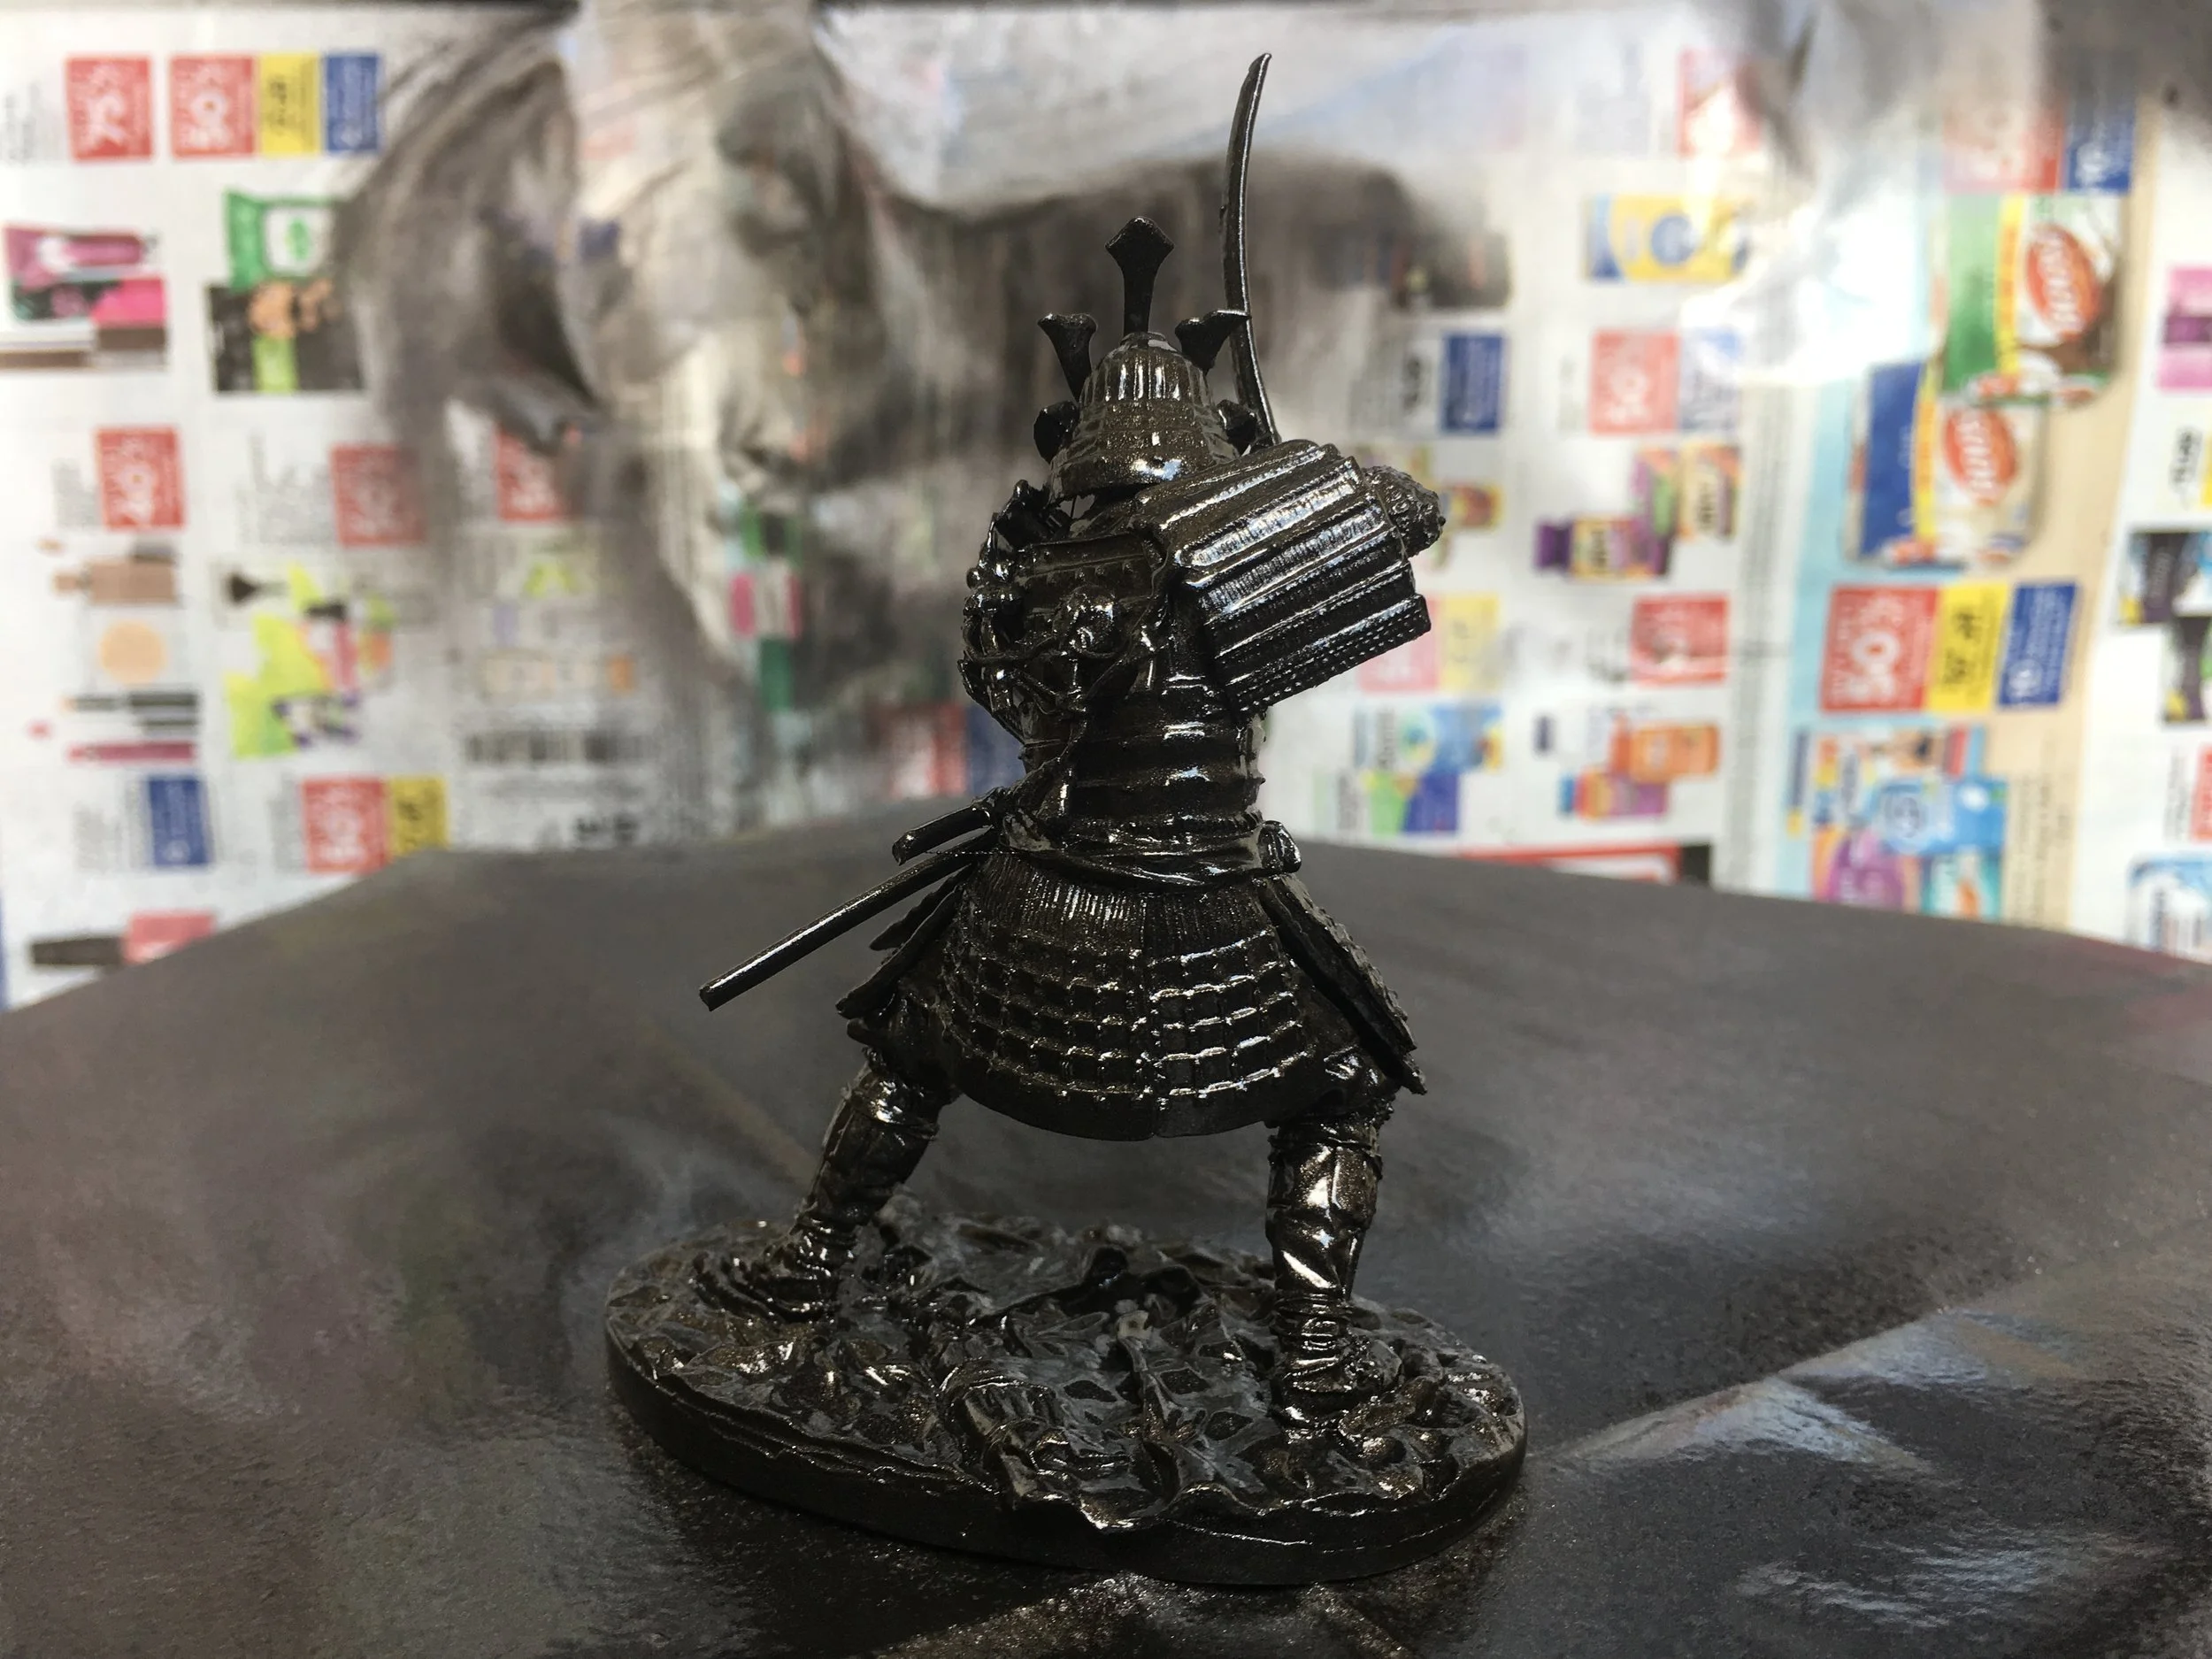
Bronze Mini Samurai Armor Statue — Master Build Process
In this full step-by-step build process, we’ll reveal the assembly & painting of a Japanese model kit from start to finish.
Samurai armor is one of the most iconic protective armors used in battle throughout history, and is an iconic symbol of Japan, as well as of the warrior spirit. In this full step-by-step build process, we’ll reveal the assembly & painting of a Japanese model kit from start to finish. The final icing on the cake will be a final bronze coat of paint, which gives this model the effect of having been weathered by the elements throughout the ages. I personally love this effect, because it is super simple and can instantly give a luxurious, sophisticated appeal to any model, 3d print or art piece. Anyone can use the process I’ve perfected in this video to achieve dramatic effects in his or her own models. Some of the key fundamentals of model making are covered here, including gluing, collecting photo research, sanding, preparation and final paint application.
Materials used in this build:
-Resin Samurai model kit (www.aliexpress.com)
-PROkleber Hot Glue Gun (www.amazon.com)
-Rust-Oleum Automobile Primer (Light Gray)
-Rust-Oleum Universal Metallic Paint (Oil Rubbed Bronze)
-Testors Acrylic Enamel (Flat Brass)
1) This build starts off with an unassembled resin model kit. Even though this is a small 3” model, the kit had quite a few parts, each with an impressive amount of detail. Mold flashing will need to be trimmed off with an X-Acto knife before assembly:

2) The assembled model, bonded together with hot glue. I would usually apply a coat of automobile primer here, but opted to go straight to the rattle can paint instead. Paper is laid down to protect from paint overspray:

3) Below is a collection of real-world bronze weathering reference imagery, which I took from a trip to Disneyland. There’s nothing like studying from real-life reference, sine this will give this model an air of ultra-realistic authenticity. This reference will be critical to get the realistic bronze effects just right:

4) The first base paint coat of Rust-Oleum Metallic Oil Rubbed Bronze is applied in three light to medium coats, a few minutes apart. A few minutes later, the final layer of paint is applied. The base of the model is rotated to reach all angles evenly, since you NEVER want to touch a model while it is still wet:
5) After allowing the paint enough time to dry to touch, the underside of the model is sprayed and left to dry on a makeshift drying rack (T.P. rolls). This layer is given a few hours to dry before moving onto the next step:

6) The base paint layer after allowing to dry upside down for a few hours — now ready for bronze highlights:
7) As a final paint application, I use Testors Flat Brass color acrylic enamel paint, lighting dabbed on with a paper towel. A Q-Tip is then used to paint in all of the hard to reach crevices. Like the bronze statue reference from Disneyland, the brass effects are only applied to areas that are facing up to the sky — which would likely be touched by tourists or passers by, which would give this sort of weathered effect. A little bit of the brass highlights goes a long way here, so be careful not to do overdo it:

8) And Voilà — the 3” statue now has the incredible look of a life-sized samurai statue, which has been sitting in an ancient courtyard for hundreds of years. Shout out to DD Hobby for the spectacular level of detail on the casting of this kit — this was a super fun build!
-Chris


Take your Maker game to the next level with The Maker's Field Guide: Master Maker Edition!
More step-by-step pro builds like this one can be found in the all new Master Maker edition of The Maker's Field Guide — available now as both a book & ebook in the online store. Take your maker game to the next level and become a true design, model making, and fabrication Samurai warrior!

Amazon Spheres Architectural Design & Prototyping Process
The design process behind these sci-fi offices showcases a fantastic use of rapid prototyping technologies like laser cutting and 3d printing.
If you haven’t been to the Seattle area recently, you may not be familiar with the Amazon Spheres. These sci-fi co-working offices showcase a fantastic use of rapid prototyping technologies like laser cutting and 3d printing in the early design stages, used to build an initial scale model of the “catalan” modules, which give the domes a pentagonal skeleton structure.
Source: Wall Street Journal
Architectural firm: NBBJ

Building up parts on the pentagonal scale model structure using laser cut wood and paper cardstock:


These laser cut parts are later transformed into 3d Printed Catalan Module - or 'elongated pentagon' building block:
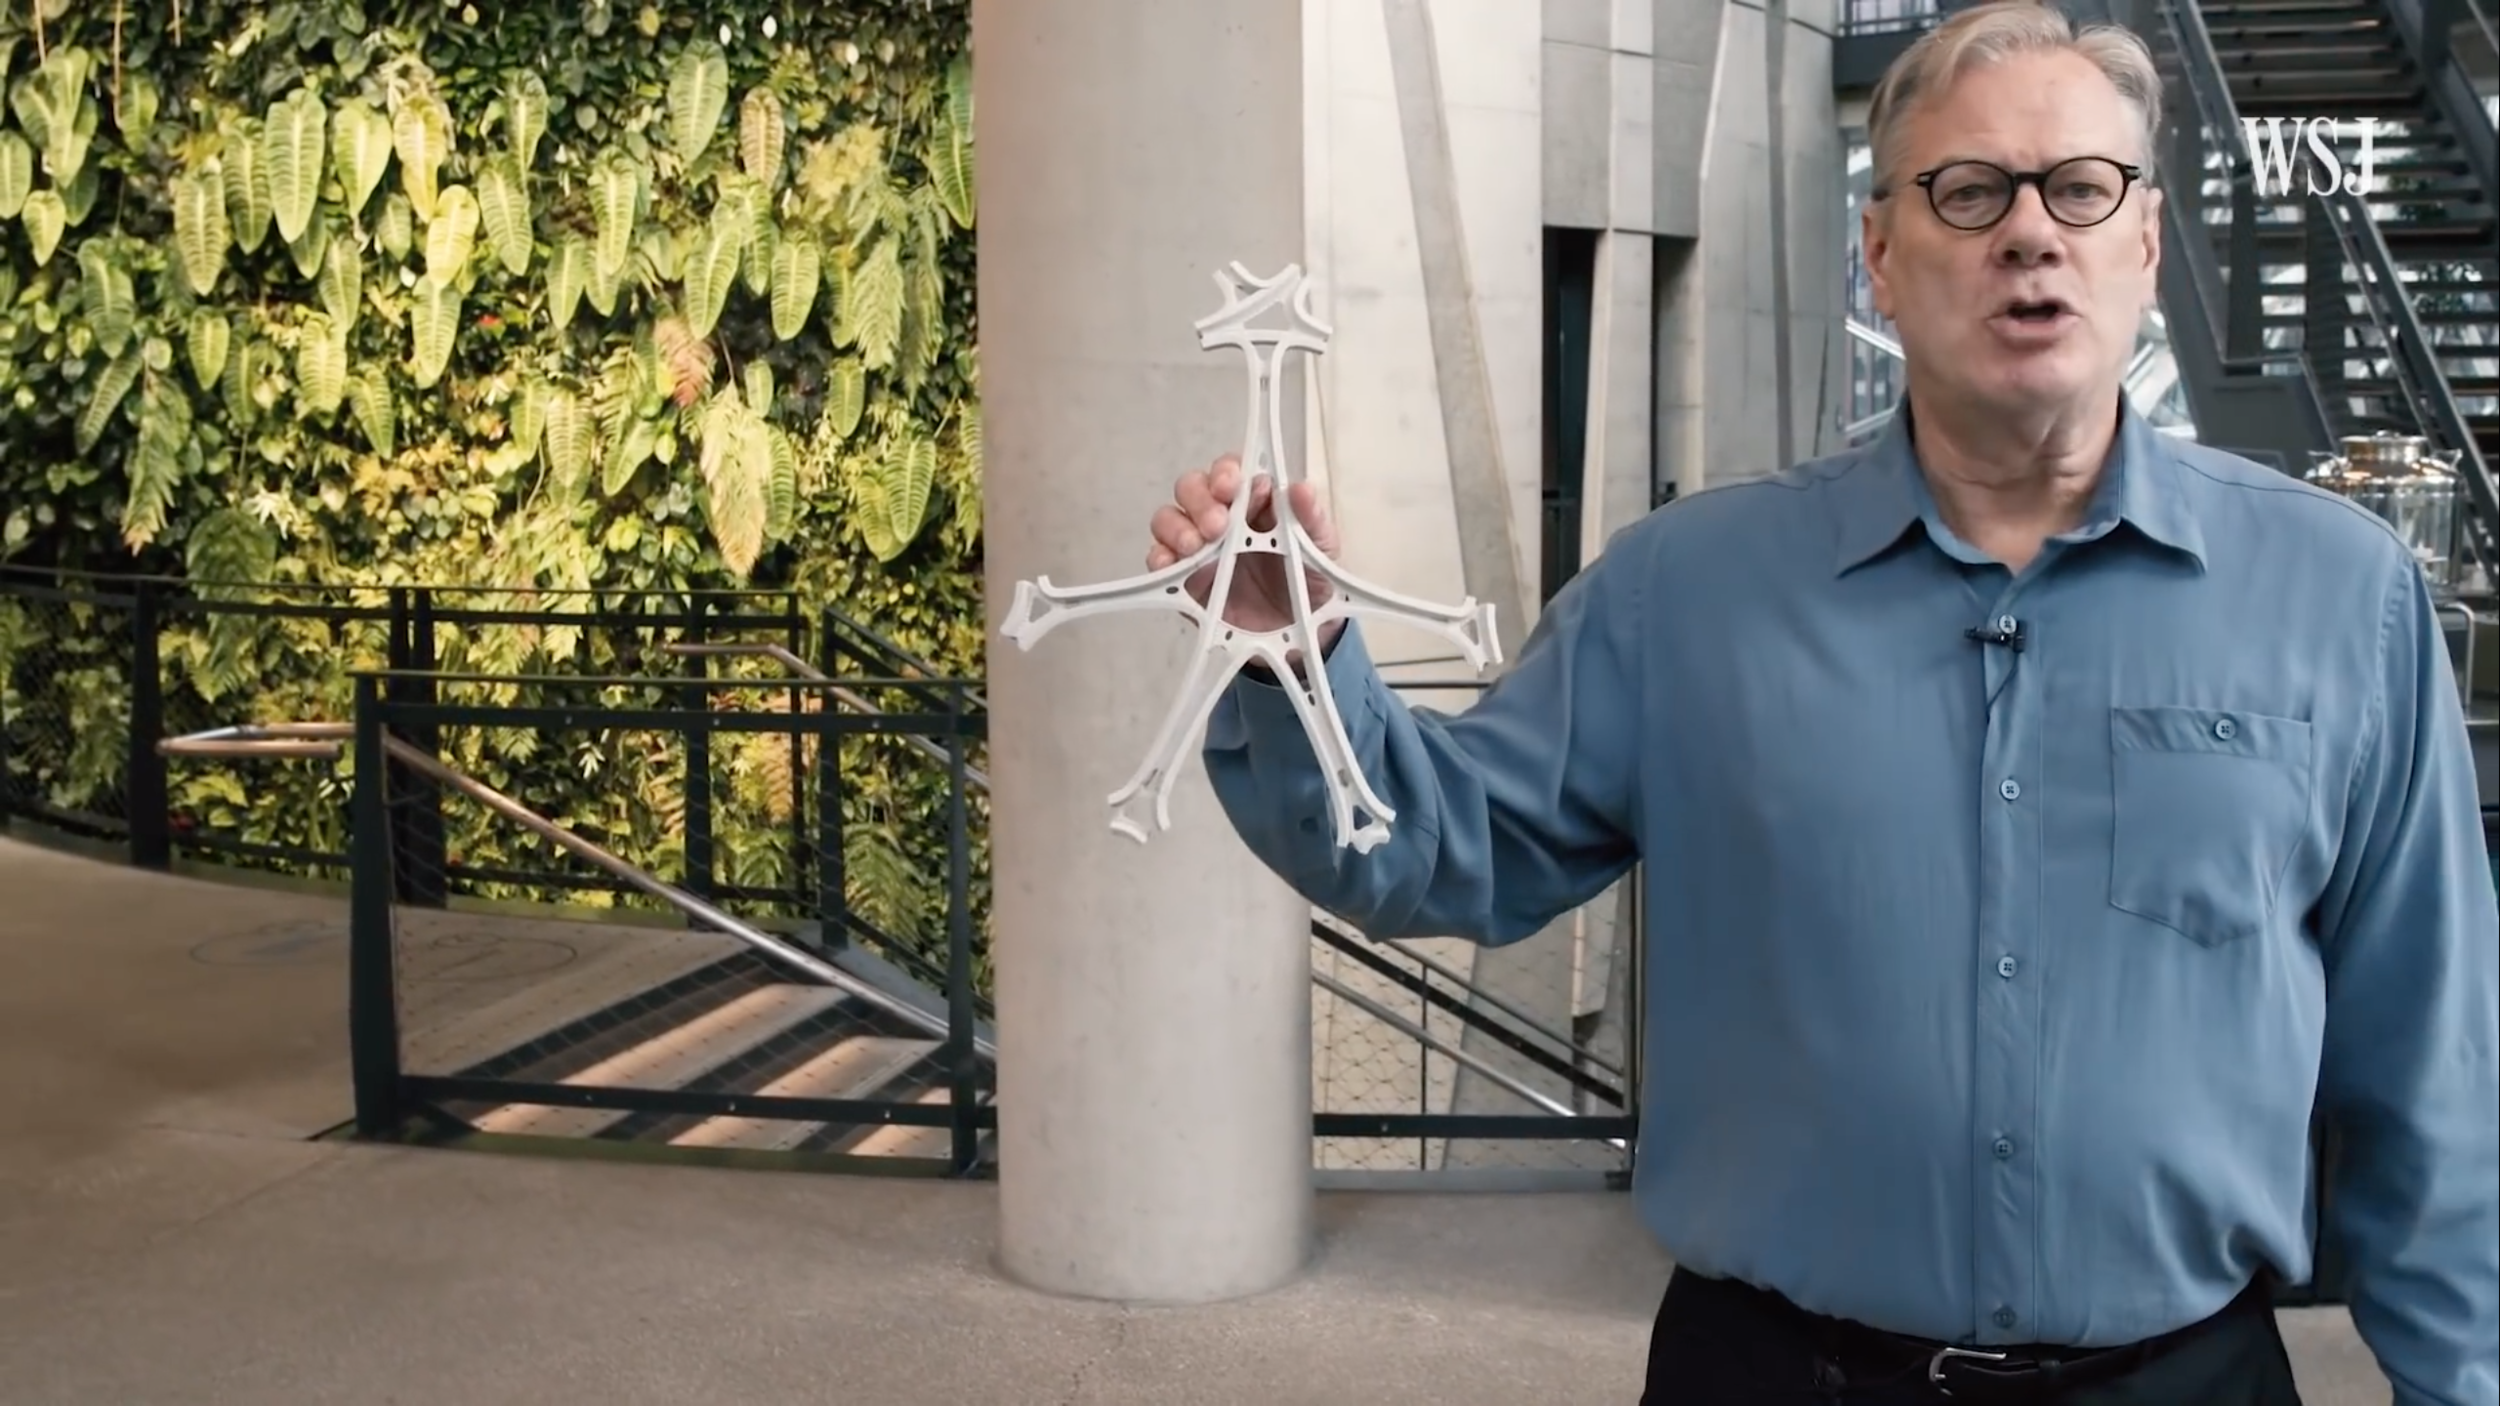

Finally, the small scale 3d-printed prototypes are then realized as 1:1 full scale interlocking steel structural parts:


The space is designed to be an alternate environment for amazon executives and employees, giving them a natural green space to work from — all in the sake of helping spark productivity, creativity, and reducing stress:


The Maker's Field Guide: Master Maker Edition is now available!
More on laser cutting, 3d printing, and many more rapid prototyping techniques and more can be found in The Master Maker edition of The Maker's Field Guide. Now available as both a digital ebook or premium quality photography book through the online store.

How Modern Toys are Made (McFarlane Toys' Best Kept Secrets)
The secret of the modern toy development, prototyping, and production process as presented by Mile Deep Productions. In this day and age of Z-Brush digital sculpting and super fast 3d printing technology, it’s surprising to see that some things just don't change — one being craftsmanship. As discussed in an early post about Oakley’s professional model shop facility and heavily reliance (still) on hand craftsmanship, the artist’s touch is the of quality, refined taste, and layered emotional appeal that’s very difficult to replace with a machine or 3d printer. Most of the materials used in this film include Super Sculpey polymer clay, wire end clay tools, RTV silicone molds, urethane casting resins, and other tools that are standard in the movie prop / special effects industry.
Enjoy!
The Maker's Field Guide: Book & Ebook Available Now
These tips and more can be found in The Maker's Field Guide — the most advanced guide to making anything on the planet. Written from a professional industrial designer with over 7+ years experience in the industry. Now available as digital ebook or premium quality coffee table book through the online store!
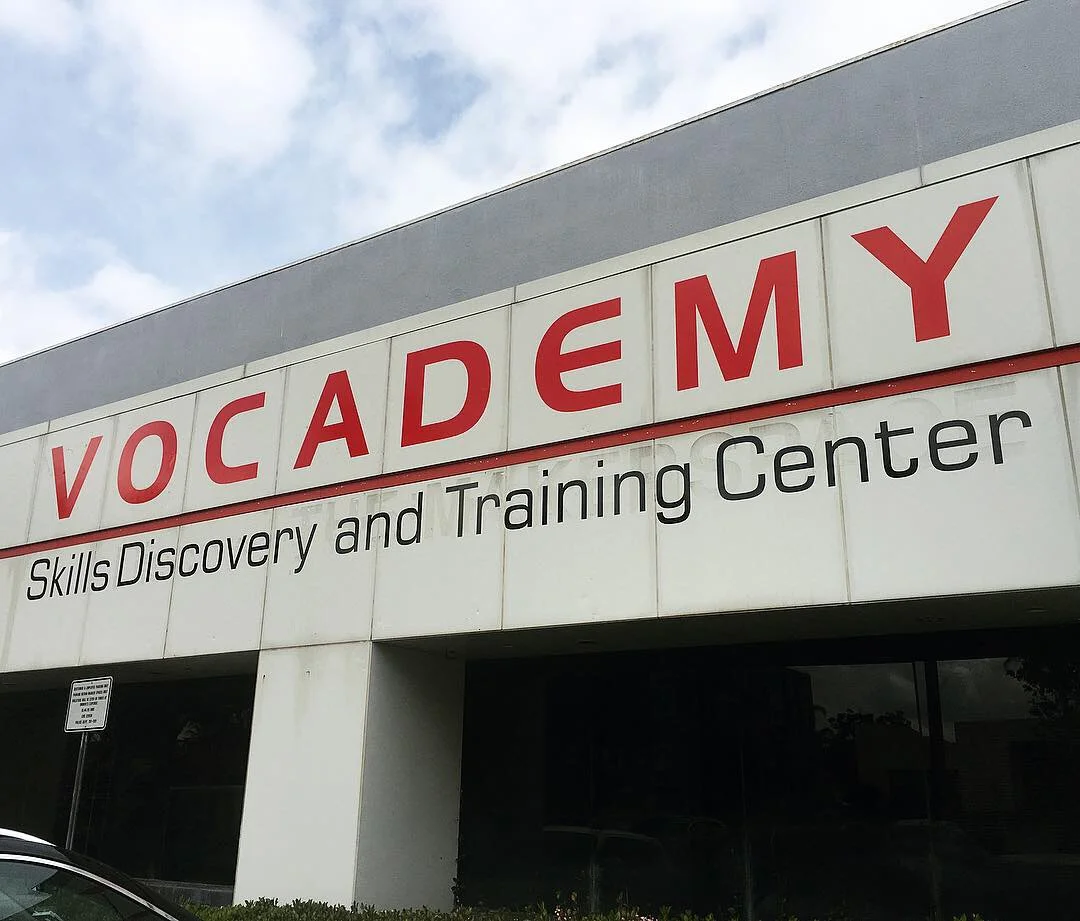
Visit to the Vocademy Makerspace & Training Center (Riverside, California)
A selection of photos during a recent visit to Vocademy’s Makerspace & technical skills training center in Riverside, CA.
A selection of photos during a recent visit to Vocademy’s Makerspace & Training Center in Riverside, CA.
Not only does Vocademy have an impressive array of machines available, they also offer classes for hands-on (or vocational) training.


The Maker's Field Guide: Book & Ebook Available Now
These tips and more can be found in The Maker's Field Guide — the most advanced guide to making anything on the planet. Written from a professional industrial designer with over 7+ years experience in the industry. Now available as digital ebook or premium quality coffee table book through the online store!

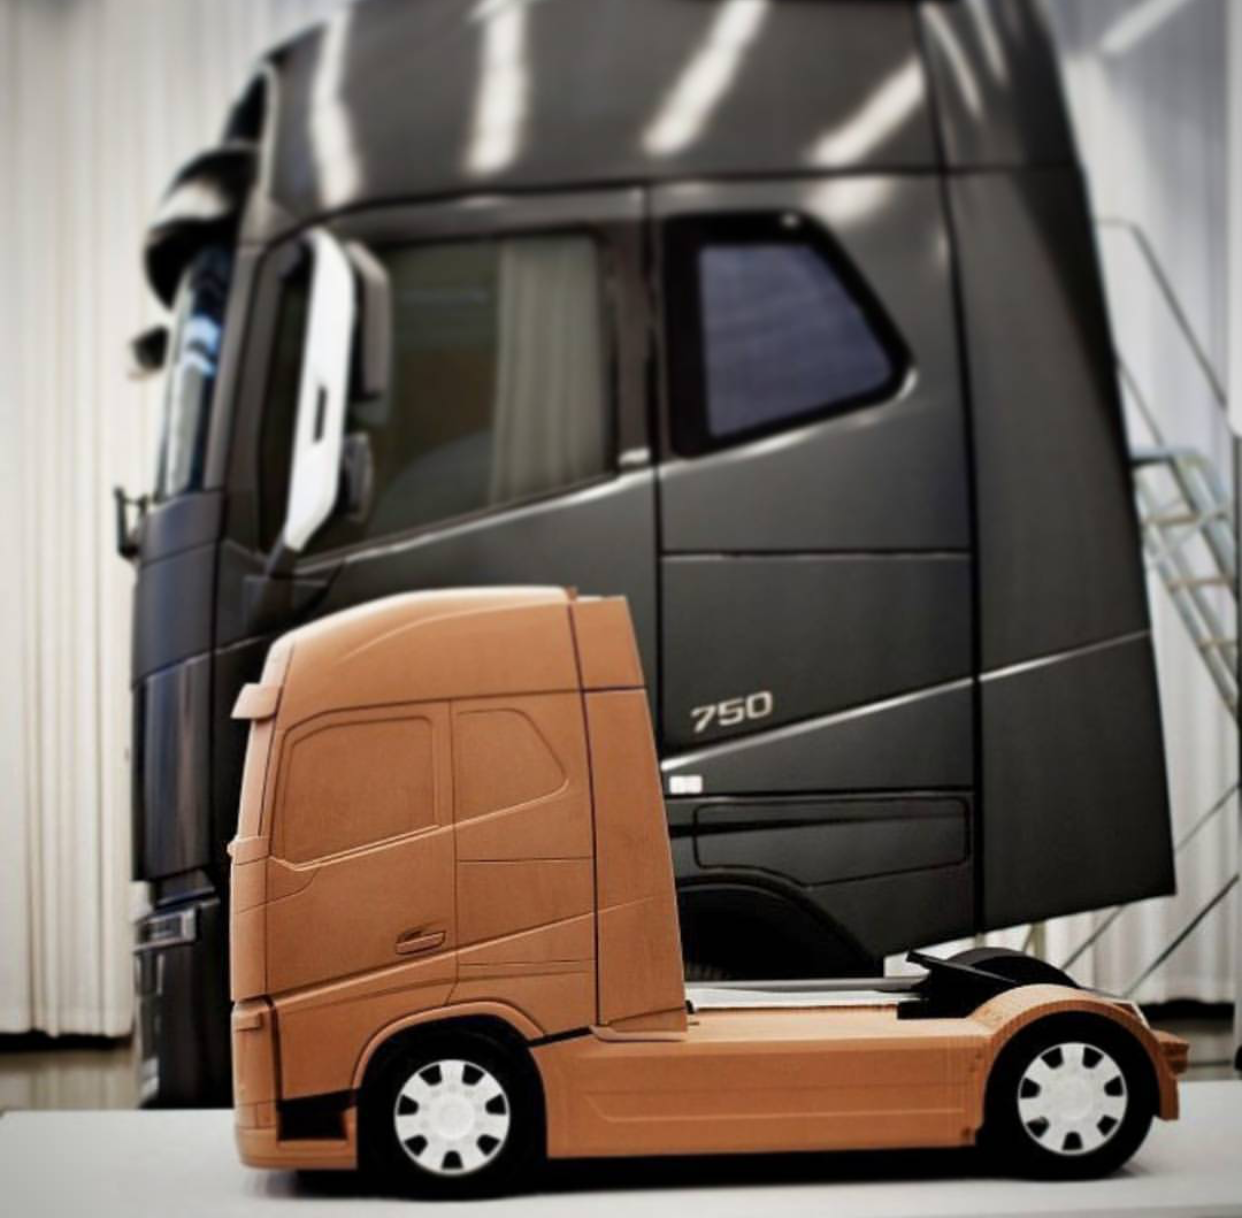
Inside Oakley's TOP SECRET Prototype Facility (aka The 'O' Model Shop)
Inside Oakley’s super secretive in-house model shop facility, where a high level low tech / high tech and model maker / designer team integration is crucial to the product develop cycle.
Inside Oakley’s super secretive in-house model shop facility showcases a perfect example of where a high level low tech / high tech and model maker / designer team integration is crucial to the product develop cycle. Although the speed of 3d printers and additive manufacturing have become a factor of life, there still exists a true artistry and craftsmanship involved in building high-level presentation models for internal team evaluation. Talk to any hardcore designer working in the industry and they will agree — the high touch, emotional, and tactile sensibilities that go hand in hand with TRUE skill in fine craftsmanship can fully never be replaced — despite by whatever ‘latest and greatest’ new technologies may make their way into the equation.
The full HYPEBEAST feature is available here: Finding Purpose in Product Design with Oakley Eyewear


“We create beautiful designs and to realize them, we have to build them three-dimensionally. Our industrial designers have drawings that our modeling team will ultimately build. They take two-dimensional drawings and create three-dimensional forms. They do it both traditionally — by hand and sculpting — as well as in a 3d space, of CAD and 3d printing. We take that 3d model, evaluate it, and the designers and modelers continue to iterate and interact, so that the product actually fulfills what it is meant to do.” - Peter Yee, VP of Design


*All content featured in this post is shown strictly for educational learning purposes only. All image rights belong to their respective owners.

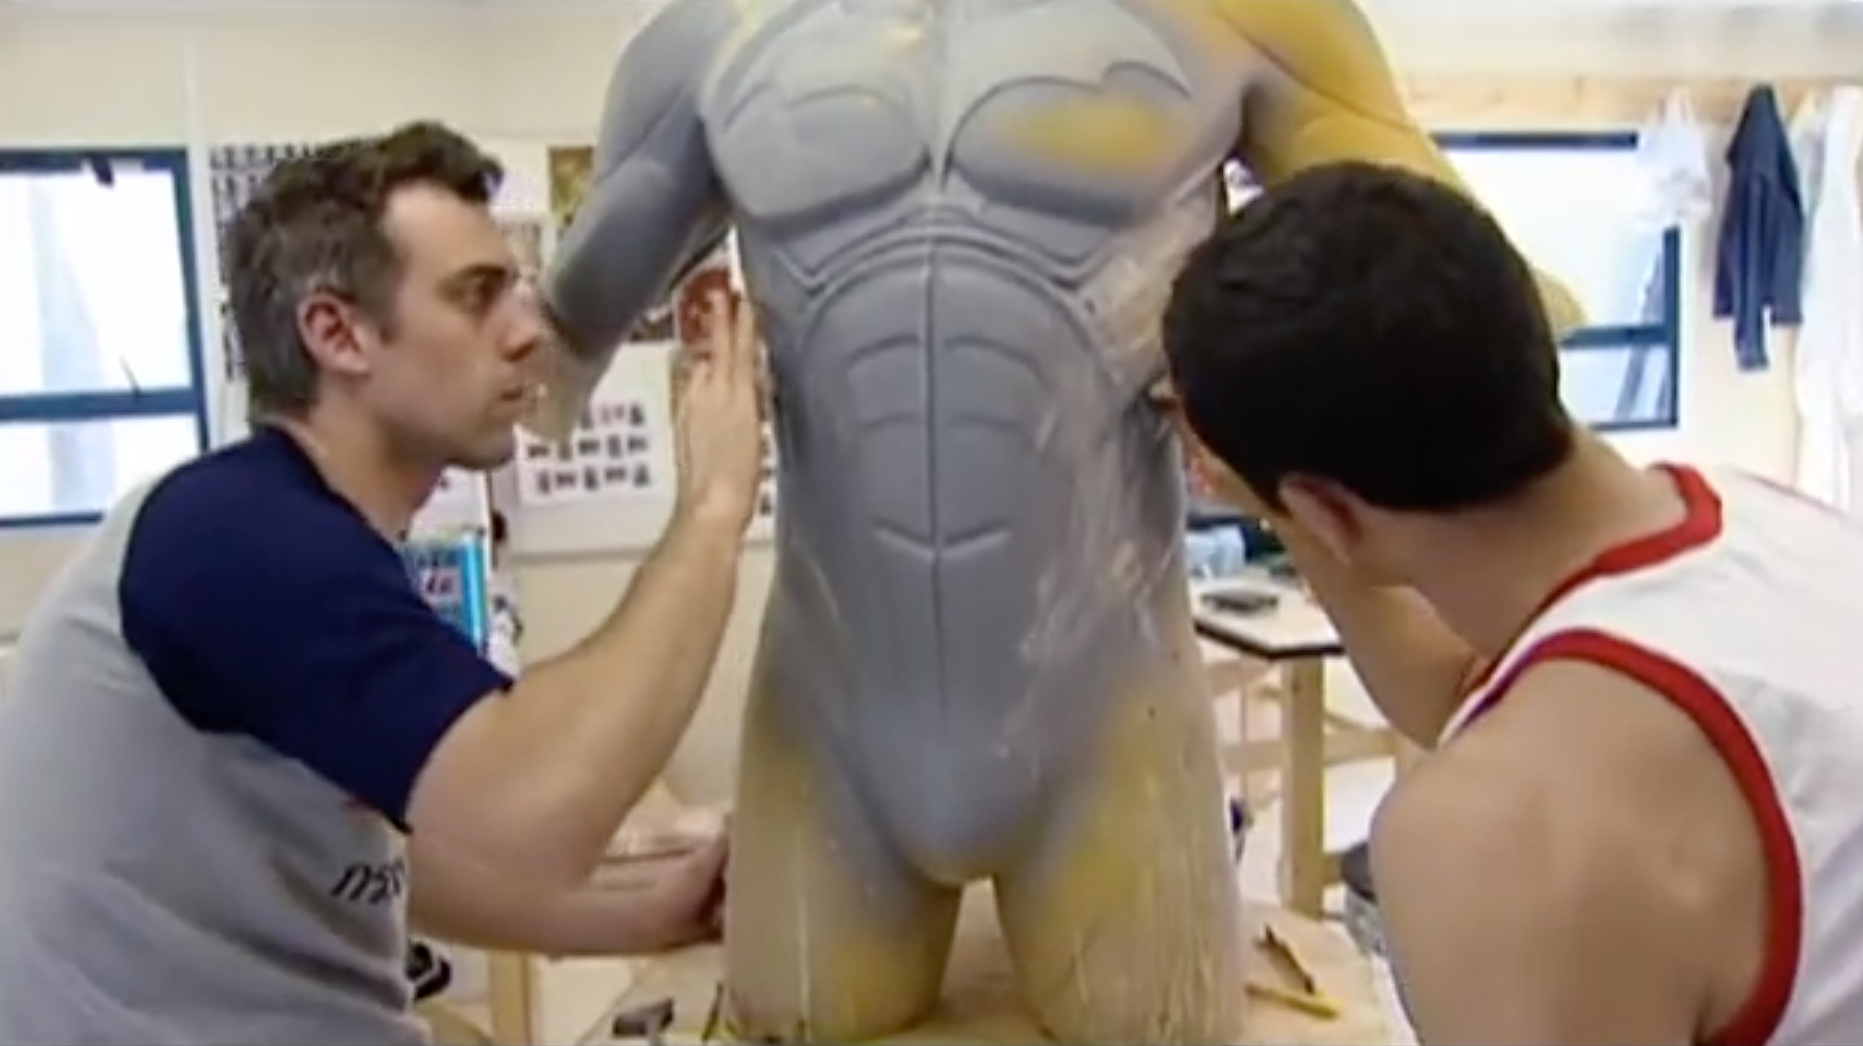
Making of the Batman Batsuit : Behind the Scenes of a Hollywood Effects Shop
A look into the model shop behind Batman Begins, reveals a highly sophisticated combination of industrial design, foam latex prosthetics, model making, costume design, and technical apparel / fashion design (softgoods or “cut & sew”). Maker’s Rejoice!
I have always had tremendous respect for the amount of labor and quality work that has gone into Hollywood blockbuster films. Even in today’s digital effects world, practical effects lead by teams of propmasters and model makers continue to give an air of believability that simply cannot be simulated through SFX. There’s just nothing like the real thing, right? Throughout the years, I have personally gravitated towards films that lean heavily on the use of practical effects — such as Terminator 2, Iron Man (Stan Winston / Legacy Studios), Oblivion, and Batman.
A look into the model shop behind Batman Begins, reveals a highly sophisticated combination of industrial design, foam latex prosthetics, model making, costume design, and technical apparel / fashion design (softgoods or “cut & sew”):
Clay Sculpting
Lifecasting
Bondo Auto Body Filler
RTV Molding & Casting
Fiberglass Composites
Spray Painting
Industrial Sewing
Maker’s Rejoice!

Clay Sculpting:

Bondo Auto Body Filler finishing:

Lifecasting:


RTV Molding & Casting (foam latex):


Fiberglass Composites:


Spray Painting:

Industrial Sewing:


*All content featured in this post is shown strictly for educational learning purposes only. All image rights belong to their respective owners.
The Maker's Field Guide: Book & Ebook Available Now
These tips and more can be found in The Maker's Field Guide — the most advanced guide to making anything on the planet. Written from a professional industrial designer with over 7+ years experience in the industry. Now available as digital ebook or premium quality coffee table book through the online store!

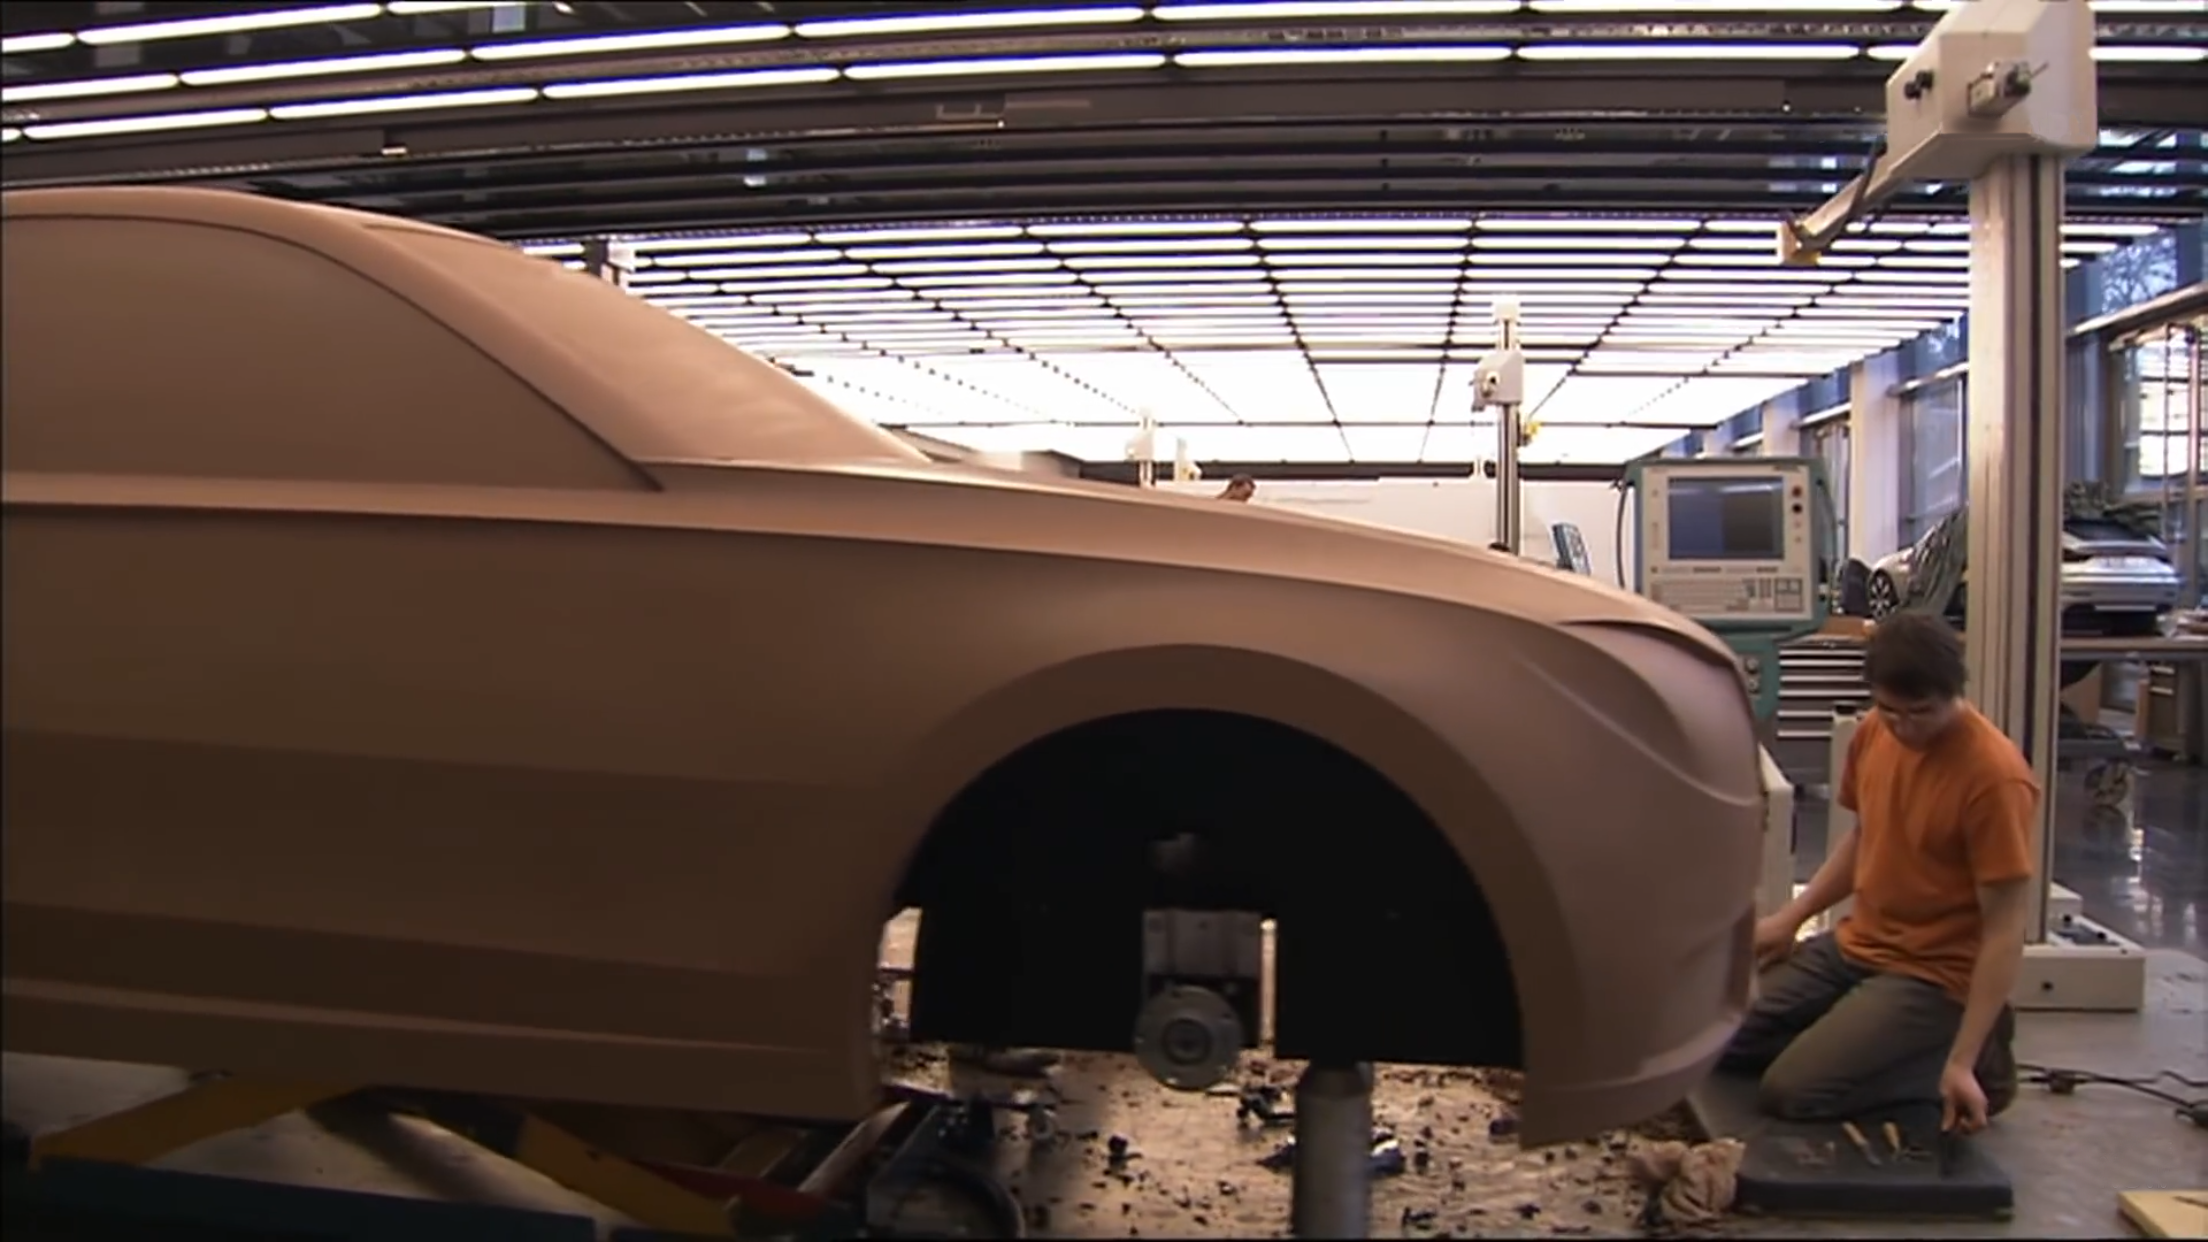
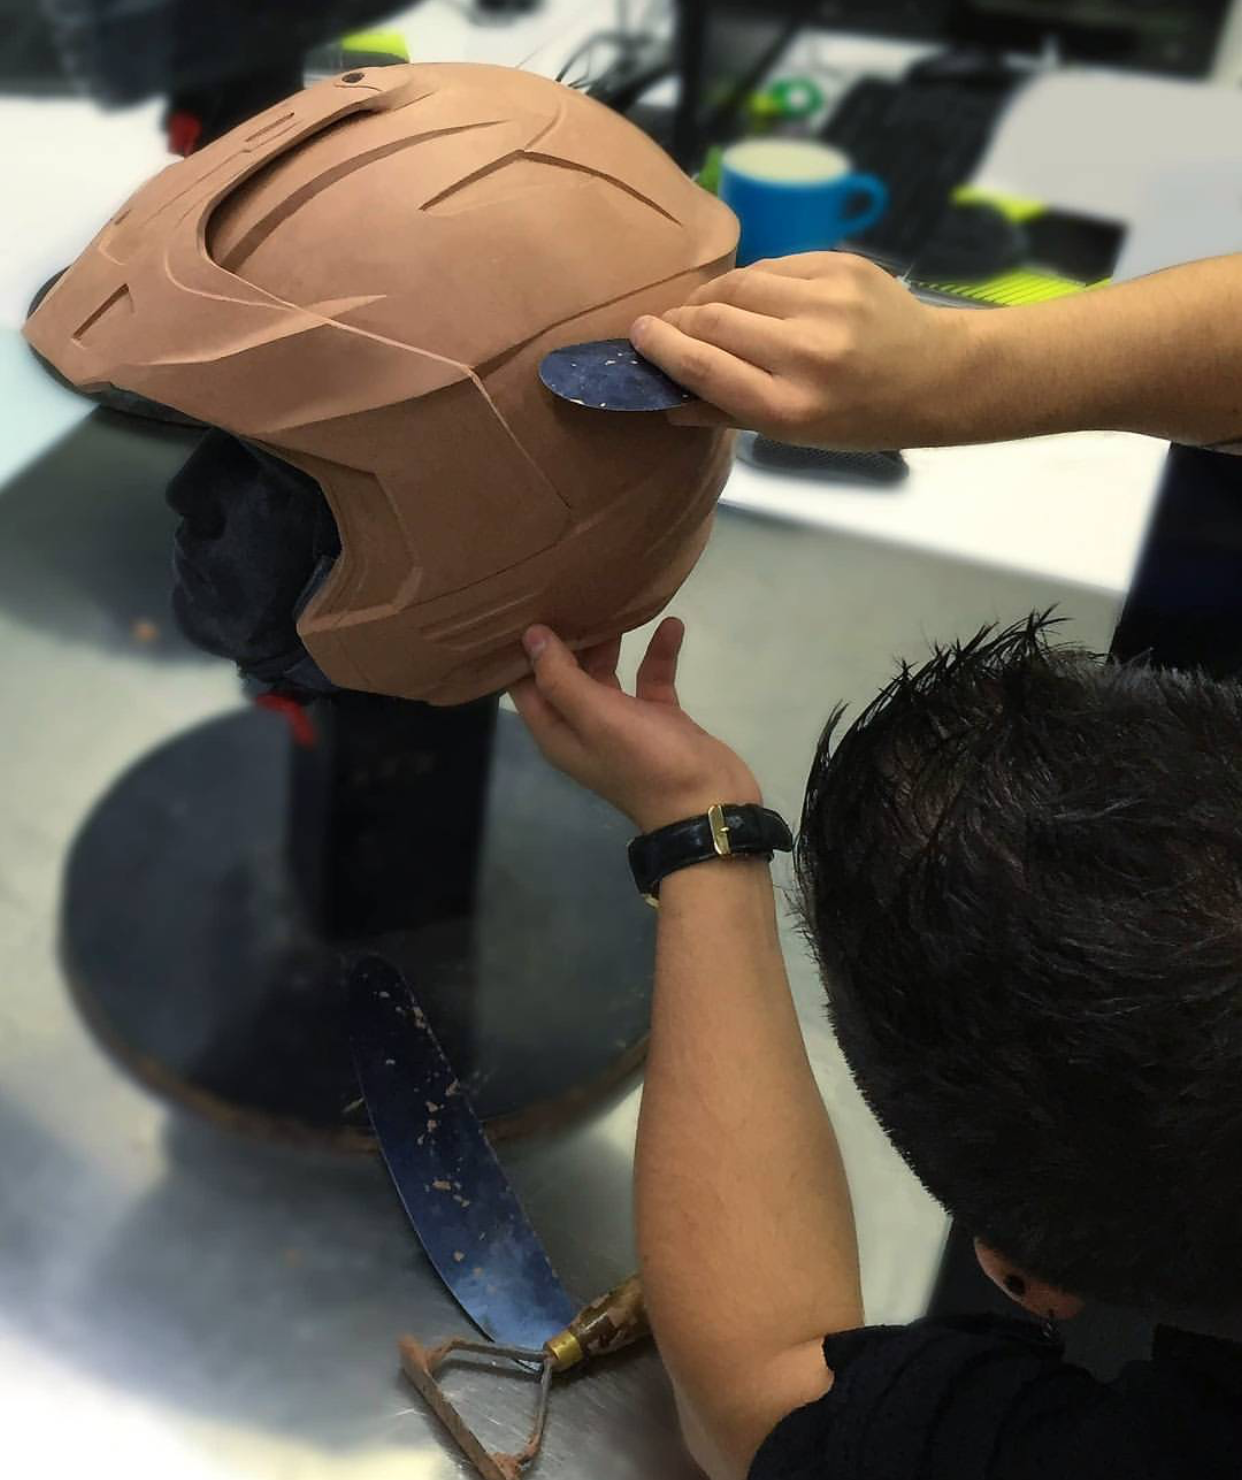
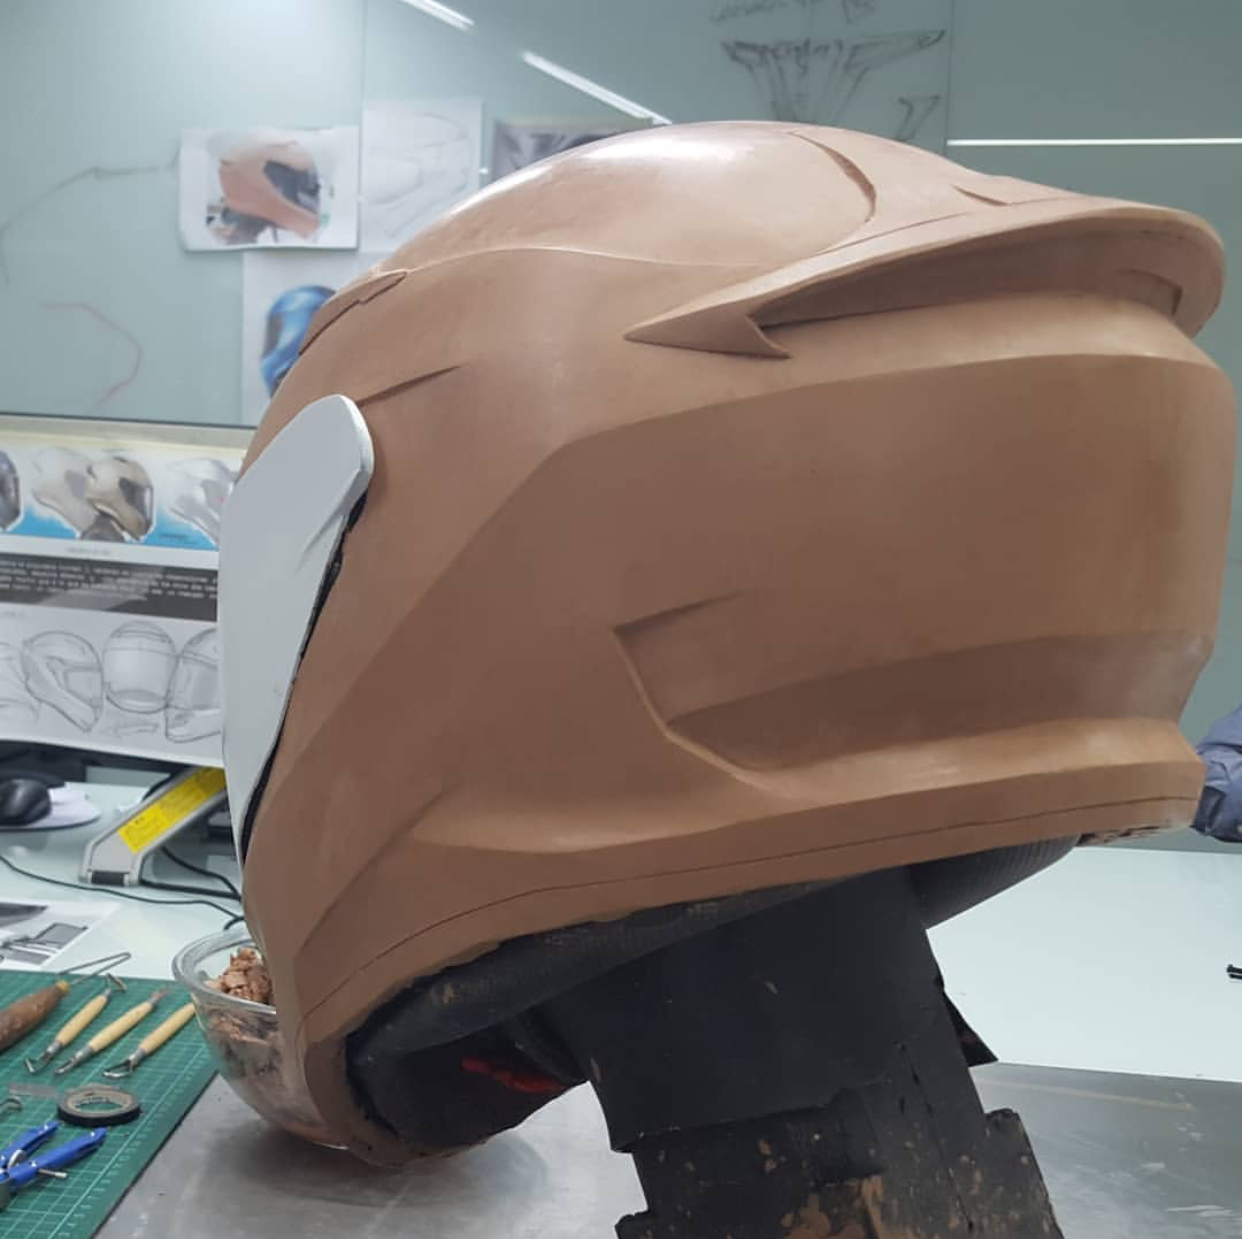
Why Clay is here to stay : Clay Modeling in Automotive & Industrial Design
Even with advanced 3D printing and VR technologies, make no mistake — clay is here to stay. Find out why in this in-depth article.
Why is clay still being used in the real world of design? Is clay just a dinosaur, bound to be replaced by more modern tools?
Virtual Reality and 3D printing has changed the game on how designers, engineers and developers react with their physical world. Such as the VR motorcycle prototype evaluation by ARCH motors, allowing design teams to evaluate a design in virtual space even before a physical model is made:


Well, although the world has becoming increasingly digital based, where we interface now with design models using 3D CAD and even virtual reality headsets — make no mistake, clay is here to stay.
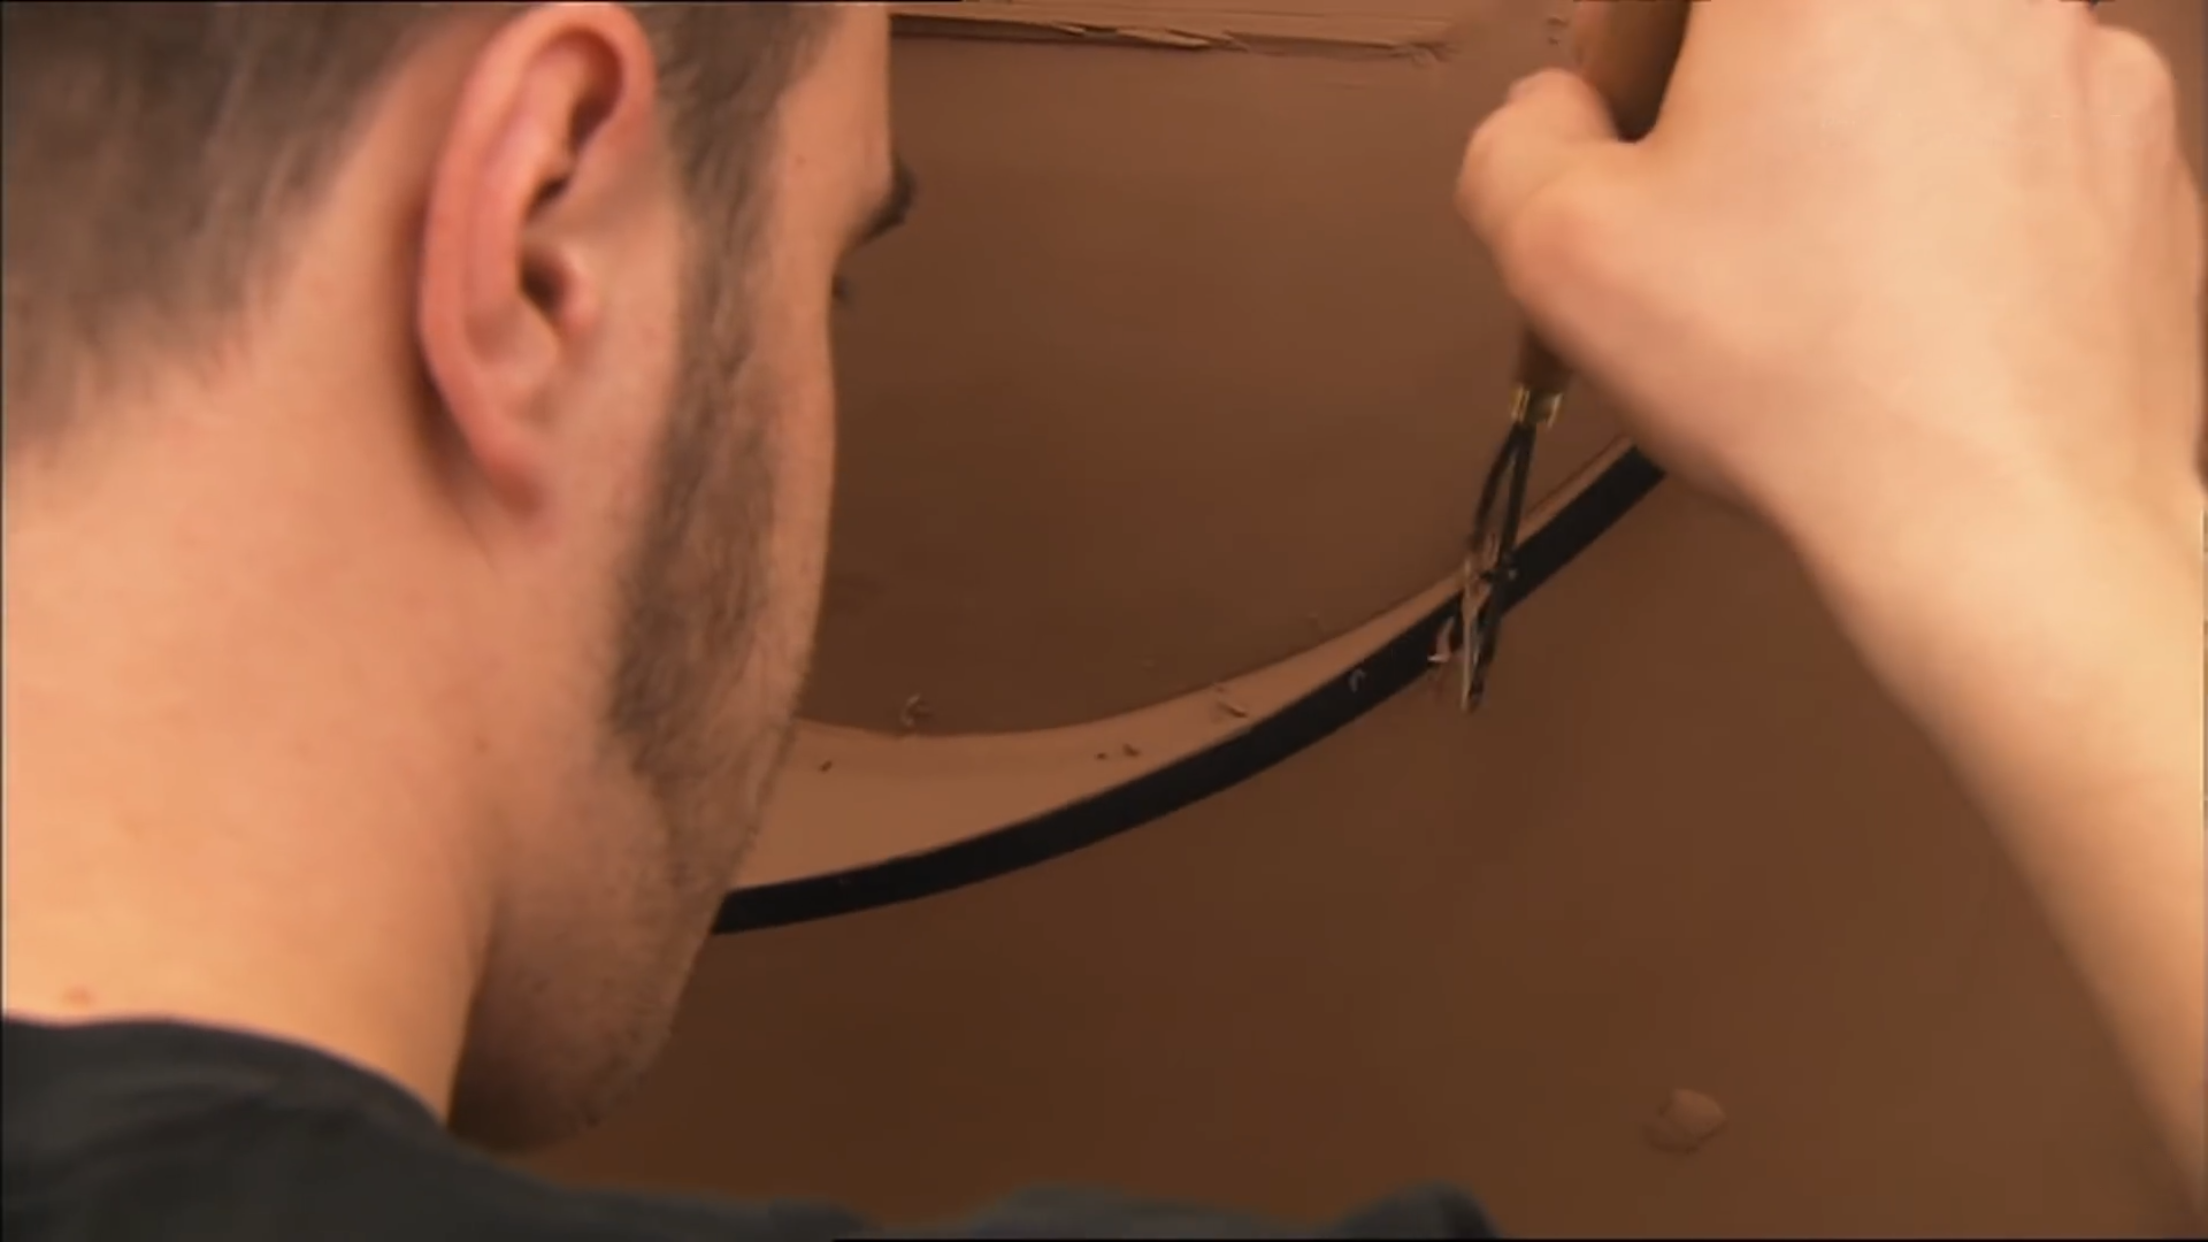
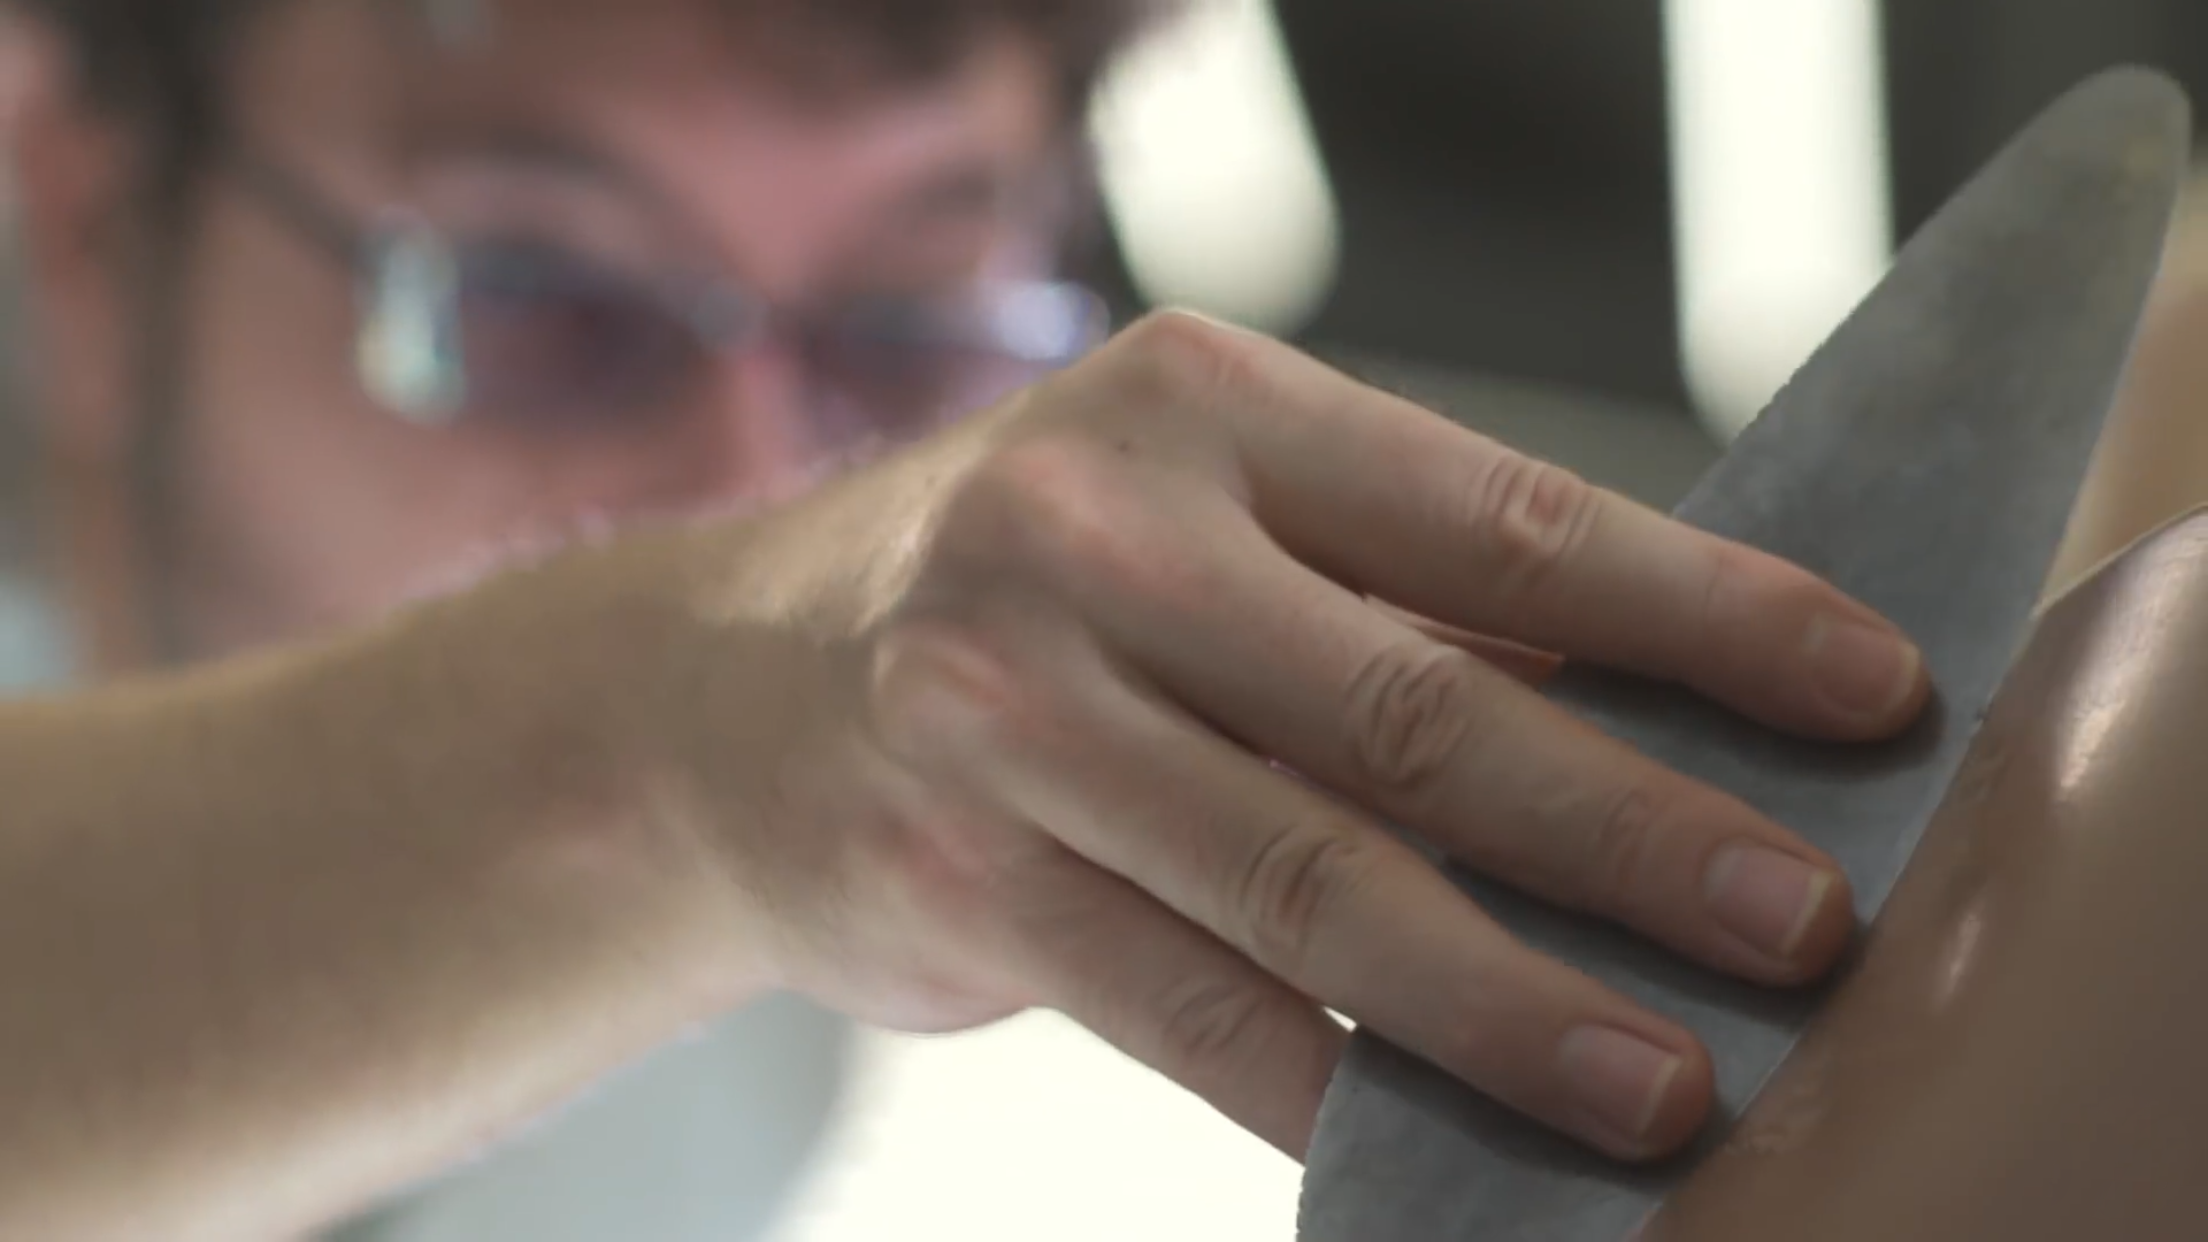
A few of my design colleagues work in the automotive industry, one of them for McLaren Automotive in the UK. He even attests to the power of clay as a designer. There simply just isn't a way to physically see how a surface of a form will react with light, shadow, and touch unless you have the chance to touch it in person. This is where clay shines, the ability to physically massage every line and control every suface is where clay is particularly powerful. There are full-time automotive clay modelers (very well paid, I might add) working in Advanced Design studios across the world, who's job it is to translate a designer's sketch into a 3D, real car. Working in clay gives modelers and designers a more tactile, fingertip feel for the design that simply cannot be replaced by any other medium — and is ideal for sorting out optimal ergonomics. Later, these full 1:1 car models can then be scanned into 3D CAD, and converted into 3D production designs for production (composite tooling, aluminum sheet dye stamping, etc.) :


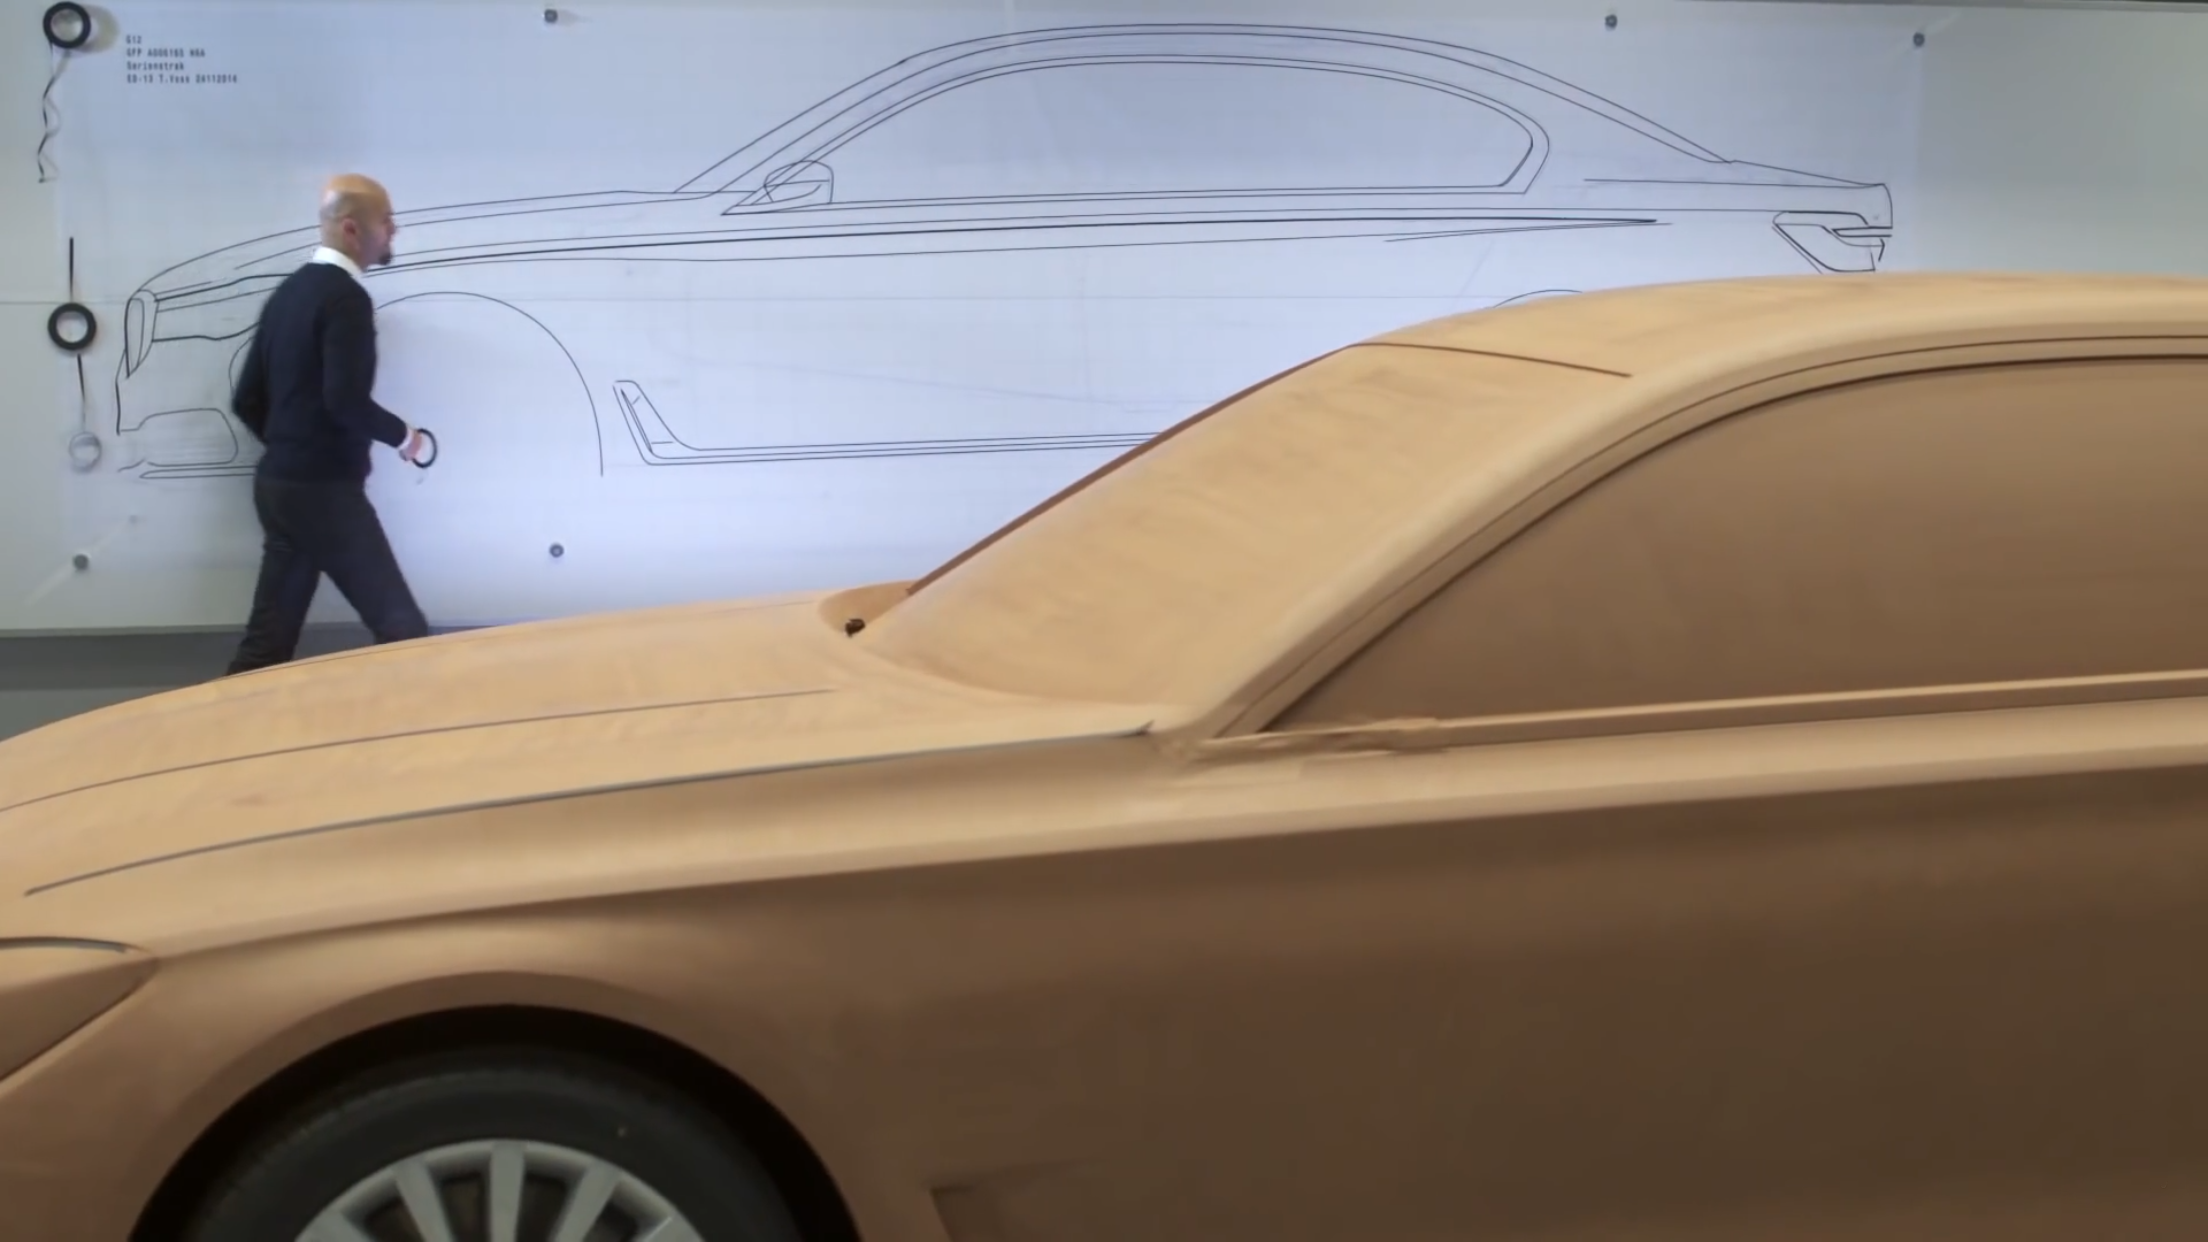
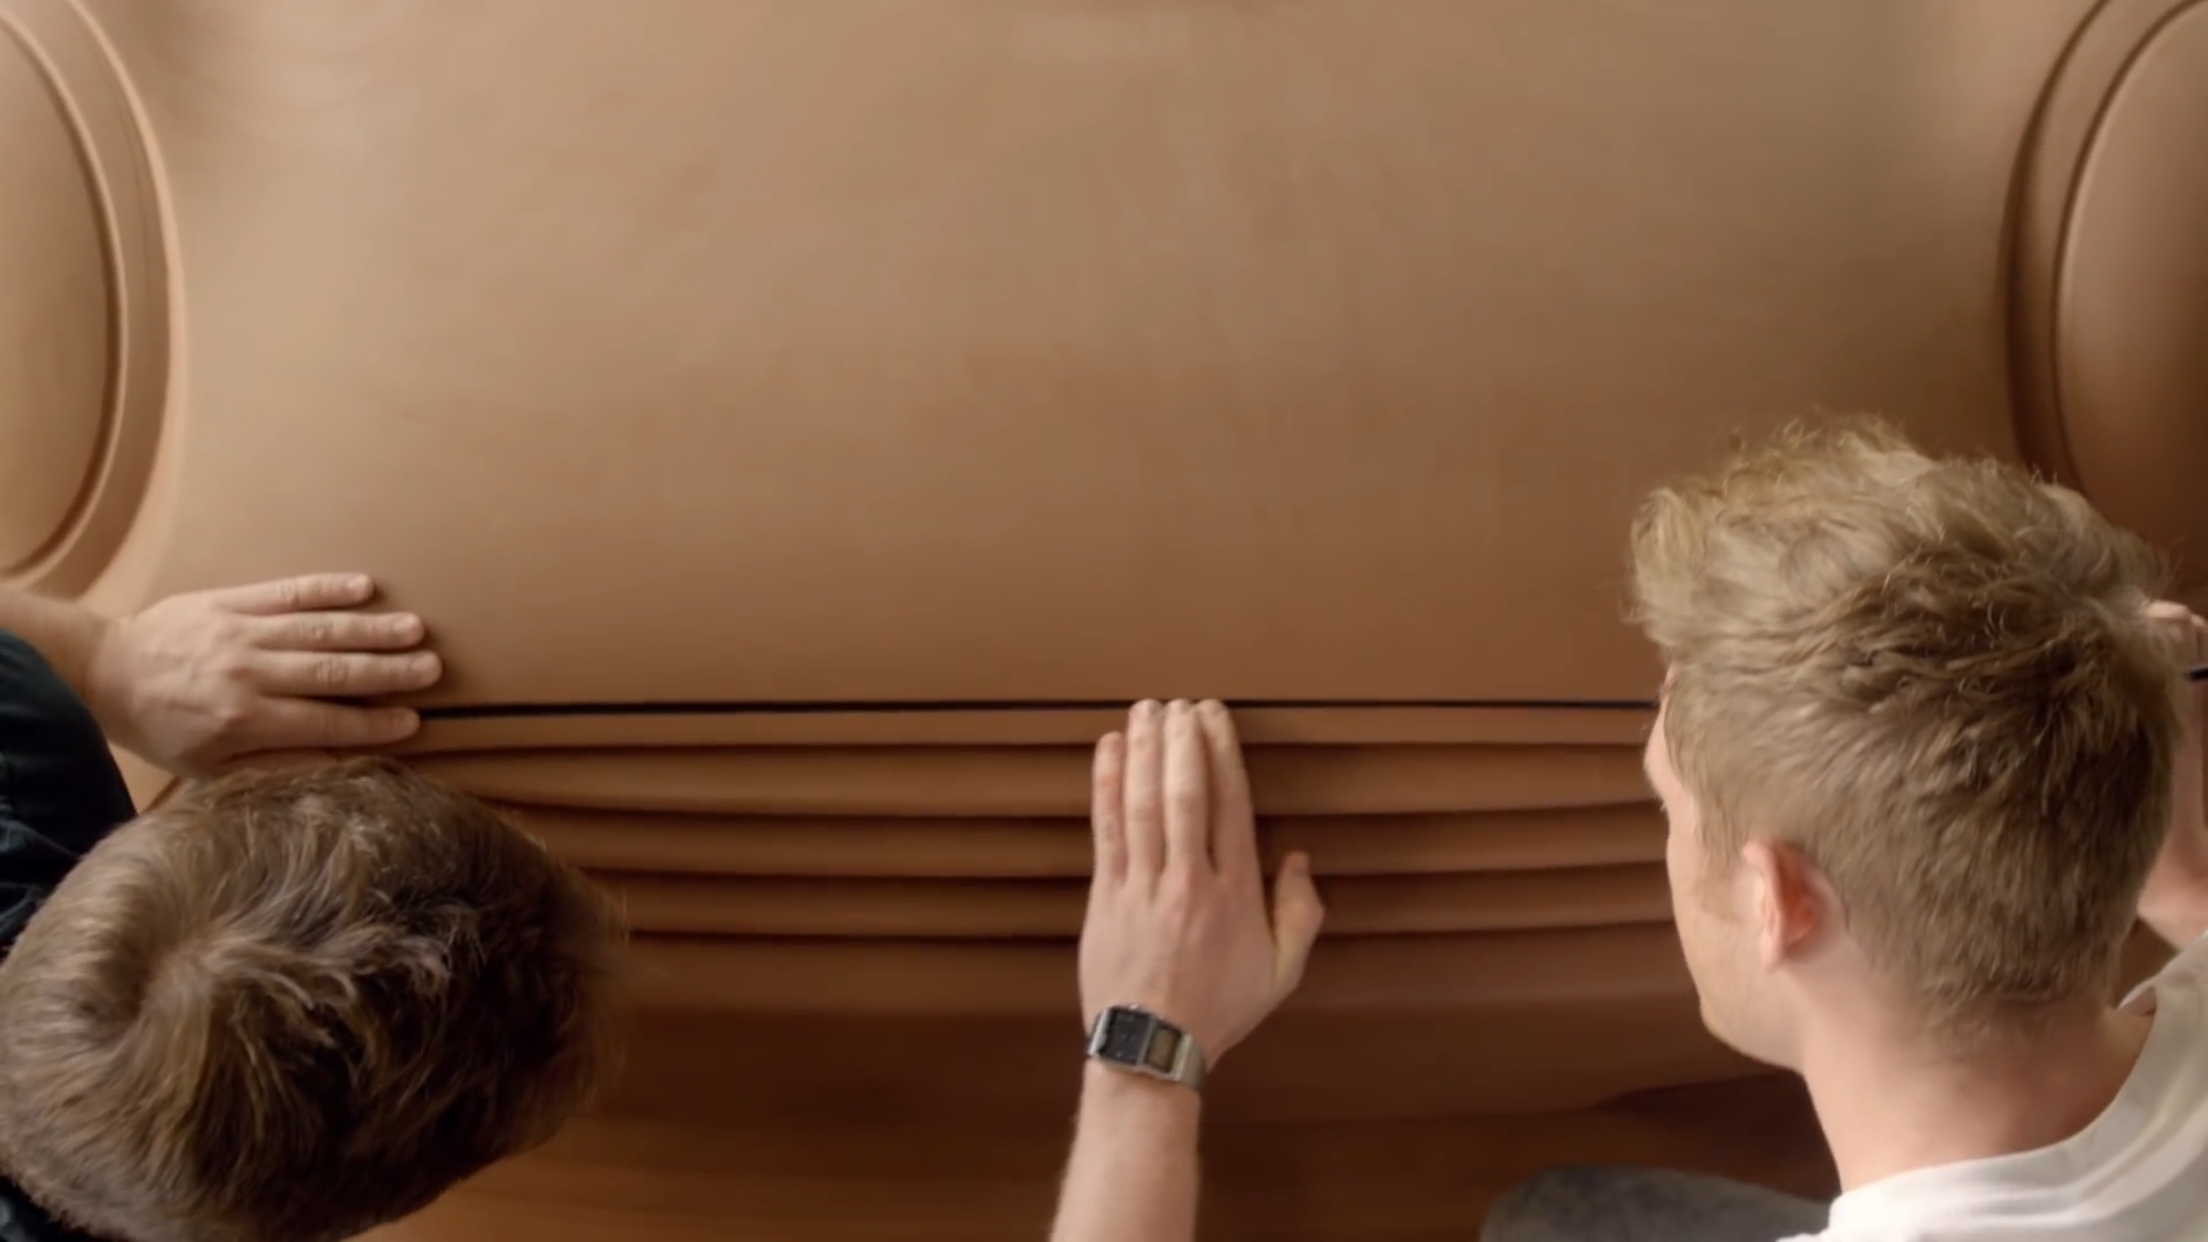

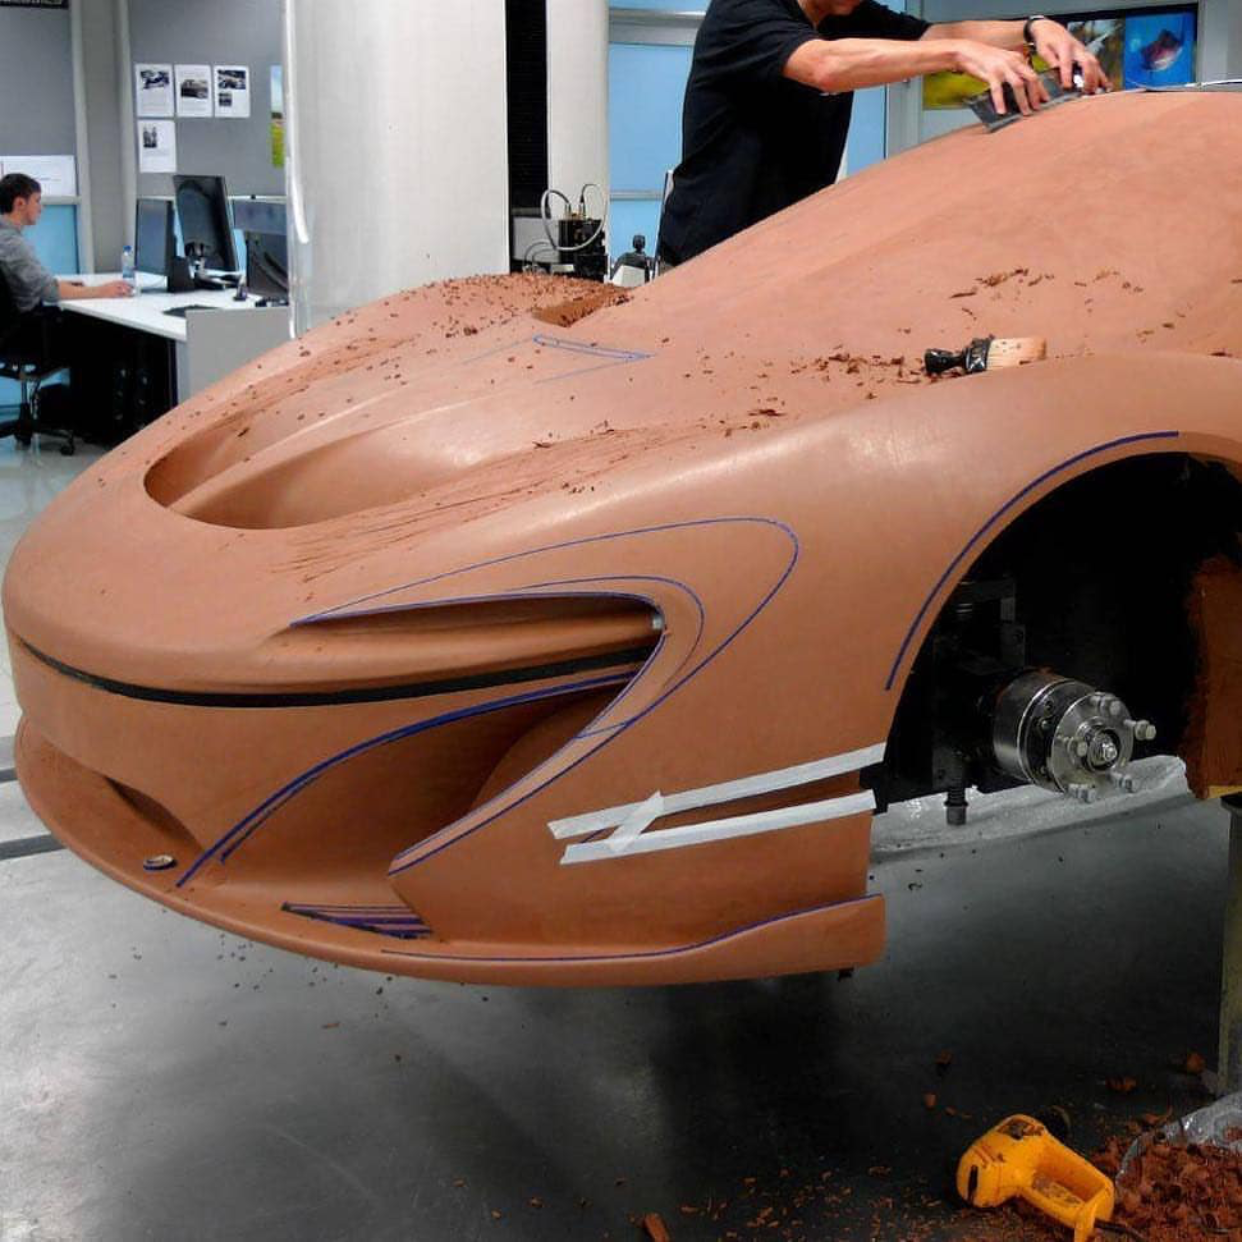
One useful advantage of clay is it can be finished and painted to resemble a realistic prototype. This is the process advanced R&D studios use when creating concept cars at key automotive design shows, such as LA Auto Show and Geneva Auto Show in Europe:


Industrial Clay is an extremely versatile tool, with many wide-ranging uses for the medium. In addition to car modeling, clay is still being used widely in highly sculptural Industrial Design product applications (i.e. protective helmets, eyewear, etc.), motorcycles & bicycle design, and concept model making in the entertainment / special effects industry:


Below is a great video by Business Insider about why some car companies still use clay models that cost up to $650k (yes, that’s US dollars).
In Summary: Clay is a beautifully nuanced, emotive tool that’s here to stay for hundreds, if not thousands of years to come!
*All content featured in this post is shown strictly for educational learning purposes only. All image rights belong to their respective owners.

The Maker's Field Guide: Book & Ebook Available Now
These tips and more can be found in The Maker's Field Guide — the most advanced guide to making anything on the planet. Written from a professional industrial designer with over 7+ years experience in the industry. Now available as digital ebook or premium quality coffee table book through the online store!
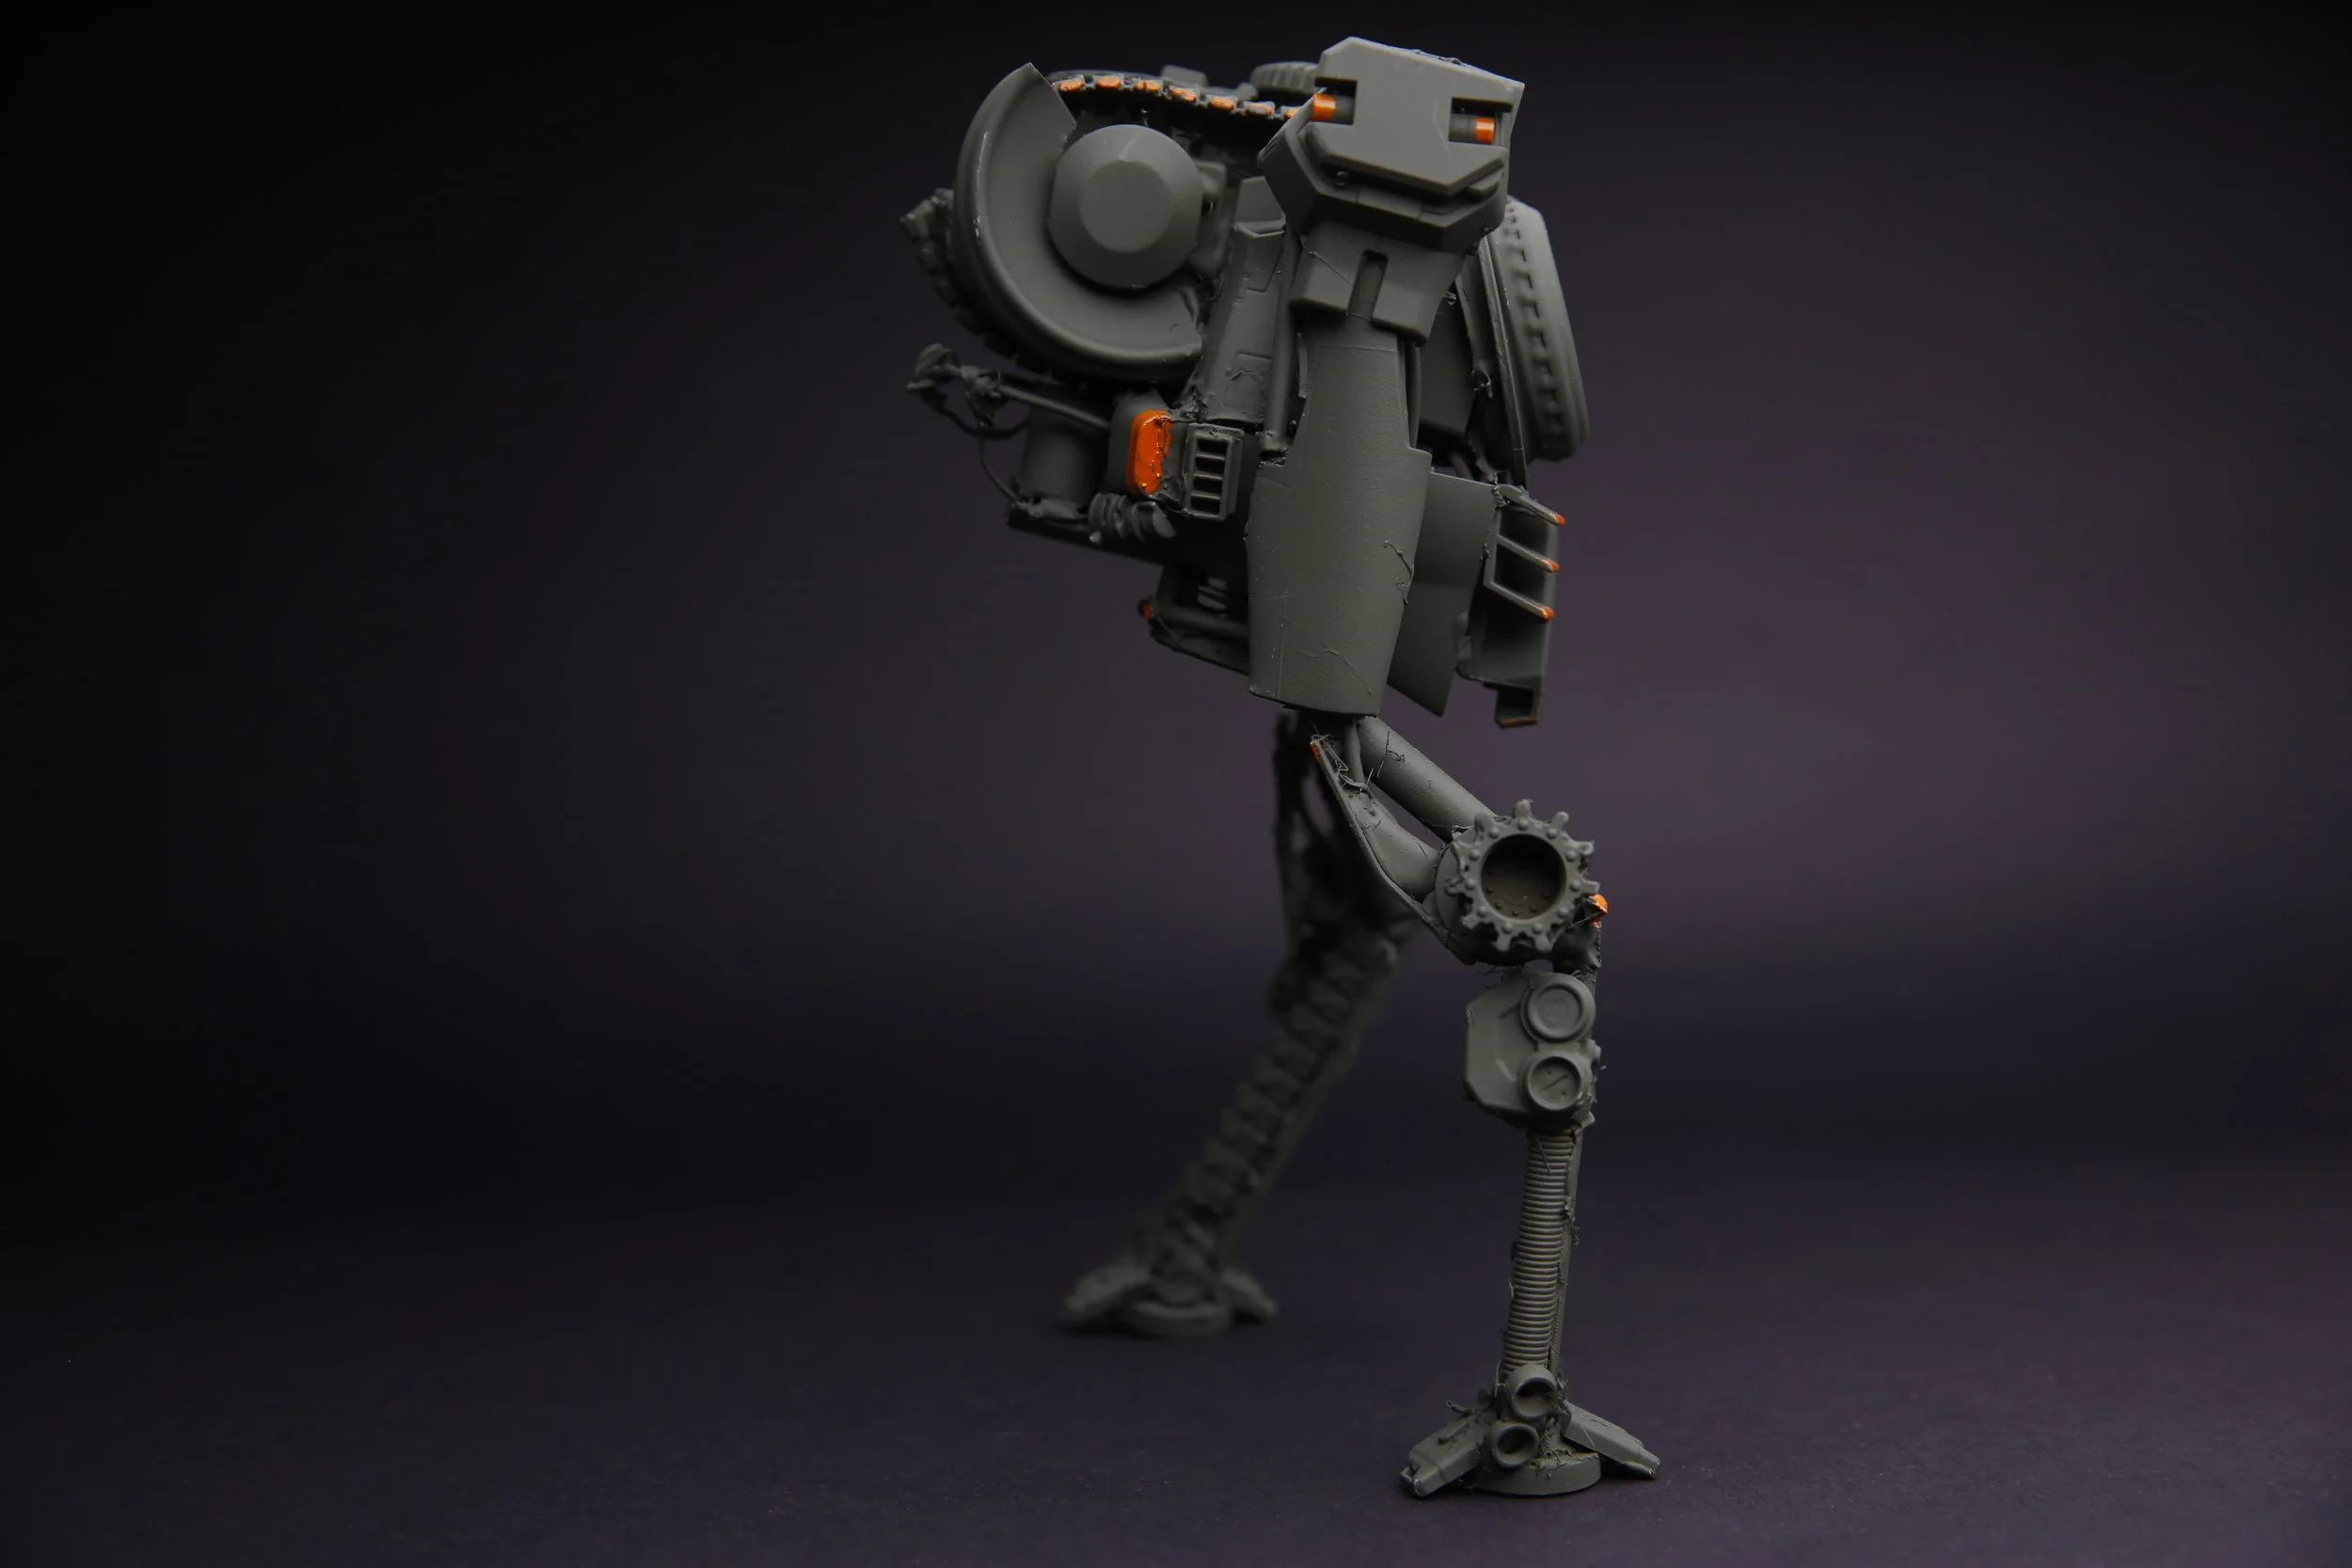
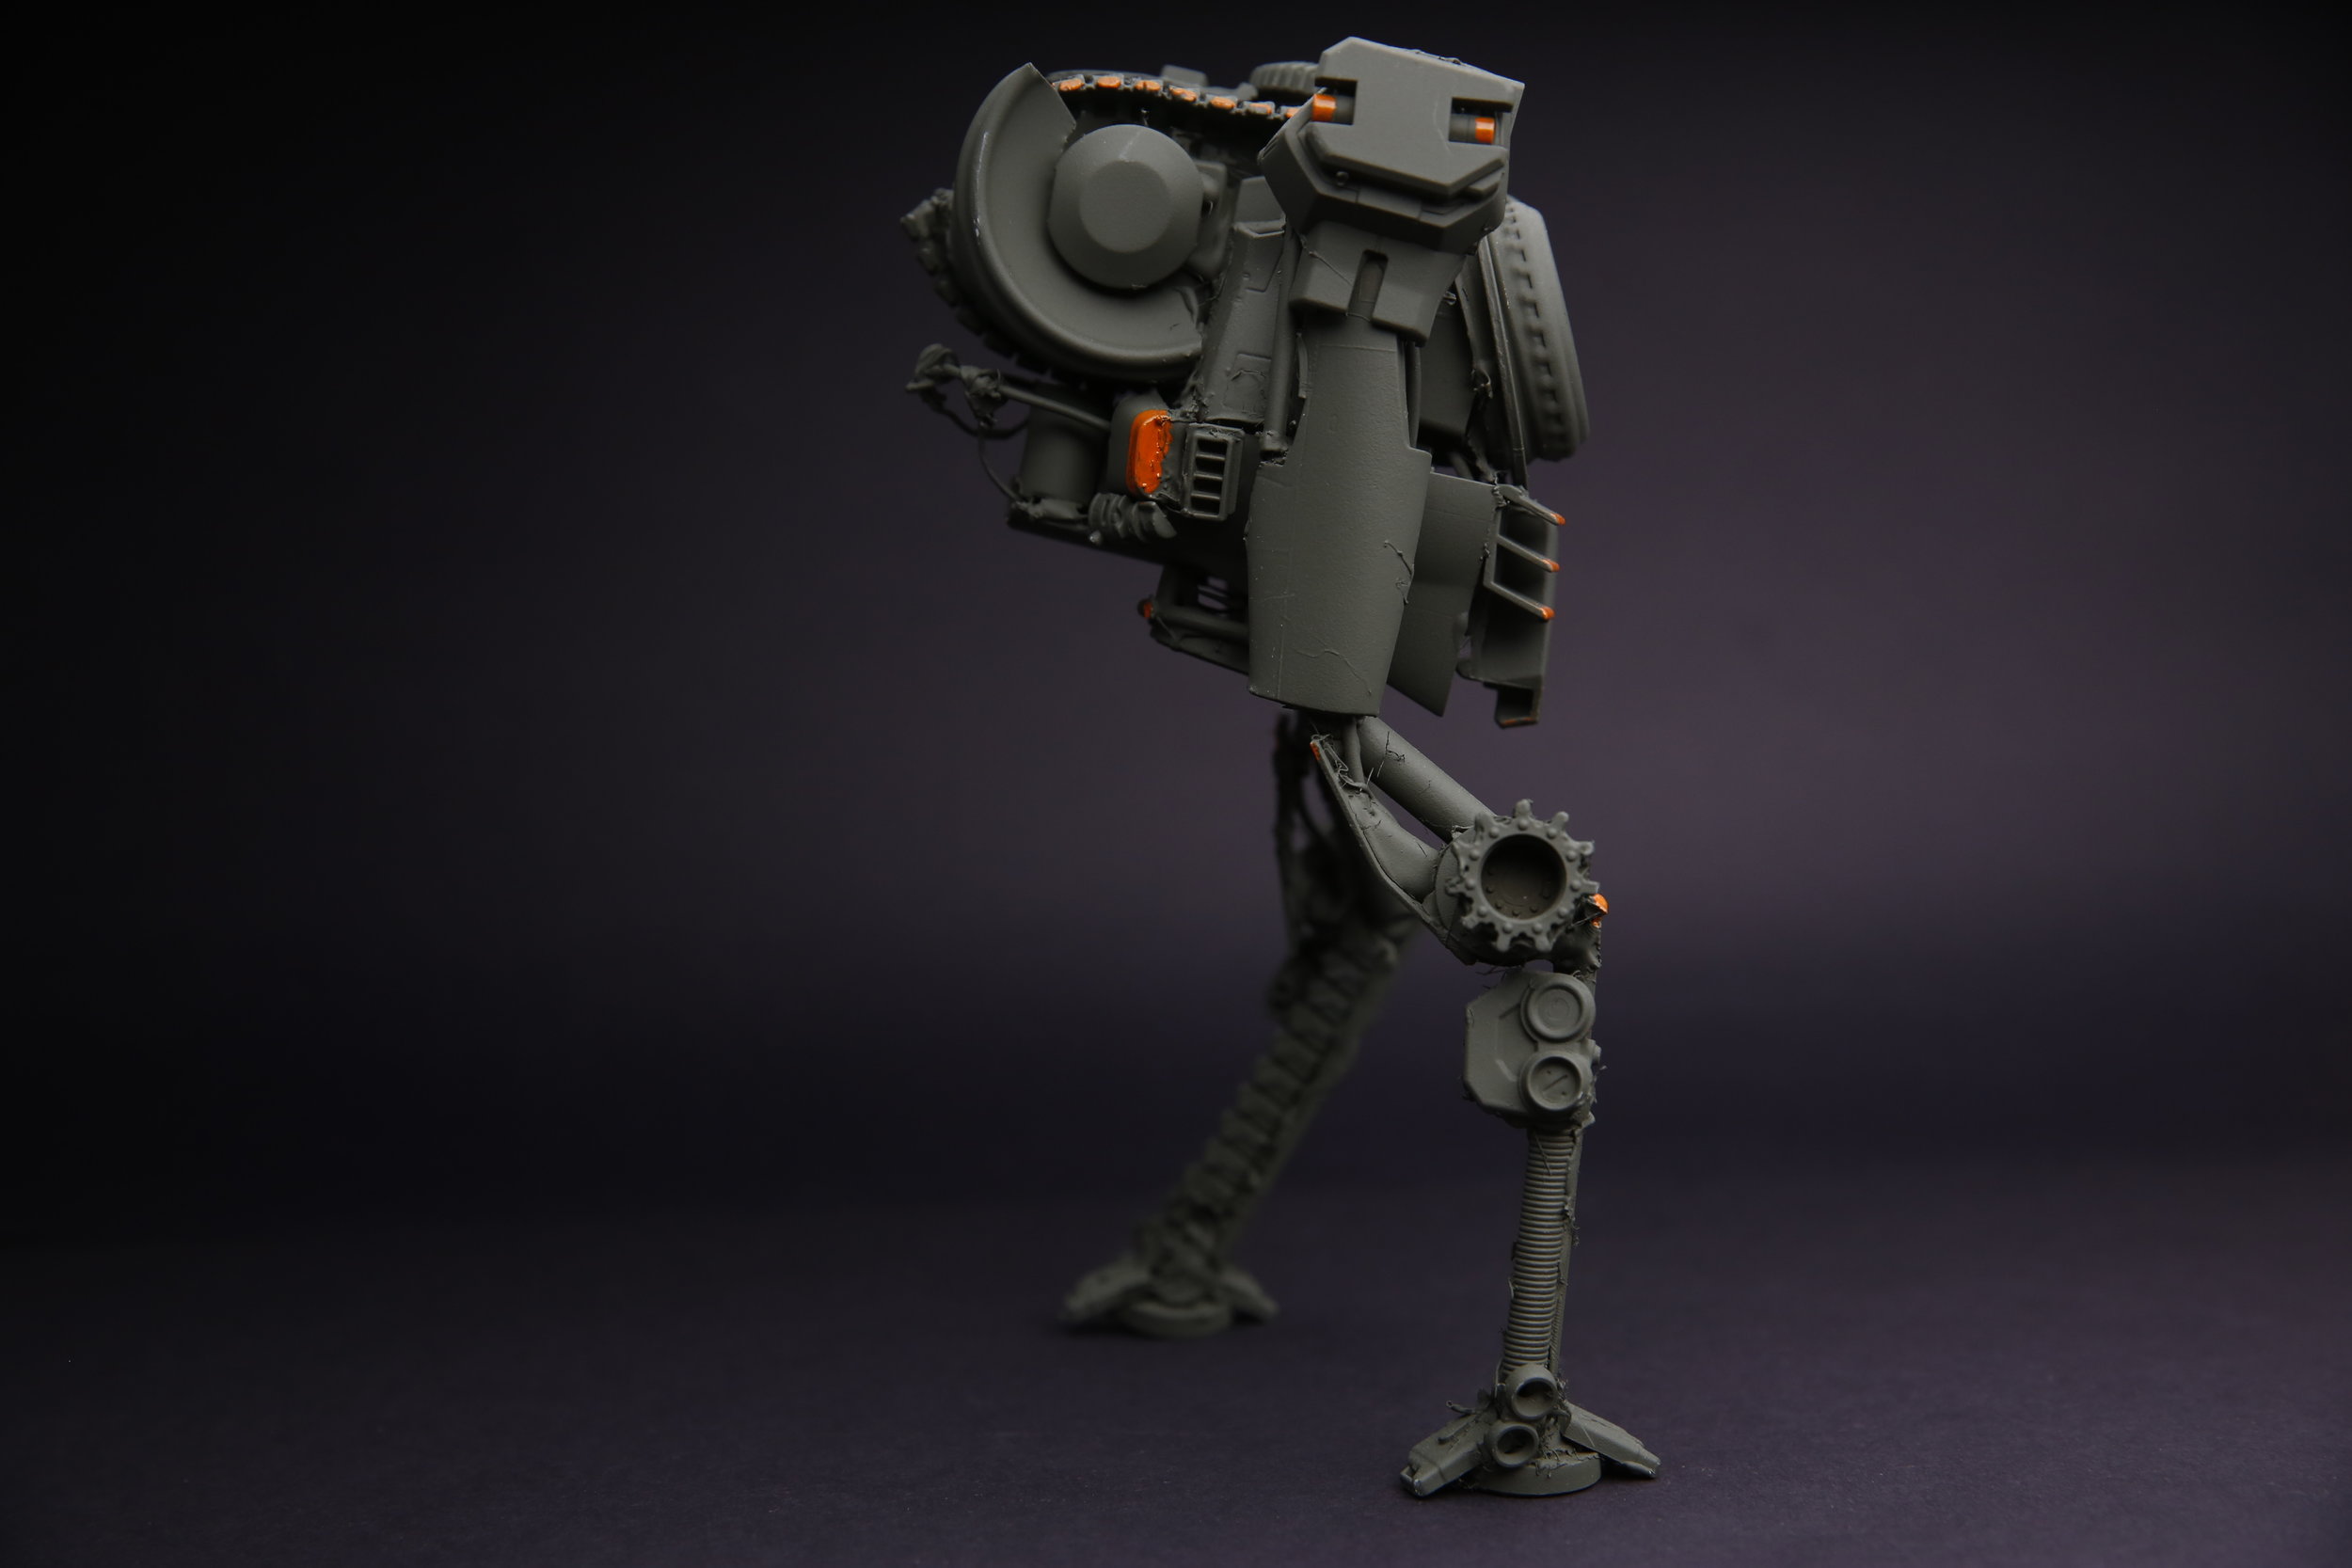
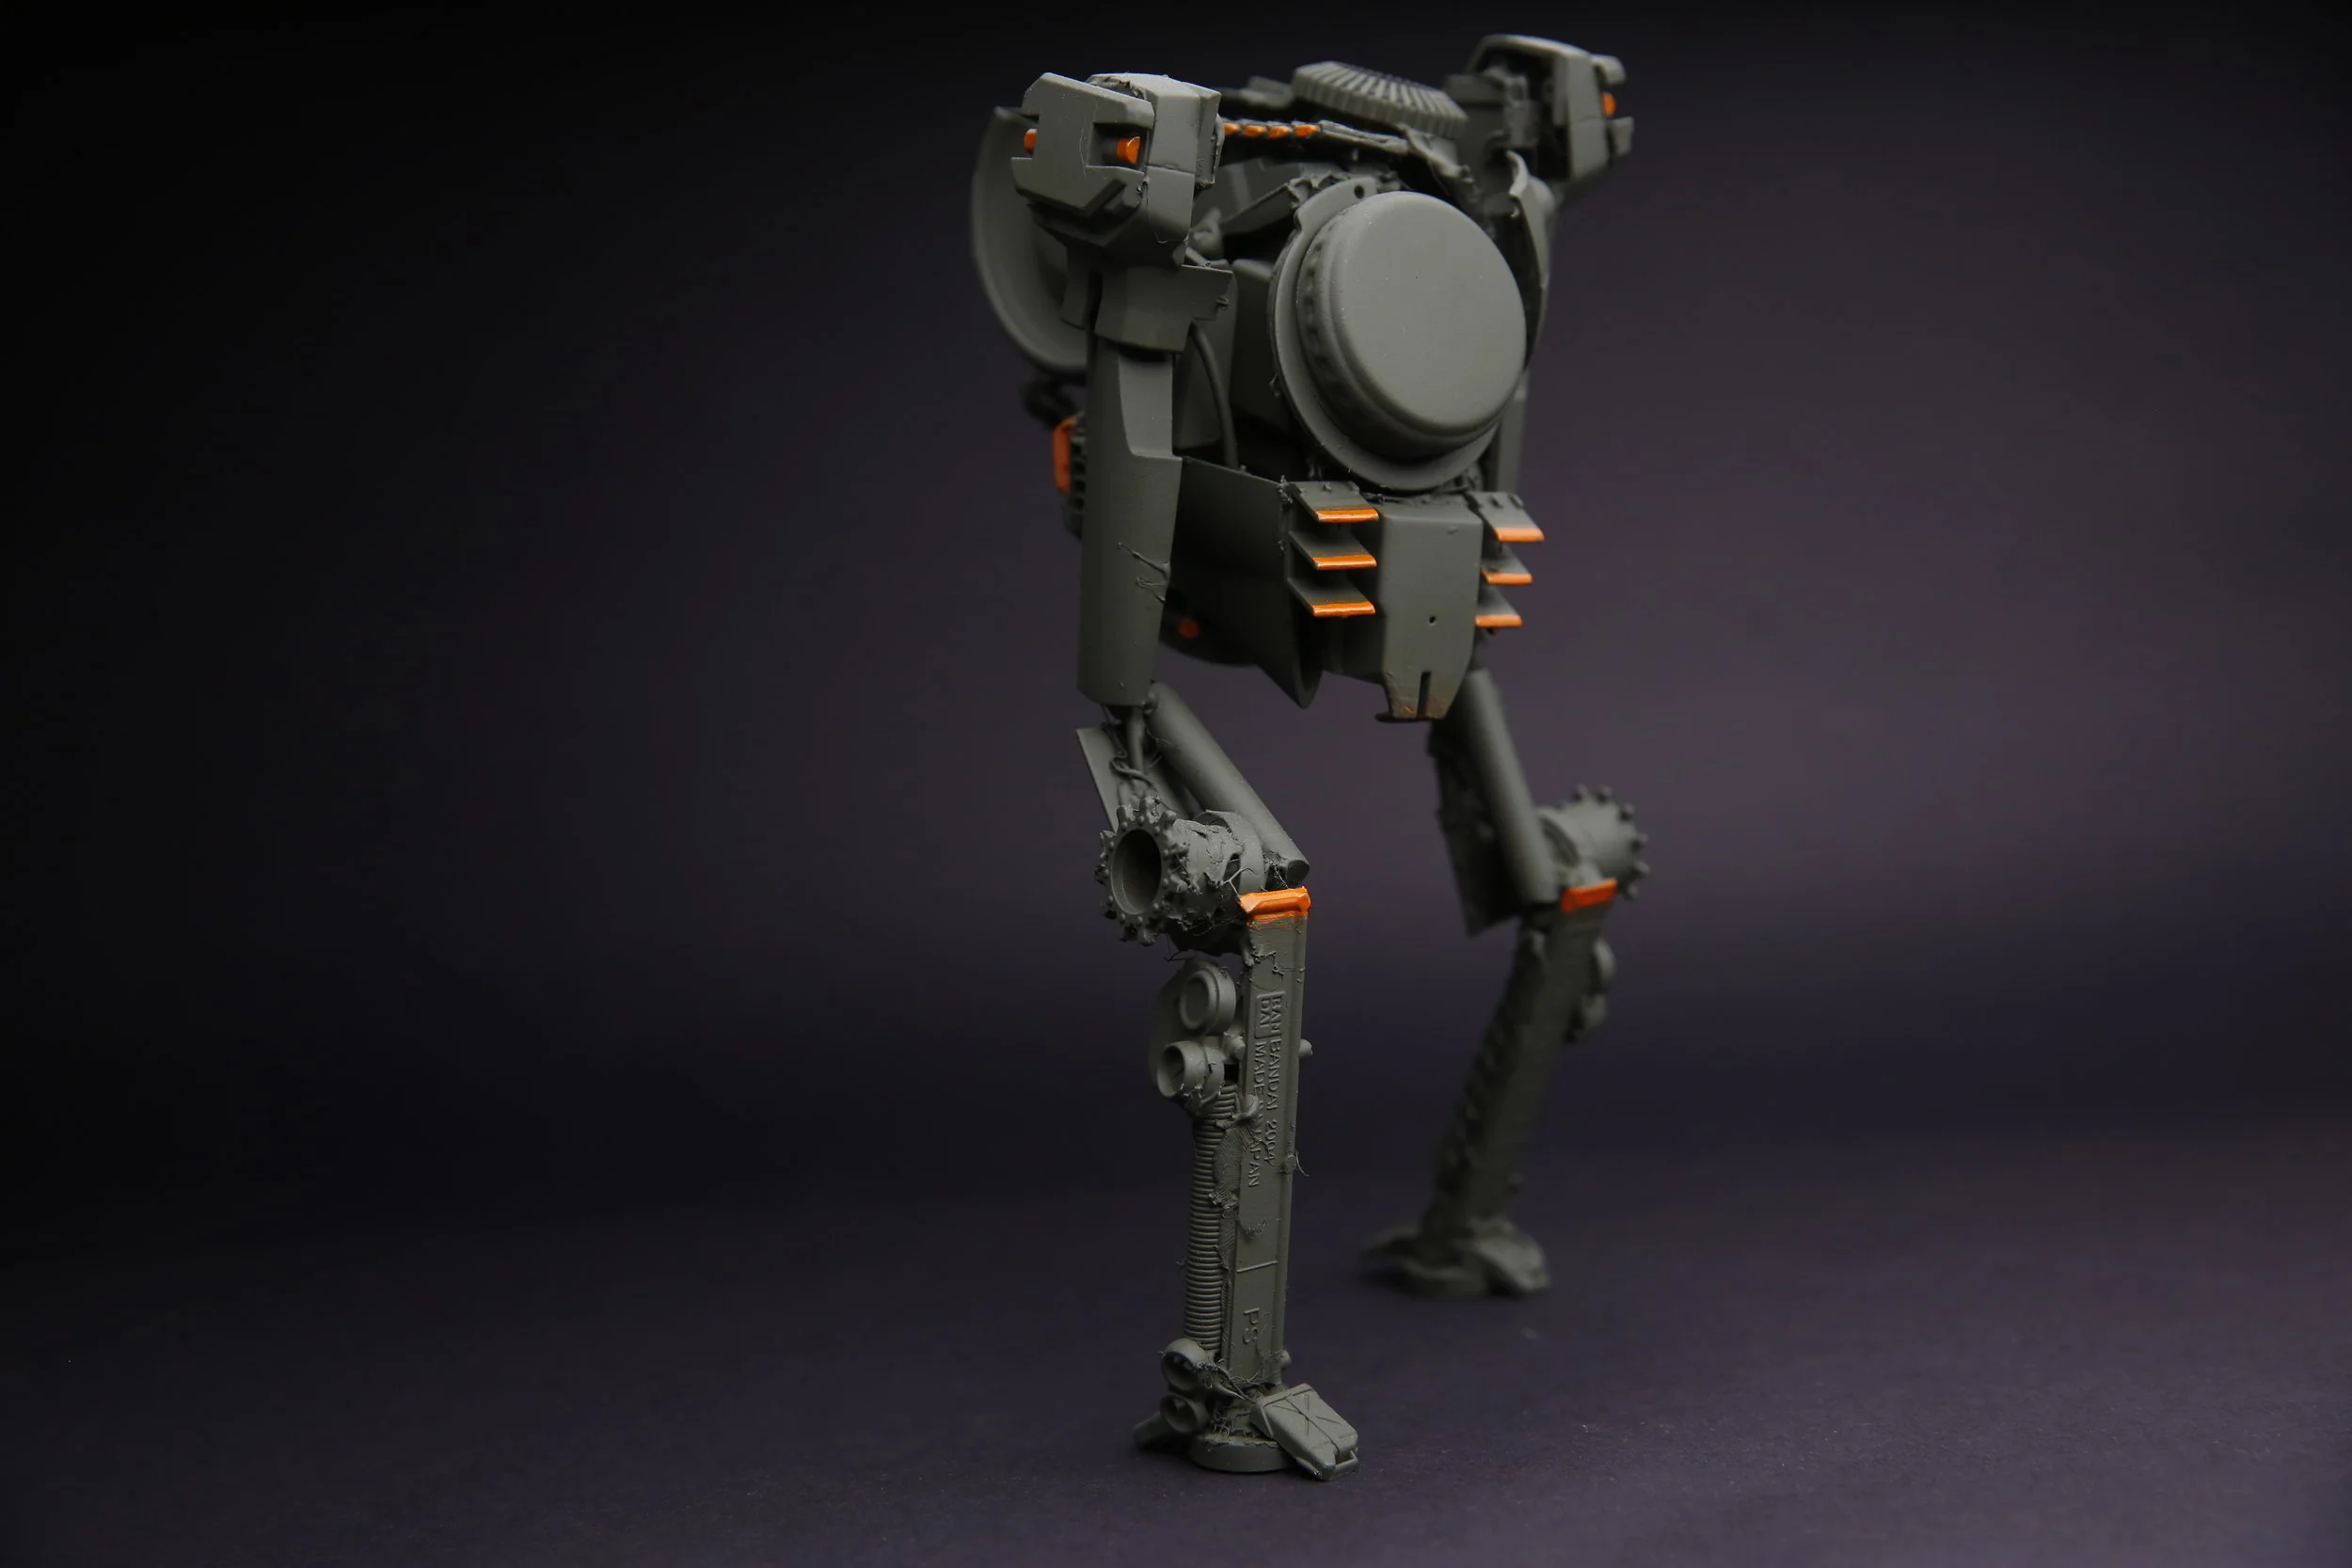
Kit-Bashing For Concept Design & Entertainment Design : Robot Mech Design Process
Kit-Bashing is a technique made famous in the original Star Wars film franchise, where it was first pioneered to create the intricately-detailed concept fighter jets like the X-Wing, and even the Death Star itself. This technique is blazingly quick, and still quite effective for making very convincing props for film or special effects. The process uses parts Frankensteined together from various model kits, hardware store parts, and various scraps. Once a design silhouette is established with bulk parts, glue and an armature skeleton, the model kit parts are then added to give another layer of textural design interest. The final design can then be primered and painted, to give a realistic model prop effect.
*The Kit Bash build process shown below has been adapted from a class I formerly taught with John Park at the Red Engine School of Design, and later Concept Design Academy (CDA) called Advanced Vehicle & Mech Design:
Make sure to pick up a good variety of parts. Don't feel like you have to constrain yourself to the pre-designed kits like the military or Gundam kits, sometimes the most simple objects work the best: glue sticks, random computer parts, bottle caps, plastic drink cups and yogurt cups, etc. Most importantly be sure to pick up some armature wire, this will be used for the main skeleton structure for all other parts to be placed on top.


Building up parts on the armature (for here you'll want basic shapes like computer parts, plastic styrene sheet or credit cards, etc). Hot glue is used to set the parts in place, drying very quickly:

Once all of the parts have been glued in place, it will look like a kaleidoscope of different mis-matched colors botched together. Don't worry, these parts will all be unified nicely after a coat of primer:


Finally, a coat of olive drab paint with safety orange color-blocking is added, to simulate a heavy piece of industrial machinery. Quite incredible what a solid photography & lighting setup can do, isn't it? :
The Maker's Field Guide: Master Maker Edition is now available!
More on kit-bashing can be found in the all new Advanced Projects chapter exclusively available in The Master Maker edition of The Maker's Field Guide. Now available as both a digital ebook or premium quality photography book through the online store.